
 Aktif Konular
  Üye Listesi
  Takvim
  Arama
Arama |
Aktif Konular Üye Listesi Takvim Arama |
| |
| Tayyareler | |
| |
  |
| Sayfa 2 Sonraki >> |
| Yazar | Mesaj |
|
Nick_Karatzides
Üye 

Kayıt Tarihi: 06/06/2009 Aktif Durum: Aktif Değil Gönderilenler: 250 |
  Konu: 1/18 scale Bölkow Bo-102 Helitrainer scratchbuild Konu: 1/18 scale Bölkow Bo-102 Helitrainer scratchbuildGönderim Zamanı: 23/06/2011 Saat 15:43 |
|
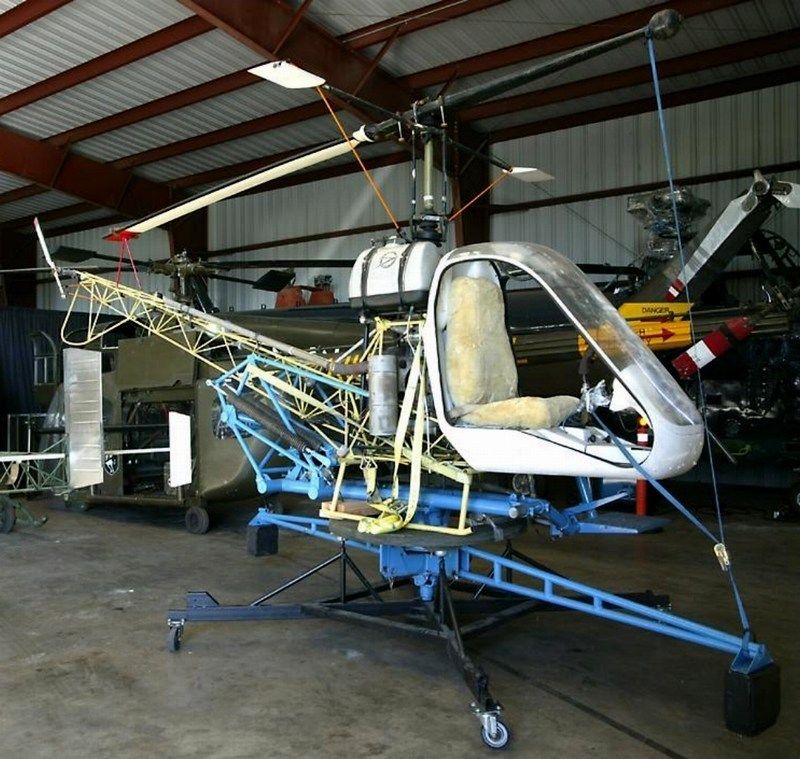
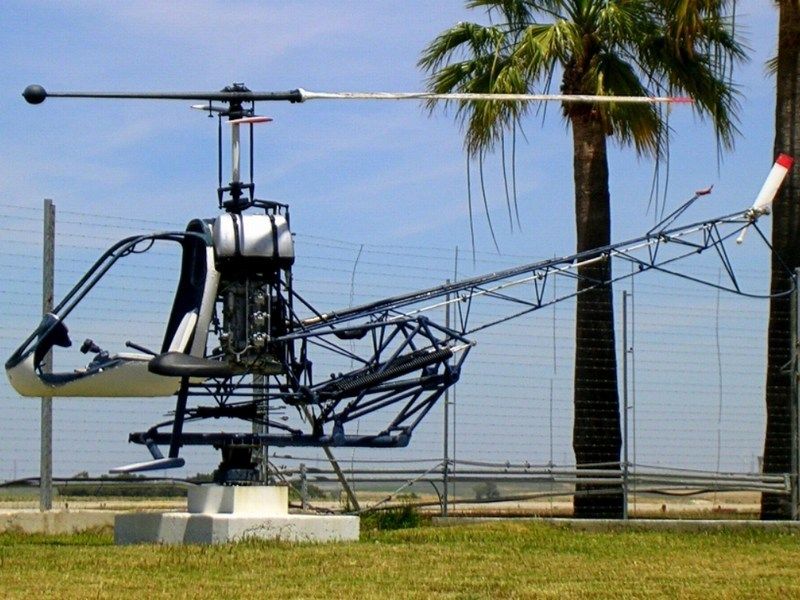
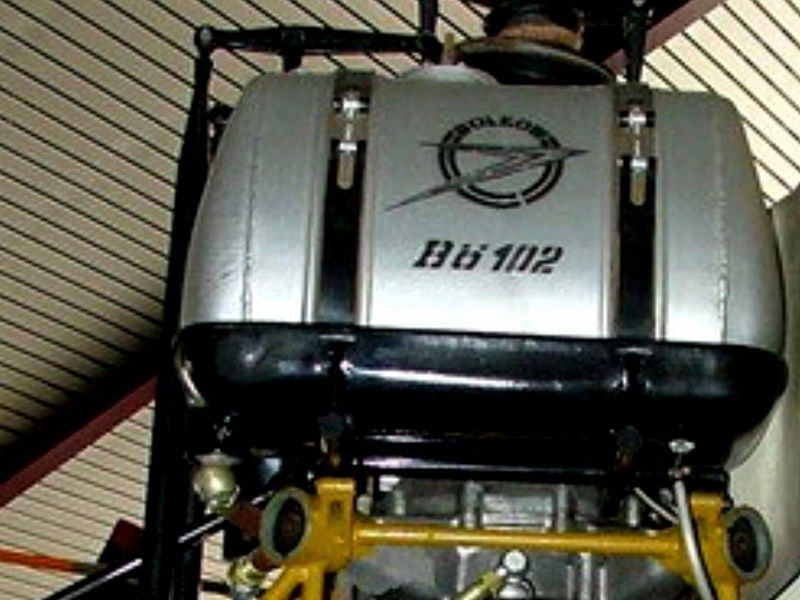
The Bölkow Bö-102 Helitrainer was an unusual ground-based helicopter training aid that was developed and built by Bölkow of Germany in the late 1950ies. It embodied all essential elements of a conventional helicopter, but was mounted on an articulated gantry to allow a student controlled experience of helicopter systems. Designed to be mounted on a swivelling captive rig the Bölkow Bö-102 Helitrainer allowed trainee pilots to practice procedures such as engine starting, rotor engagement and manipulation of the flight controls. Many of the Bö-102's components, including the single bladed fiberglass main rotor were used in the company's next design, the Bölkow Bö-103. 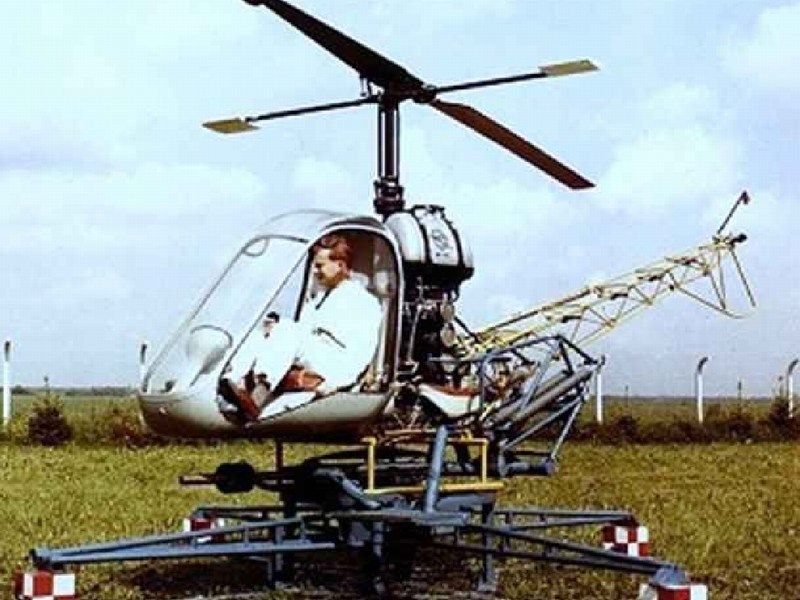

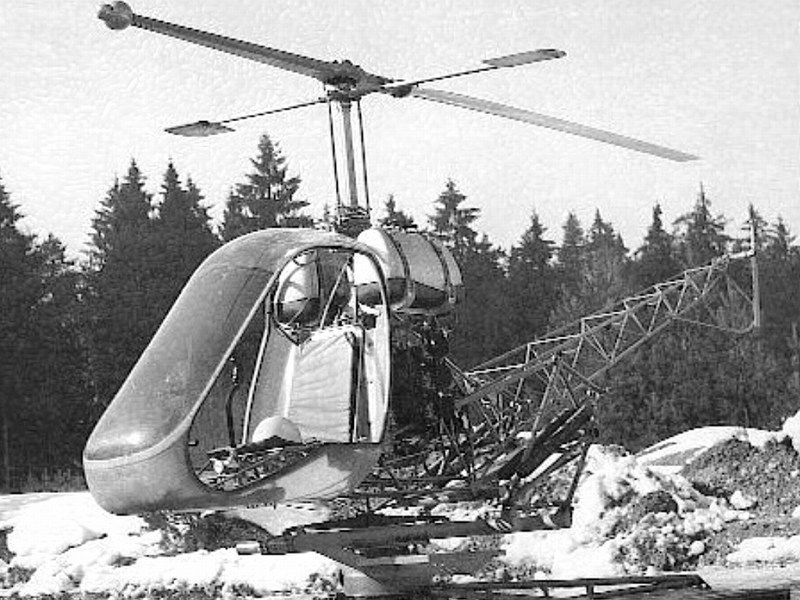
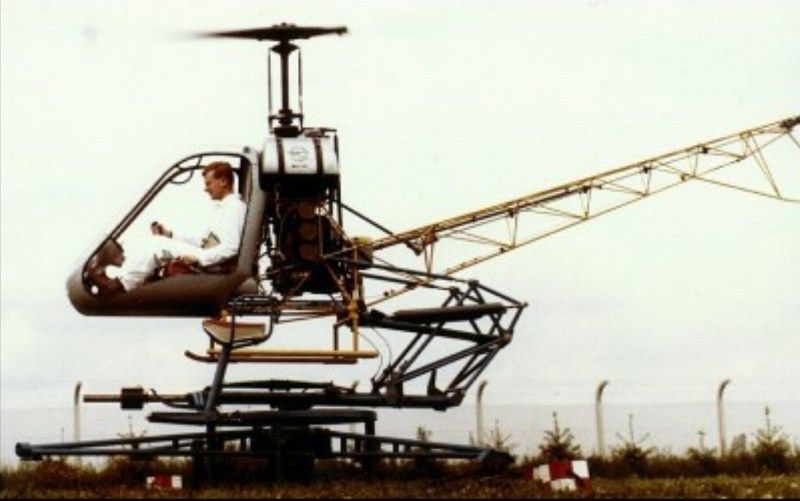 Looks like a kiddie heliride, a toy for big boys huh? 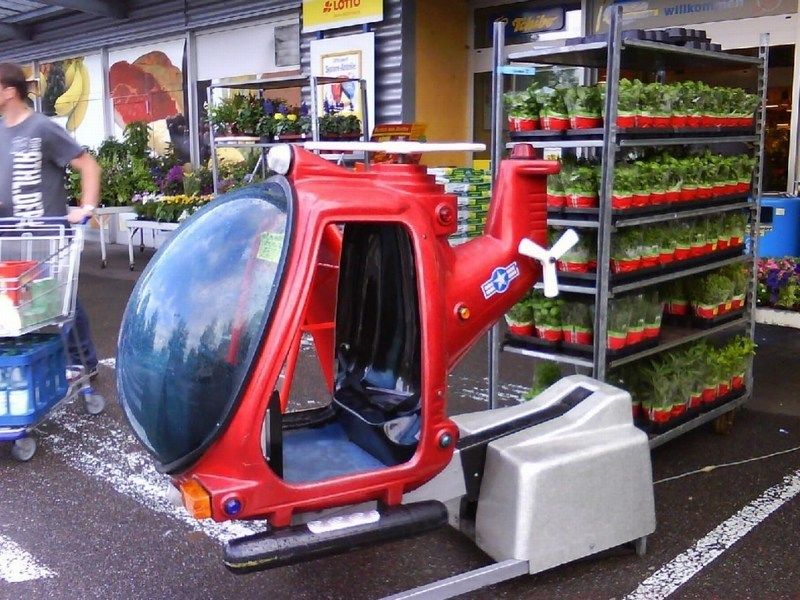 Rolled out in 1957, this Helitrainer was powered by a Hirth 3-cylinder / 2-stroke 40hp ILO L3X375 piston engine rated at 30 kW, driving a simple 21 foot one-bladed fiberglass rotor with a counterweight. In all 18 of these Helitrainers were built operating throughout Europe, training military helicopter pilots. Although unable to fly, they were ideal for the teaching of hovering techniques and were replaced by dual trainer helicopters. 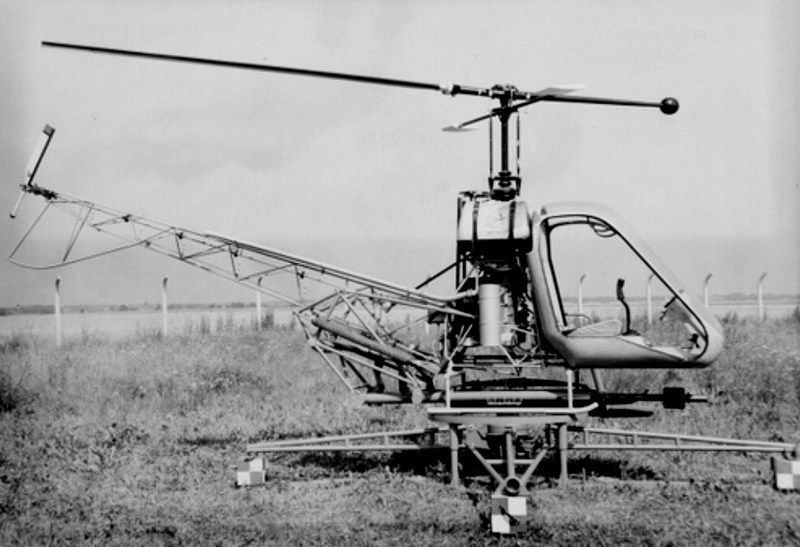
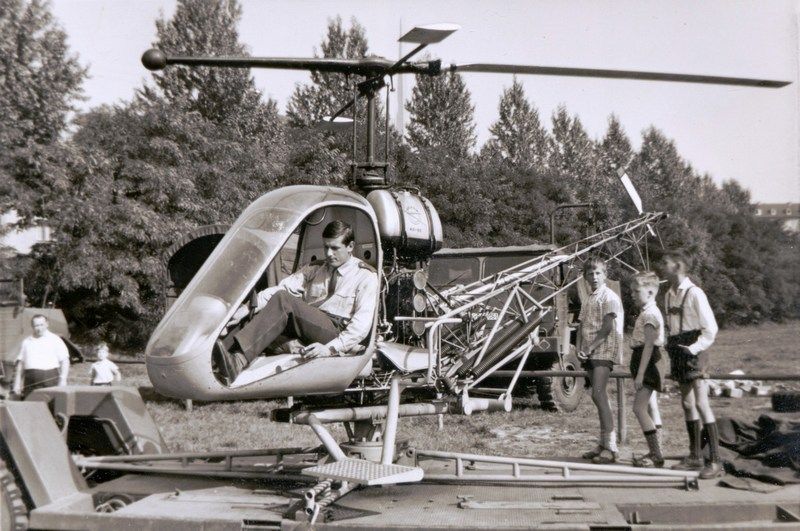
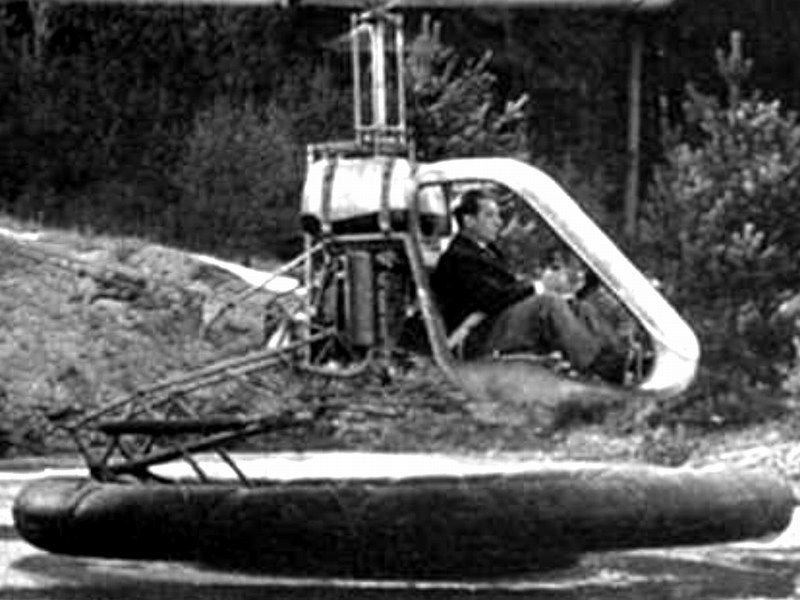
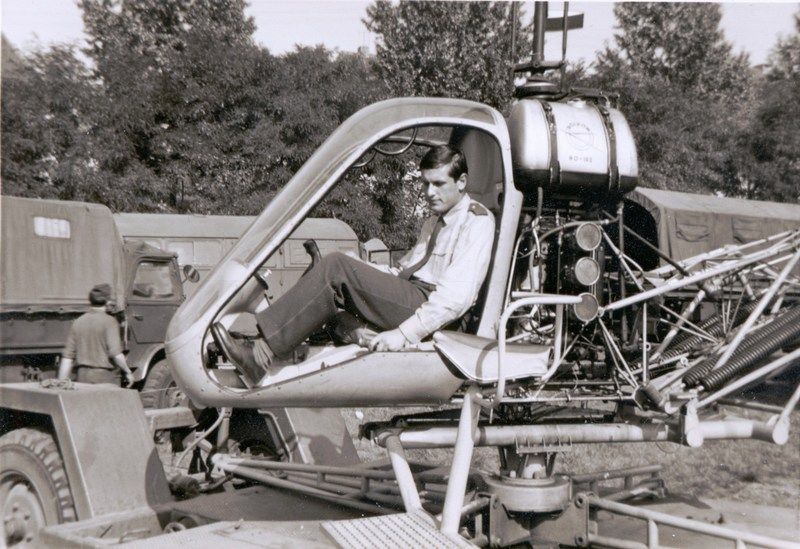 The Bölkow Bö-102 Helitrainer offered a variety of advantages for a safe helicopter training and was developed in land and water based versions, both of which were semi-captive. The first training section was conducted on this model mounted on a boogie. It facilitated the training of starting, tuning the rotary speed, taking off, hovering, turning, and landing. Simple exercising device for beginners training. Safety risk minimized by captivation, yet limited flight maneuvers possible. This feature allowed the helicopter to rise to a height of 2m (6ft), turn around a vertical axis and dip at up to 6° but prevented it from flying outside these limits. 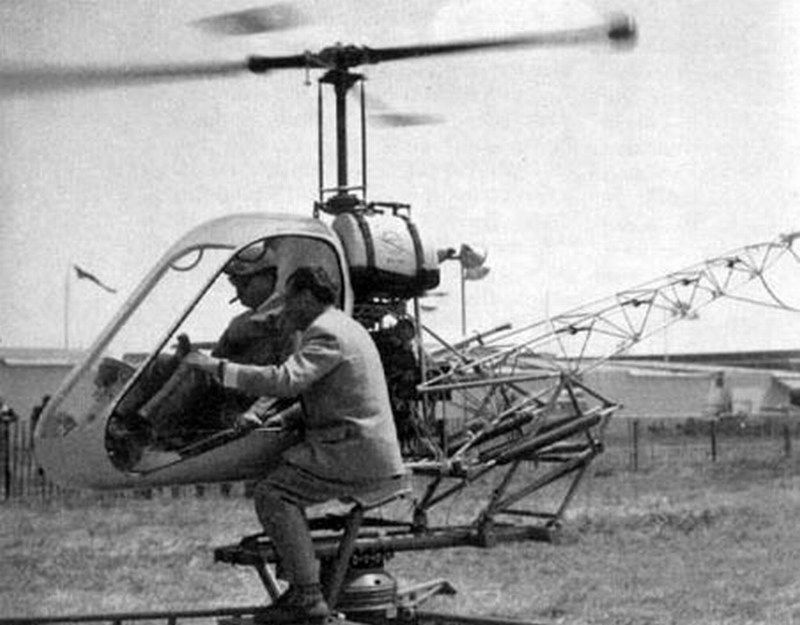
 Unfortunately, the Bölkow Bö-102 Helitrainer did not gain general approval because of its costs being nearly as high as a small helicopter. Luckily, very few of them, are still surviving as public display exhibit at the Hubschraubermuseum Bückeburg Germany, the helicopter museum Weston and in Rota museum Spain. Parts of Bö-102B were found at a freight forwarding company in Vlotho and donated to the helicopter museum in Bückeburg. The workshop team, managed to restore few of these experimental helicopter training devices. 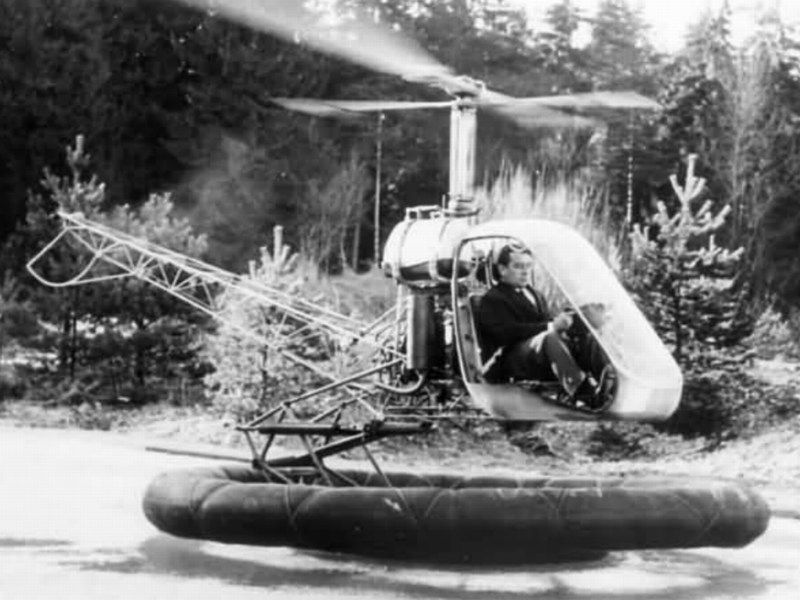
 Technical data & general characteristics
[*]Usage: Single seated captive helicopter trainer for basic helicopter training [*]Year of construction: 1958 [*]Manufacturer: Bölkow Entwicklungen KG [*]Country: Germany [*]Length: 5.68m [*]Main rotor area: 34.8m² (374feet²) [*]Main rotor diameter: 6.58 m (21ft 8in) [*]Powerplant: 1 x Hirth 3-cylinder / 2-stroke 40hp ILO L3X375 piston engine rated at 30kW [*]Power: 40shp [*]Gross weight: 770kg (1697lb) [*]Take off weight without a platform: 325kg [*]Crew: 1 student pilot & 1 trainer (on additional seat) [*]Speed: Handcuffed on the ground [*]Range: Stationary base coach 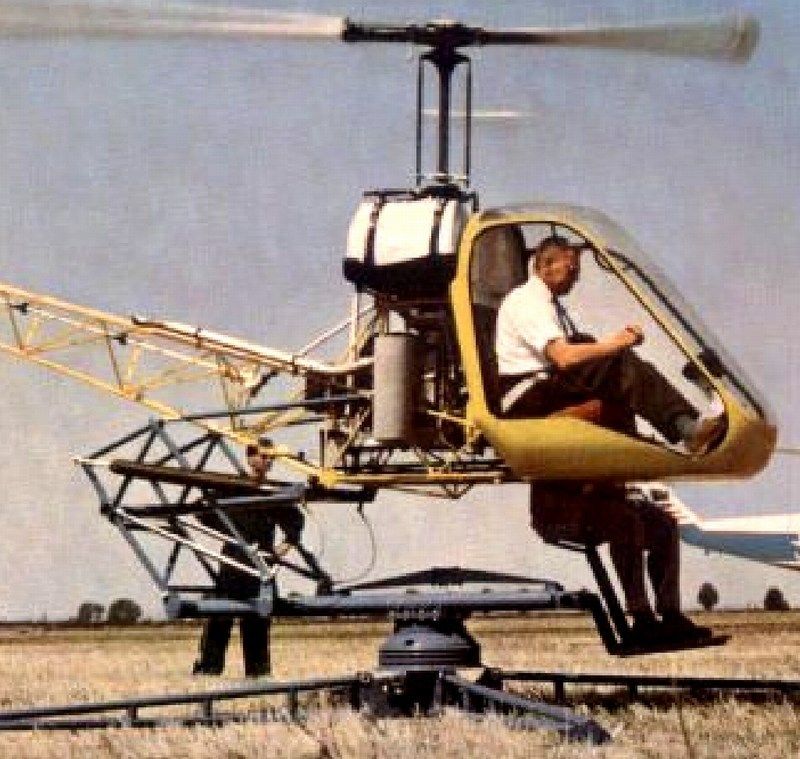
 Düzenleyen Nick_Karatzides - 30/01/2016 Saat 21:37 |
|
 |
|
|
Nick_Karatzides
Üye
Kayıt Tarihi: 06/06/2009 Aktif Durum: Aktif Değil Gönderilenler: 250 |
Gönderim Zamanı: 23/06/2011 Saat 15:46 |
|
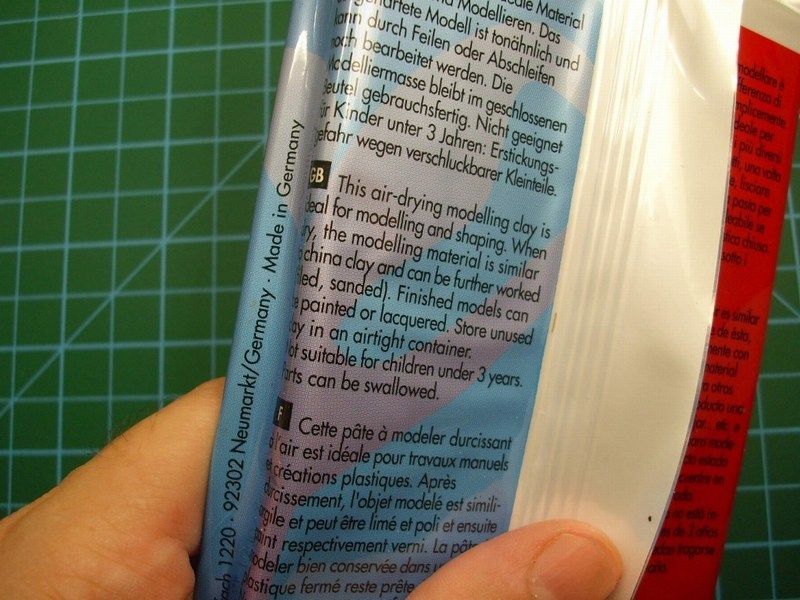
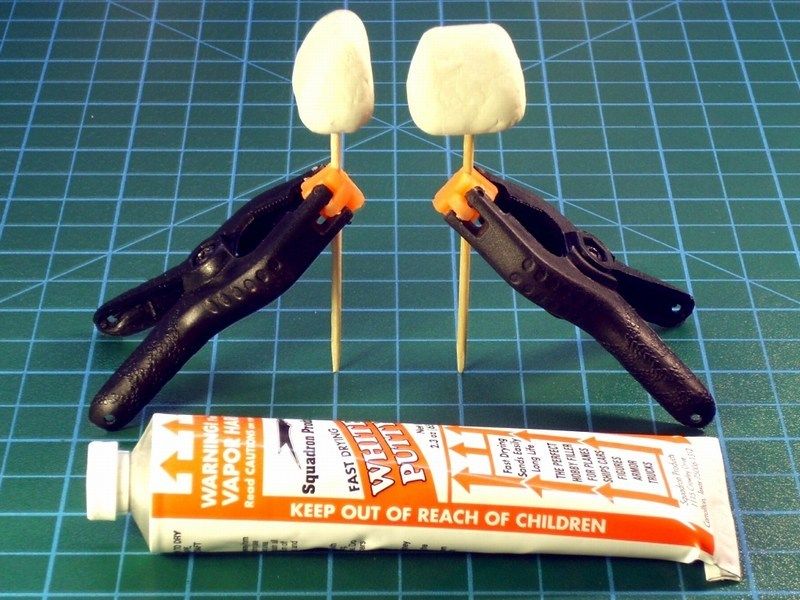
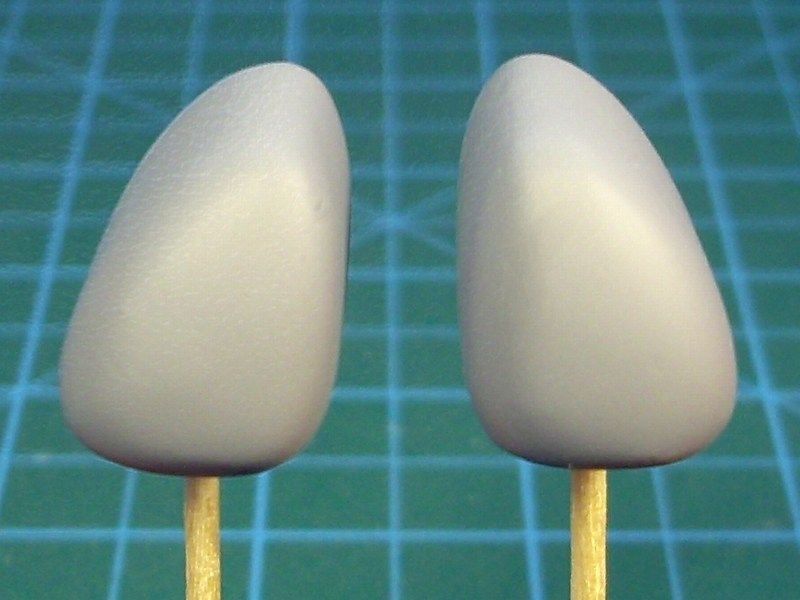
To produce a thin-skinned, right-to-scale cabin, a solid rock one-piece "image cast" of the bubble typed cabin should be made of modeling clay & epoxy first and then try to reproduce a copy by vacuum forming the image cast. Using the following modeling clay item, found in my local supermarket. It's an air-drying modeling clay ideal for scale modeling and shaping. According to the instructions, it can be easily formed into shape, become solid rock withing few hours, re-filled or sanded if necessary and painted or lacquered. That sound quite good to me and similar to the well known Milliput epoxy putty, with the only difference that the 500g air-drying modeling clay pack cost only 1£, instead of 100g Milliput epoxy putty which cost 5£. That makes the new found air-drying modeling clay, about 25 times cheaper than Milliput epoxy putty and that's a good reason for me to give it a chance. 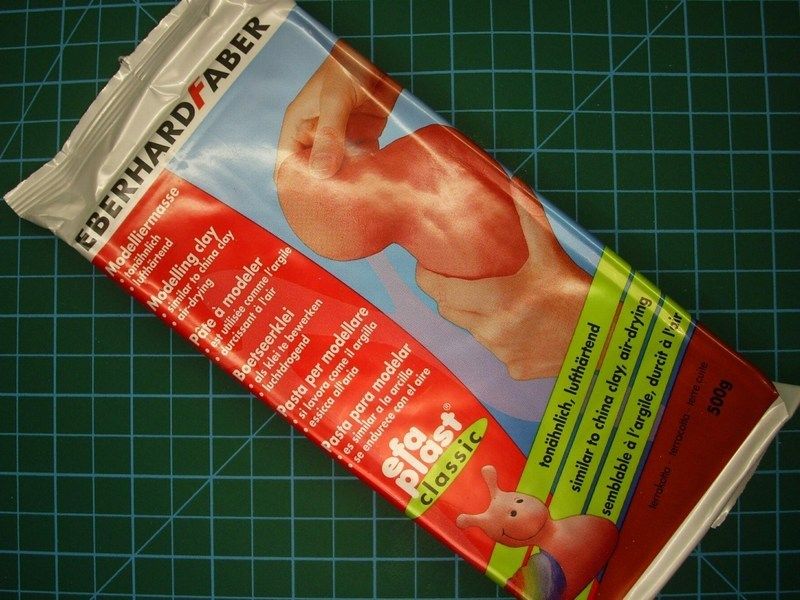
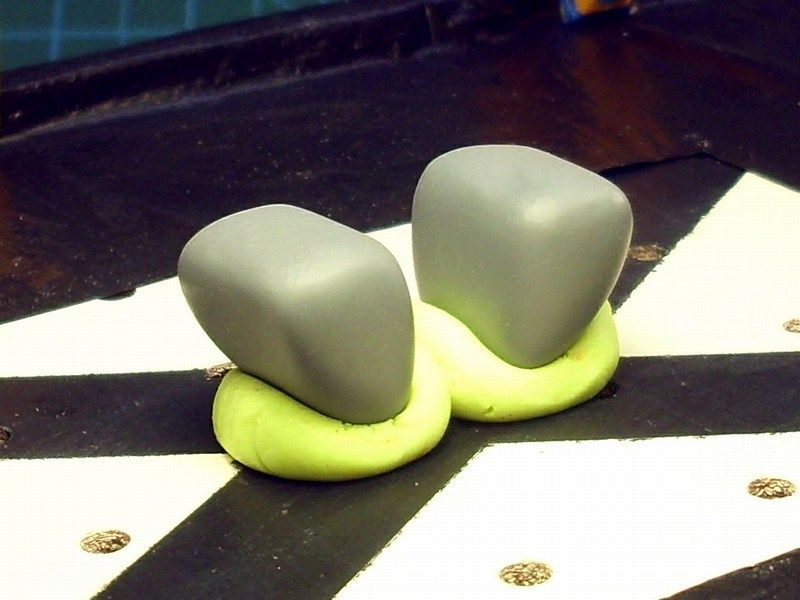
 I formed the basic shape of the bubble typed cabin, by picking small quantities of this modeling clay with a metal spatula and applying the air-drying modeling clay. It felt too soft and very easy to spread the material nicely. I didn't want to care too much and try forming and shaping the clay, because I was planning to add epoxy putty and sand to make a nice shinny finish. After all, I had no idea how much available time I had, before the material start becoming hard and difficult to handle. 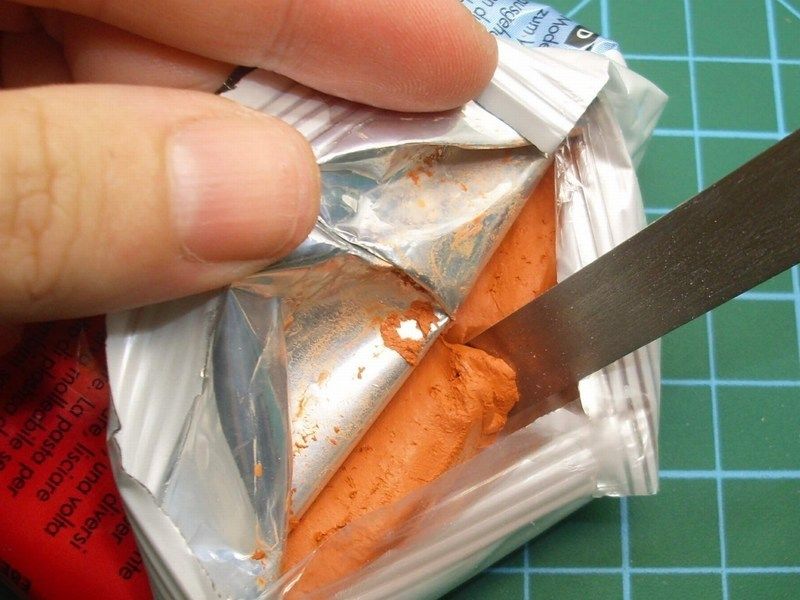
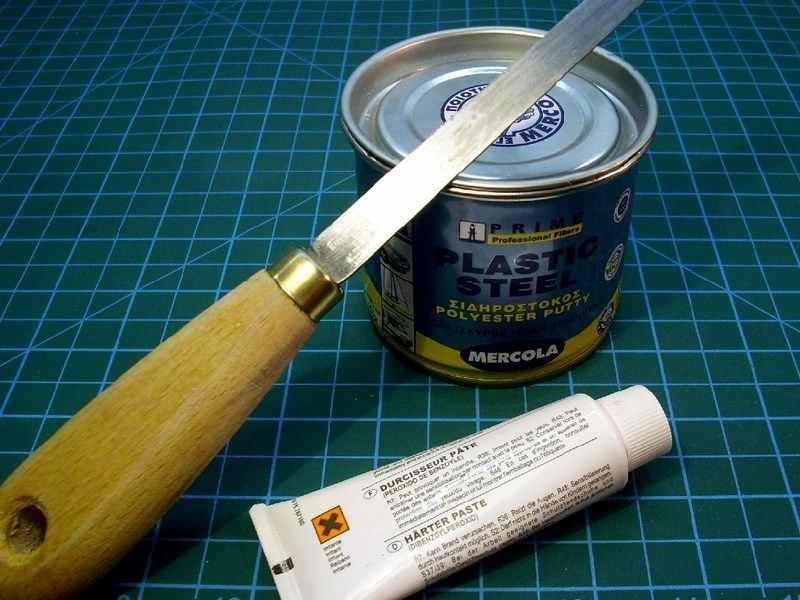
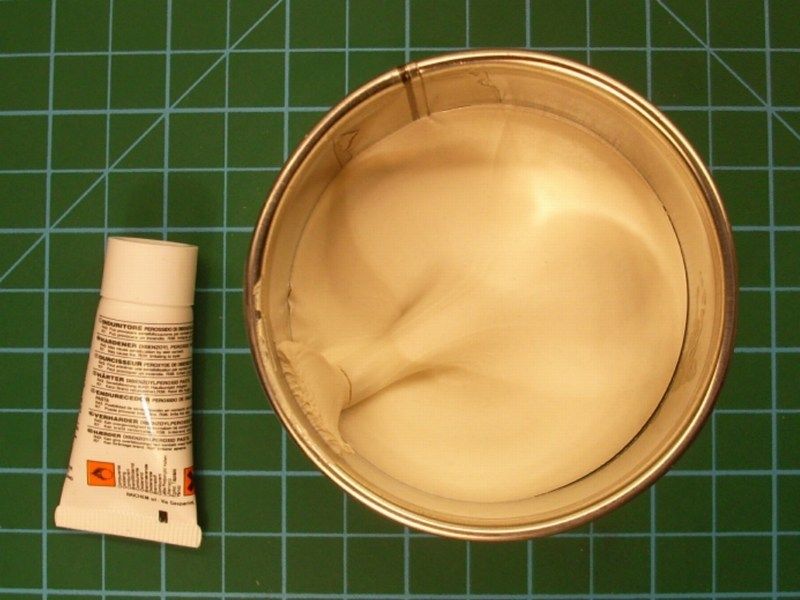 The specific polyester filler I used to apply over the clay, comes with the proper catalyst which provides a solid rock build and approximately 3 to 5 minutes time window to form it into shape. I prefer to use epoxy putty or polyester filler with fiberglass grains for special purposes, because:
[*]it does not shrink and does not crack after months or years, [*]you can pour to any shape that you want but you need to work fast because as soon as you mix it with catalyst cream approx 5%, you have limited time before becoming solid rock, [*]you can also put additional layers of epoxy or polyester filler to build up, [*]you can sand it, you can drill it, you can use any type of scale modeling glue, any type of primer or enamel / acrylic paint on it with no problem, [*]can be purchased at any good crafts store into 250ml, 500ml, 1lt (comes with a tube of catalyst hardener) or bigger canisters and if you can't find it, fear not and try your local decent hardware store and finally... [*]it is cheaper than dirt - estimated prices are £3 to £10 depending the canister size, the quality, if contains fiberglass grains for maximum strength etc. Keep in mind that the chemical reaction after mixing the polyester filler with the catalyst hardener, produces some heat that possibly effect on thin plastic parts, so test it first before try it on your scale model. I dont think that the produced heat is more than Fahrenheit 110, but better watchout. Remember that epoxy materials are dangerous when breath or shallow and could result skin, eyes or lungs problems or even cancer when used for long period with no precaution measures. Always keep in mind, that a powerful vacuum system to suck away the epoxy dust should be used all time to keep the workbench area clean while sanding or milling epoxy or resin materials. Using an issued breathing mask and a pair of surgery latex gloves to prevent dust contact with lungs and fingers while sanding or milling epoxy, is also an important matter that you should seriously take care of! My recommendation is to also wear an overall working suit (as I do) to keep your clothes dust free while sanding epoxy. Some people might find it too much, but I wouldn't like to bring epoxy dust & grains from my work bench into living room and my beloved. As long as this subject relates to our physical health and the physical health of all family members and loved ones who may come into contact with the materials we use in scale modeling, we need to be very careful and suspicious. We all need to be informed on whether it is safe or not about the materials used in scale modeling and what can we do to avoid or minimize the risks of everyday contact. Some of you may wonder if the epoxy putty or dust from the epoxy sanding is actually hazardous to health or if it really causes harm to human body. Some might say that all these are just an urban legend and a pseudo story based on Goebbels theory that has finally become accepted as an illusionary reality. Some might even support the view that these products had passed controls and been inspected by independent and non-controlled health organizations and committees and that if these products were truly dangerous, the companies would not be allowed to produce and would never be free sold in usual drugstore, where ordinary Joe might buy it. Well, should we sleep quietly at night, knowing that anything surrounds us, are truly inspected by independent and non-controlled health organizations and committees? Should we or not? Because as far as I know, the same organizations and committees are those that allow the free sale and use of other products such as cigarettes, asbestos sheets, hazardous petrochemicals etc to millions ordinary Joes daily! Should, I assume that this situation might happens, because nobody has informed them that such products, do kill slowly and painfully? On the other hand, there are thousands of publications in medical conferences and seminars to warn of the dangers that may cause the powdered epoxy resin and the dust produced from the epoxy resin sanding. There are thousands of studies showing a direct relationship of lacquer solvents, toluene thinner, thixotropic agents etc, with serious damage to the human body - including cancer. Is it a well organized theory by Goebbels himself? Surely no! Should we ignore all these warnings? Should we believe that the good companies who only care about consumers health and not bothered about the ephemeral economic gain at the expense of our health, check everything thoroughly and would never allow dangerous products in the open market? Some of you may consider an exaggeration to suggest the use of breathing mask, latex gloves and special clothing during the epoxy materials processing, but let me explain my point of view, within only few words.
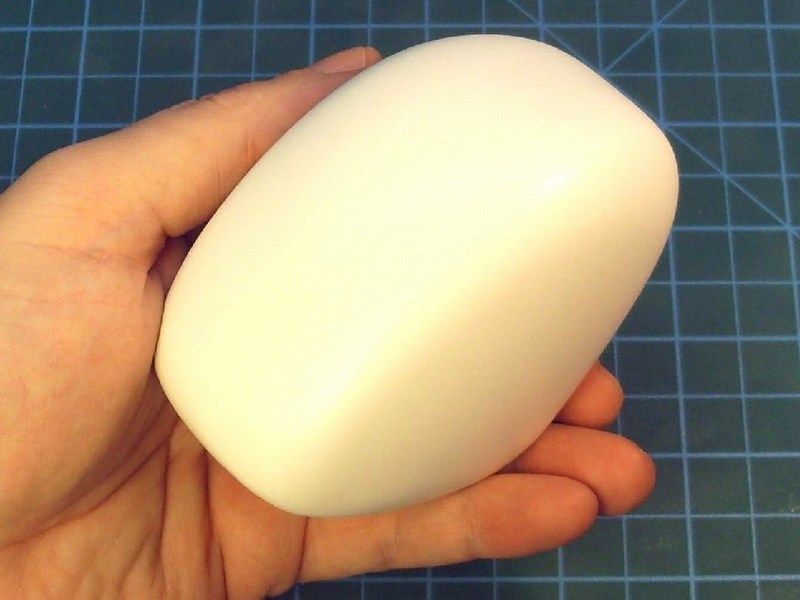
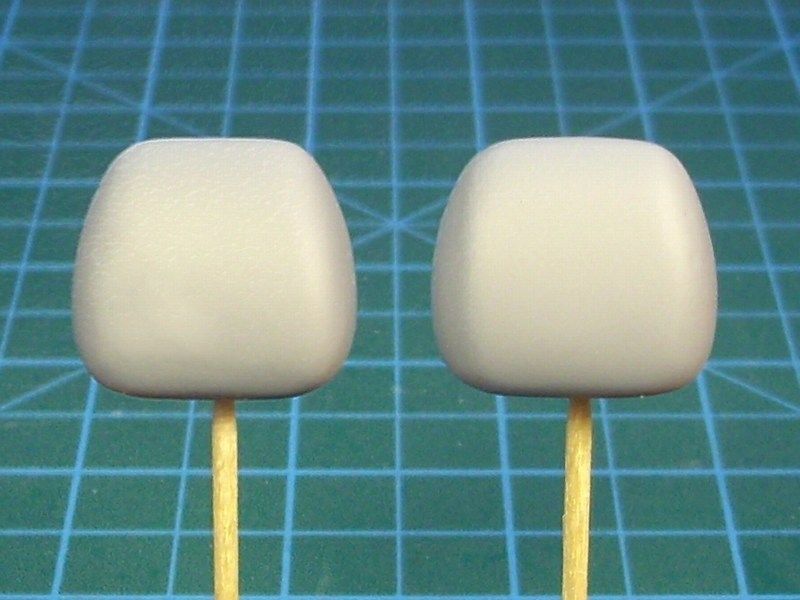
[*]Having suddenly acquired (me and tens of thousands of fellow citizens in my town, at the exact same time) some strange allergies occurred in the late 90ies, just after the Allied uranium shells bombing in Serbia, which is just few kms away from the city I live, [*]Having lost at the age of 46yo, my mentor in scale modeling and good friend who (coincidentally?) worked continuously in an environment saturated with epoxy resin powder & lacquer thinner fumes, [*]Having lost a second very good friend and highly skilful figure and miniature builder (perhaps the best in Greece at that time) for similar reason... I think its not so good idea to keep pushing my luck and I decided to follow some protection rules. Under no circumstances I propose to live the rest of our lives locked in a sterile glass - this would not be life. I would strongly suggest to live our life as intensely as possible. But keep in mind, that the wise parachutist, always checks thoroughly his main & reserve gear before each jump and does not behave casually leaving his life to luck factor, just because he was lucky so far and didnt happen to face an emergency. "SAFETY FIRST " became my personal logo and whoever wants, is free to follow. When the cast used as an "image" of the bubble typed cabin, was filled with a layer of polyester filler and had enough time to polymerize and get solid rock, it was sanded carefully to get the right shape. Finally, the cast was sprayed with white shiny finish to help me spot any scratches or defects. 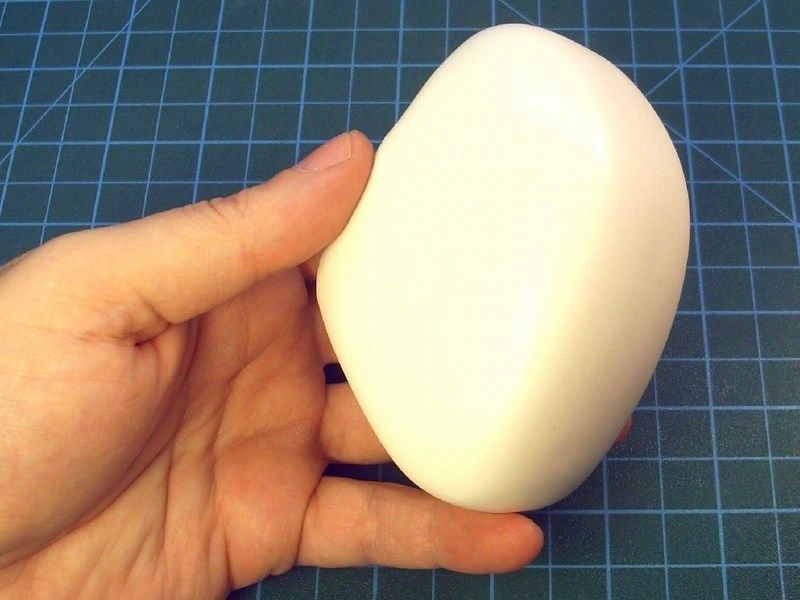
 Düzenleyen Nick_Karatzides - 30/01/2016 Saat 22:20 |
|
|
|
|
|
Nick_Karatzides
Üye
Kayıt Tarihi: 06/06/2009 Aktif Durum: Aktif Değil Gönderilenler: 250 |
Gönderim Zamanı: 23/06/2011 Saat 15:47 |
|
In my previous WIP article about the 1/18 scale Jukka Tervamäki Engineering JT-9T autogyro project, I explain in a very detailed manner, how to build a vacuum forming device, starting from scratch and using materials that can be found in your local super market. If you are not aware how to build a scratchbuilt vacuum form, please feel free to read it as I described and it might be useful for you.
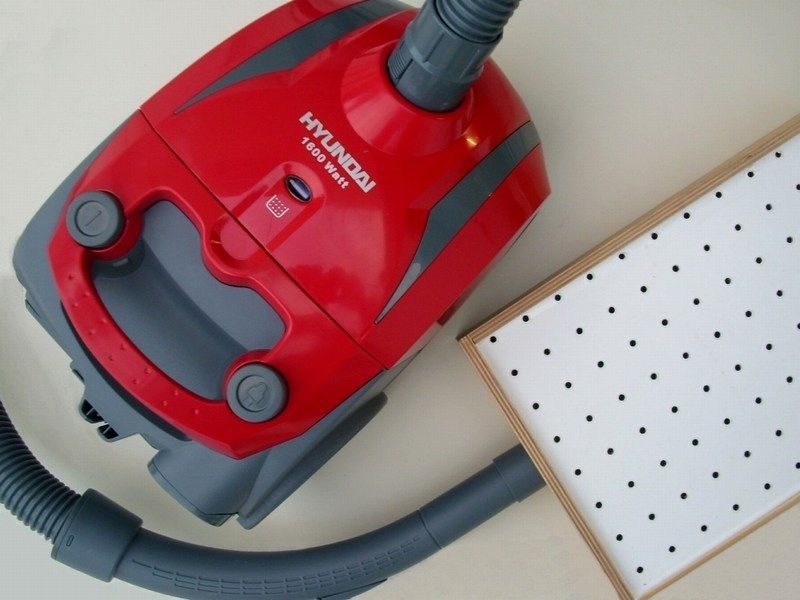
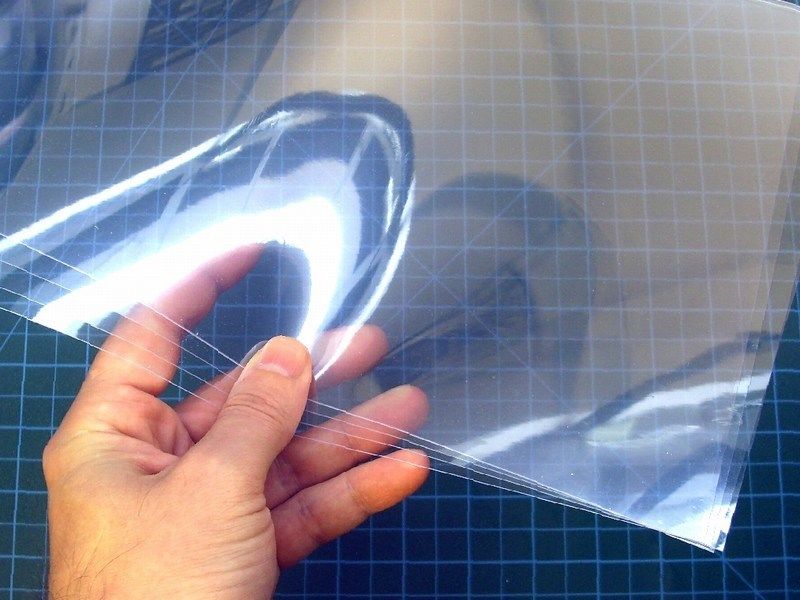
 Heat your electric oven to some predetermined level, whatever works and start heating the plastic sheet. I have never tried this with a gas one, so use caution if you do! Once the plastic gets warm, youll notice it will droop down. When you think the plastic is soft enough, fire up the vacuum cleaner, take the plastic from the oven and thrown the sheet on the vacuum former. The plastic will nicely form around the moulds. This will take some practice and sometimes a mould tips over or the plastic wont form properly over the mould (folding around edges). This is also the part where I should warn you that you can burn your fingers - I highly recommend Nomex Aramid flame resistant MilSpec gloves, which I personally use for the job. I buy large plastic styrene 50x30cm sheets for 0.5 to 1.5 each (depending width), not the more expensive styrene by Evergreen. When an attempt fails, I usually throw the sheet back in the oven and start again. Once you have the machine, you can make all kinds of things. You can make a lot of aircraft wings, airframe, panels etc out of a sheet like that. You can make the master molds from basswood, epoxy, polyester etc and the parts you make depend on how accurate the master molds are. The molds must be as accurate and detailed as necessary to achieve the results you are after. As you see in the following pictures, I tried white and clear styrene sheets too, in order to build the cabin by white styrene and the bubble canopy by clear. 

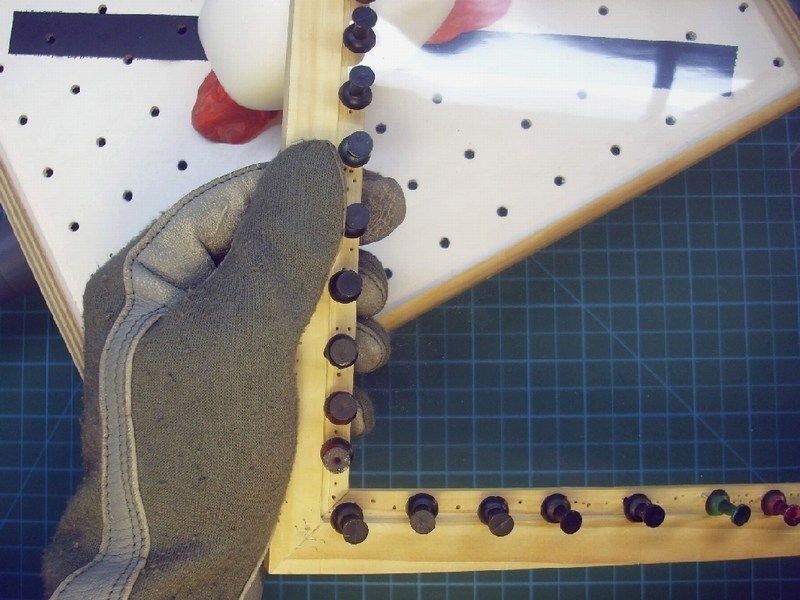
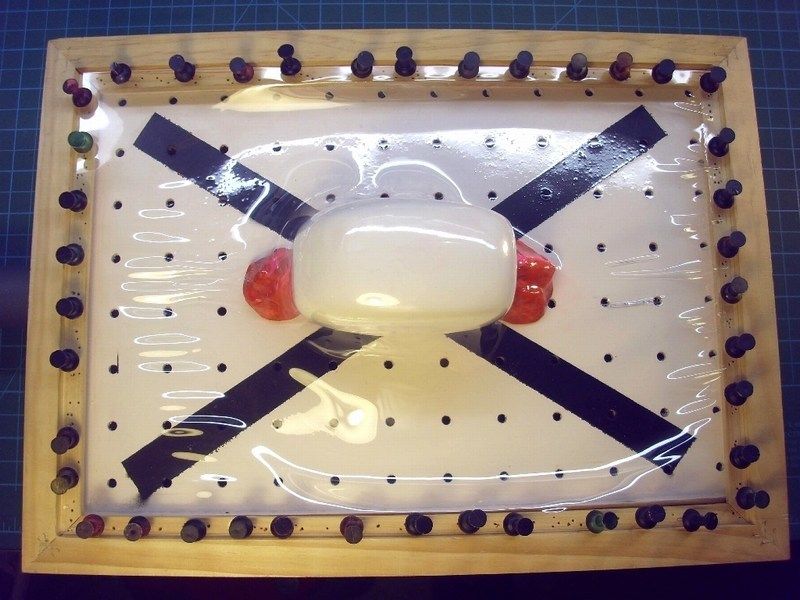
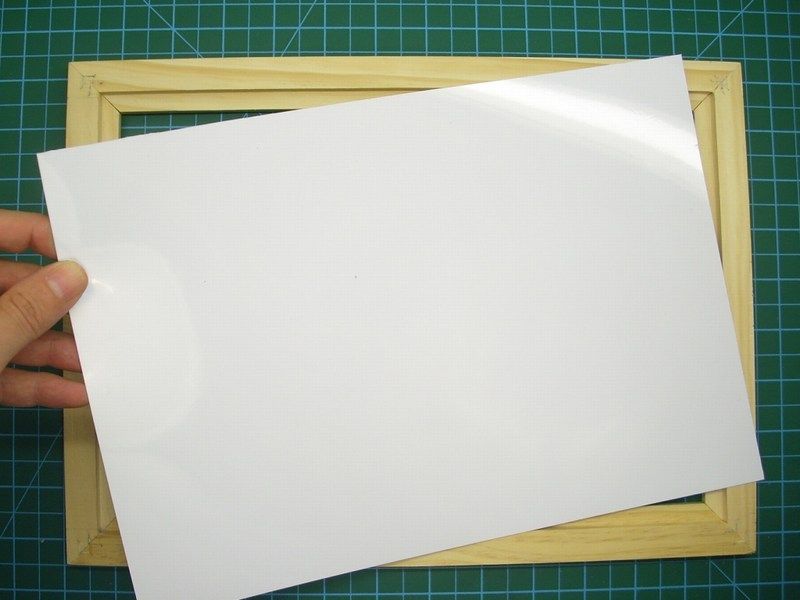 I placed the frame into the preheated electric oven and I wait few critical seconds watching the plastic start heating. As soon as I noticed that it started drooping down, I removed the frame while wearingNomex Aramid flame resistant MilSpec gloves, to prevent finger burns. While the vacuum cleaner was already switched on, I placed the wooden frame with the pined plastic sheet on the vacuum former plate. The plastic nicely formed around the virtual airframe mould... and voila! 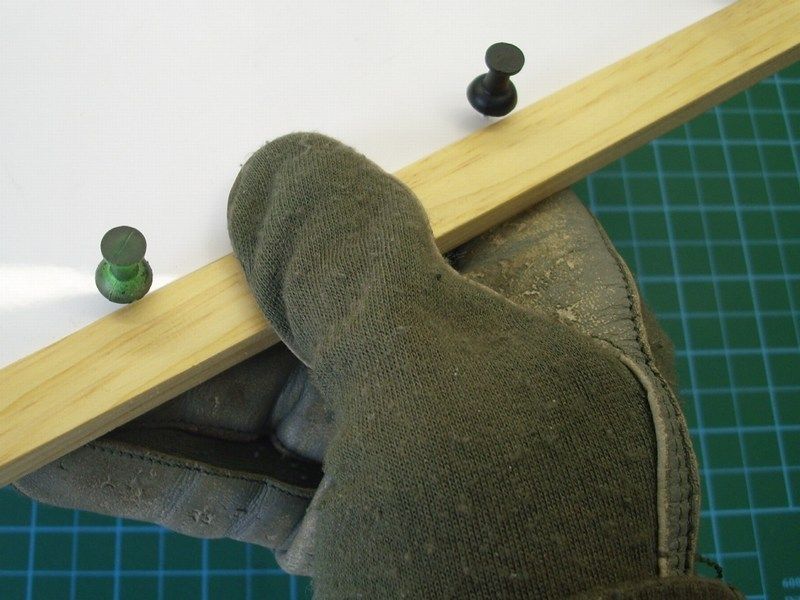 Using my X-acto knife, I removed the formed cabin pieces from the styrene white or clear sheets and tried some test fitting on the cast. 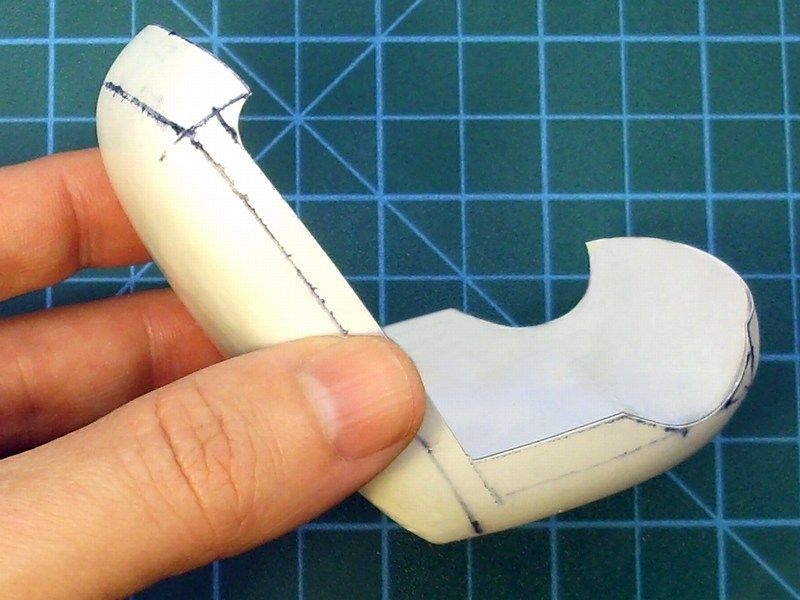 Düzenleyen Nick_Karatzides - 30/01/2016 Saat 22:20 |
|
|
|
|
|
Nick_Karatzides
Üye
Kayıt Tarihi: 06/06/2009 Aktif Durum: Aktif Değil Gönderilenler: 250 |
Gönderim Zamanı: 23/06/2011 Saat 15:47 |
|
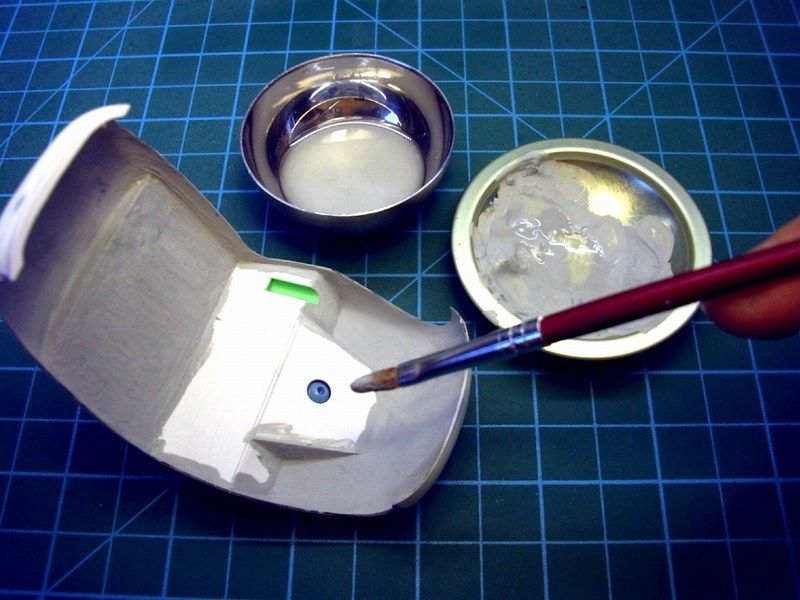
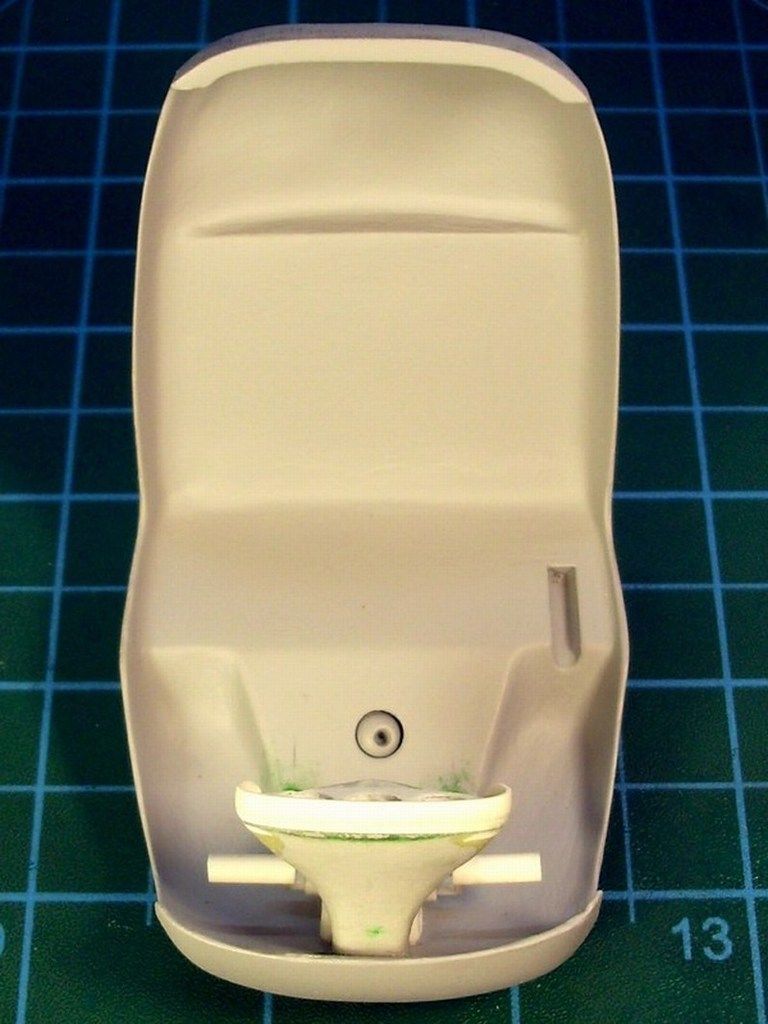
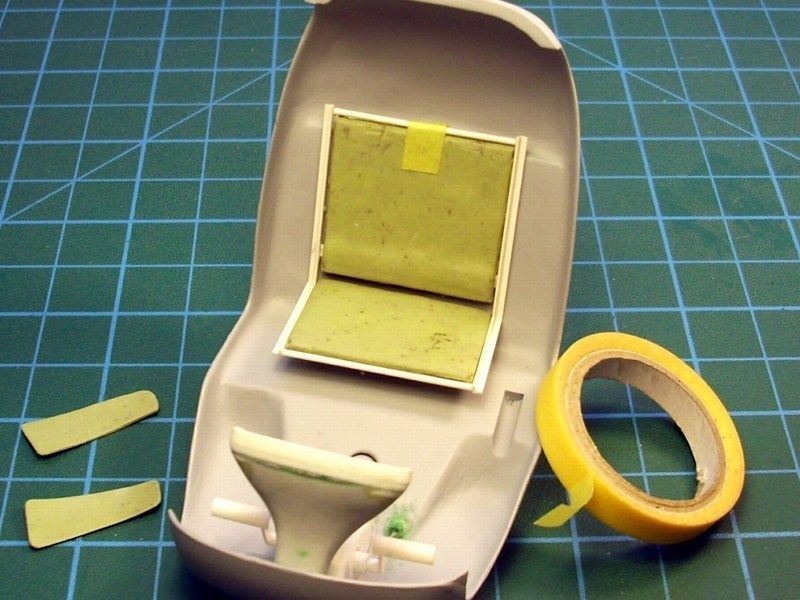
As written before, the Bölkow Bö-102 Helitrainer was a helicopter training aid that was developed and built to allow a student pilot controlled experience of helicopter systems. That's why the cockpit panel was so simple, that a 5yo child could operate. Three gauges on the instruments panel, few switches, a cyclic control stick and a collective. That's all! After all, it was not designed to fly, but only give a helicopter hover & flight feeling. 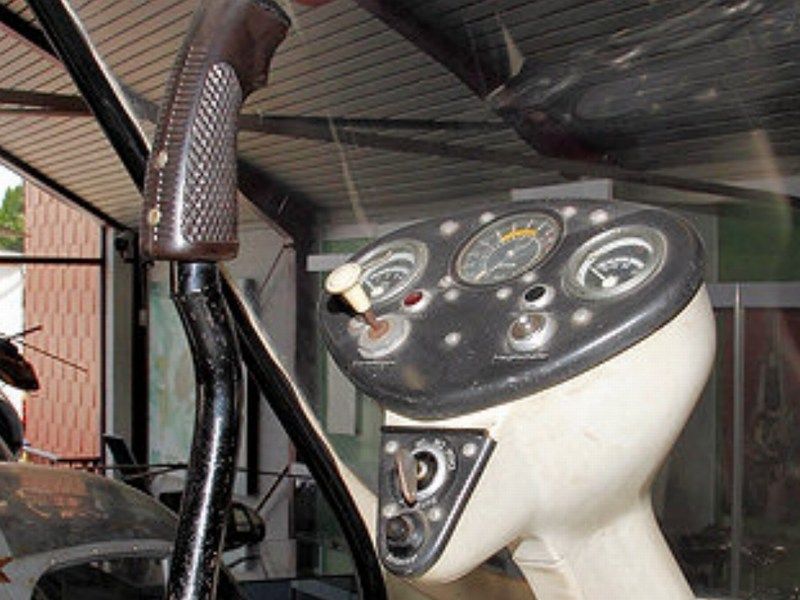 I started by cutting the cockpits floor shape in styrene and shape it as required to fit into the cabin. 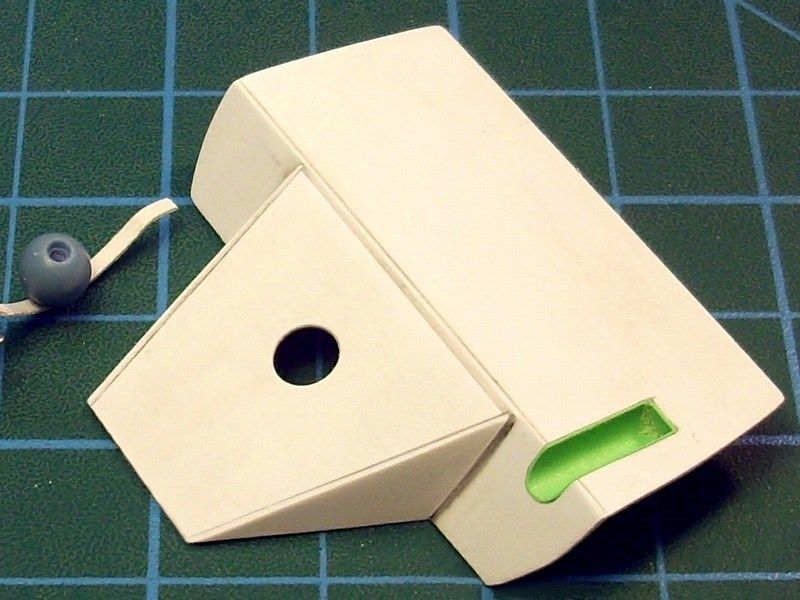 Once I tried test fitting, I discovered that there was some tiny gaps between the cockpit's floor and the cabin. These gaps, should be filled. So, "mind the gap"!  Düzenleyen Nick_Karatzides - 30/01/2016 Saat 22:48 |
|
|
|
|
|
Nick_Karatzides
Üye
Kayıt Tarihi: 06/06/2009 Aktif Durum: Aktif Değil Gönderilenler: 250 |
Gönderim Zamanı: 23/06/2011 Saat 15:48 |
|
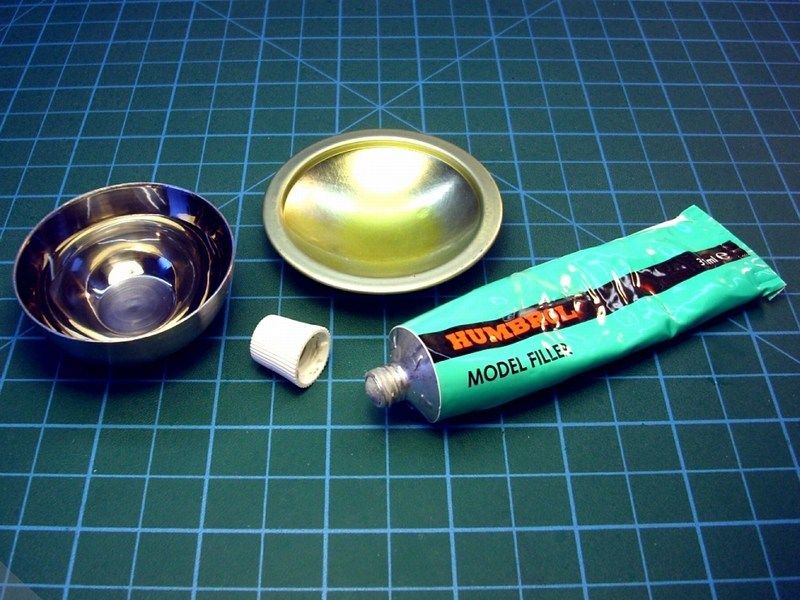
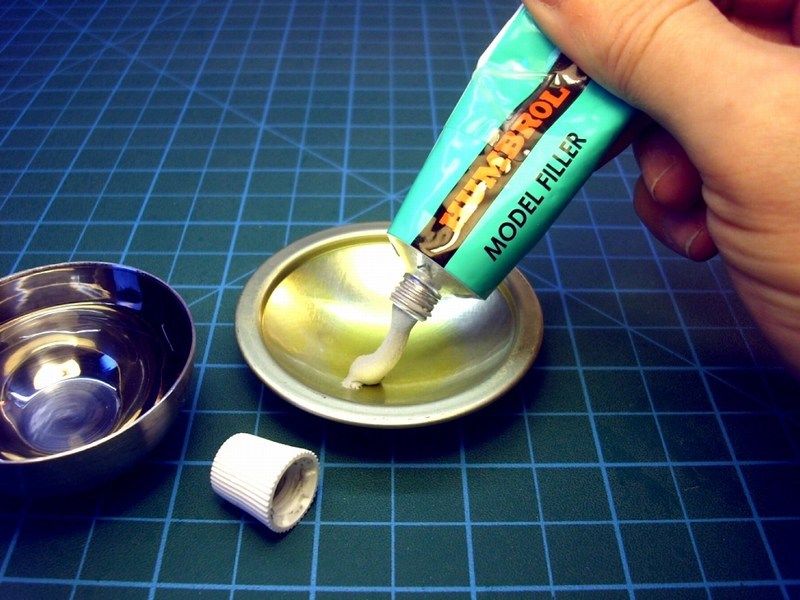
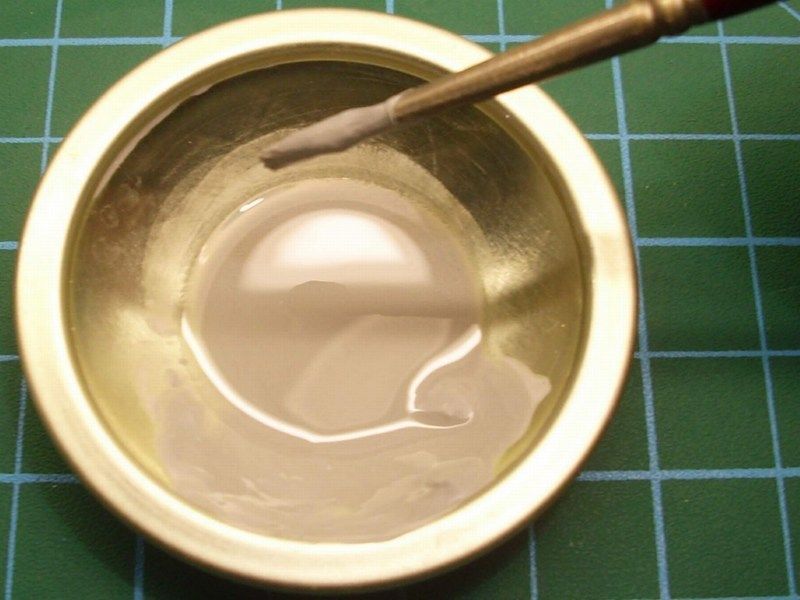
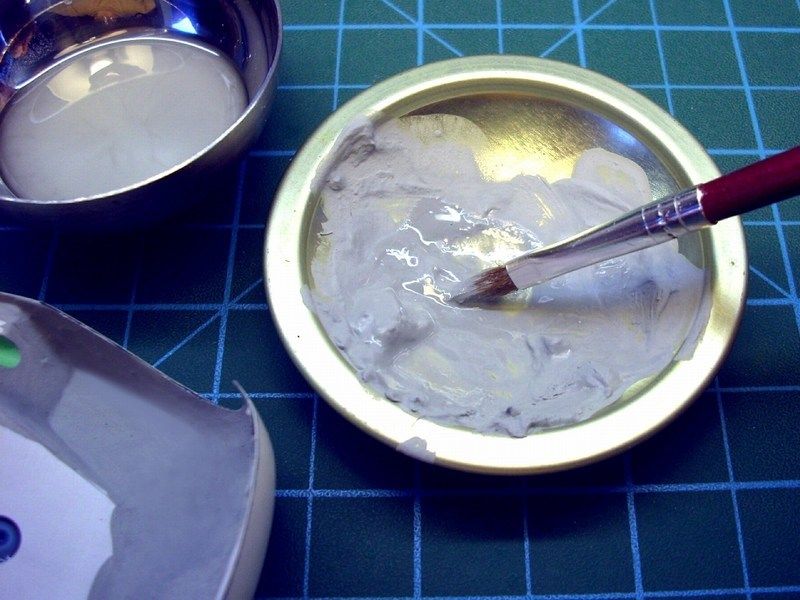
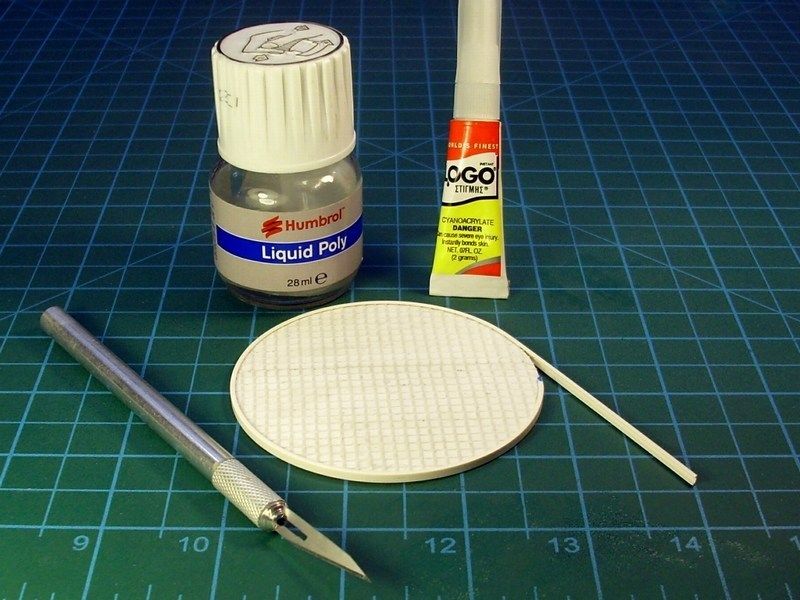
To do so, some quantities of liquid modeling putty, filled between the gaping surfaces. In order to make the putty liquid and let it spread naturally and fill the tiny gaps, I mixed Humbrol putty with lacquer thinner. Because the lacquer thinner is volatile, the liquid putty mixture took about 45 minutes to get fully dry and be safe to sand - carefully of course. If you follow this method, be sure that you mix the lacquer thinner and the modeling putty into a metal or glass plate / canister, because the most plastic materials cannot stand it and melt. For this reason, keep in mind to use just the essential lacquer thinner quantity, in order to remain the mixture in liquid form, as it is presented at the following pictures.
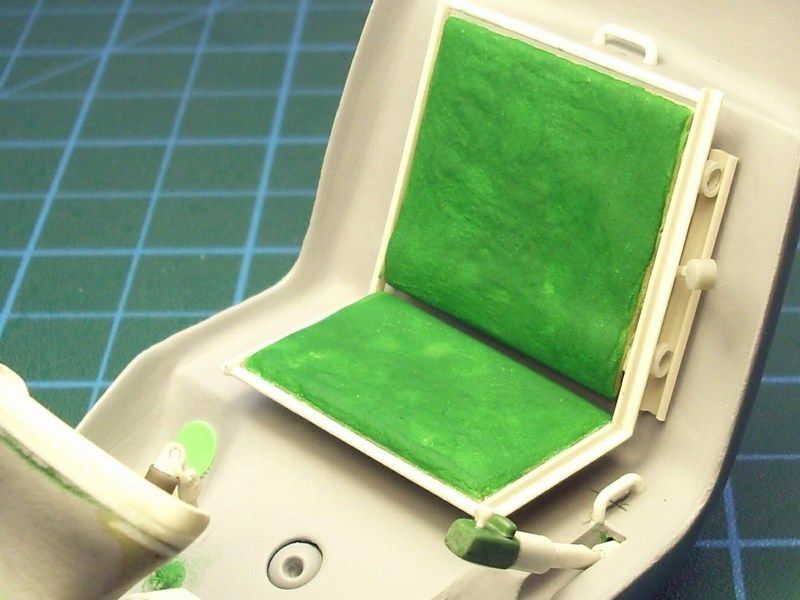
 The last liquid putty layer was applied using the Squadron MMD green putty instead of the general purpose Humbrol, because I personally find it better for final smooth details. 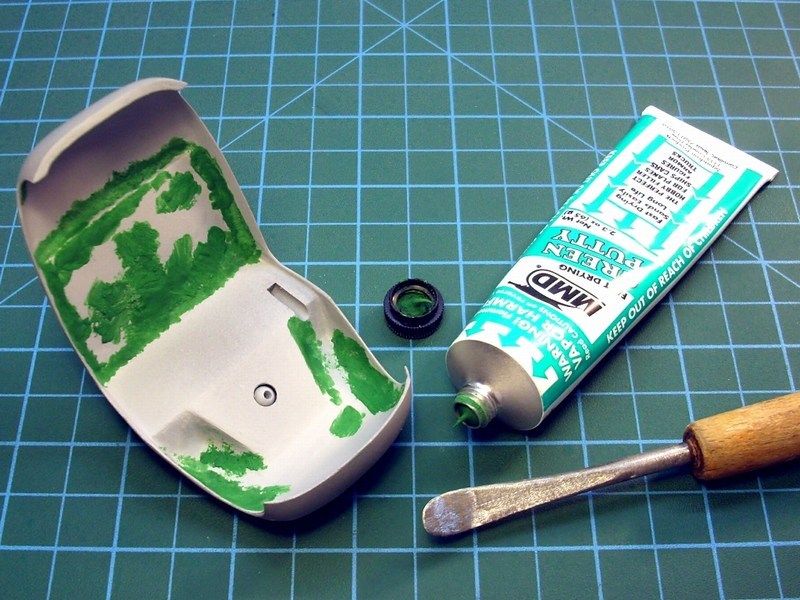 Düzenleyen Nick_Karatzides - 30/01/2016 Saat 22:48 |
|
|
|
|
|
Nick_Karatzides
Üye
Kayıt Tarihi: 06/06/2009 Aktif Durum: Aktif Değil Gönderilenler: 250 |
Gönderim Zamanı: 24/06/2011 Saat 12:32 |
|
The Squadron MMD green putty, also used to create some minor details on the cabins back side, where the tail boom frame (tail boom construction will be explained later) joints will be later fitted. At last, I tried many test fit attempts with the tail boob, to ensure that Ill not face any unpleasant surprises later.
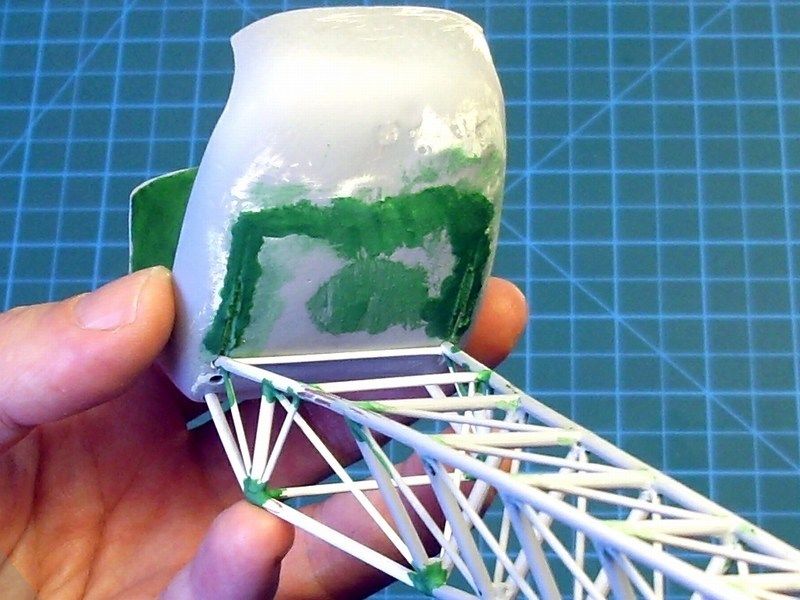
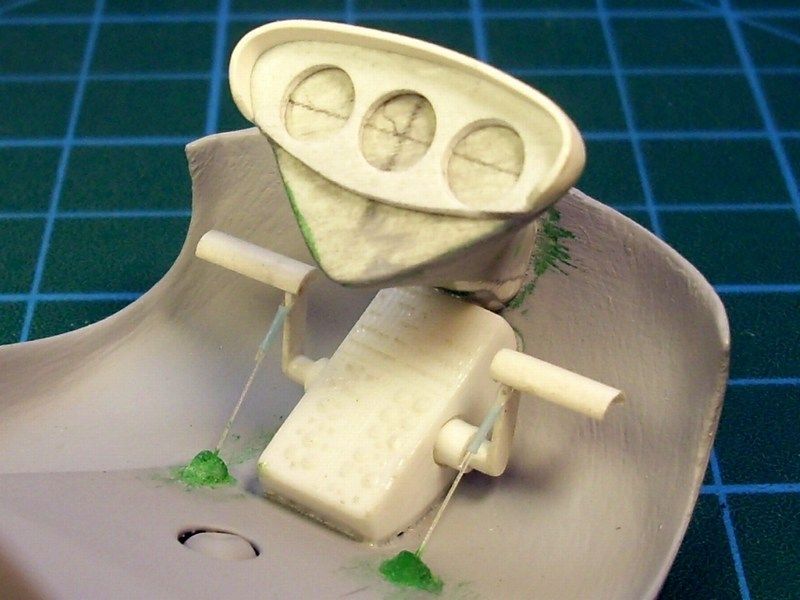
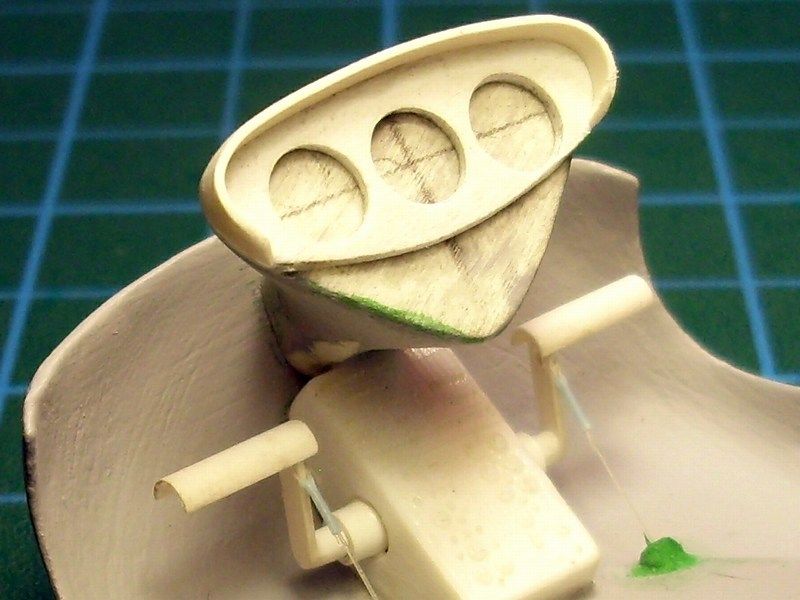
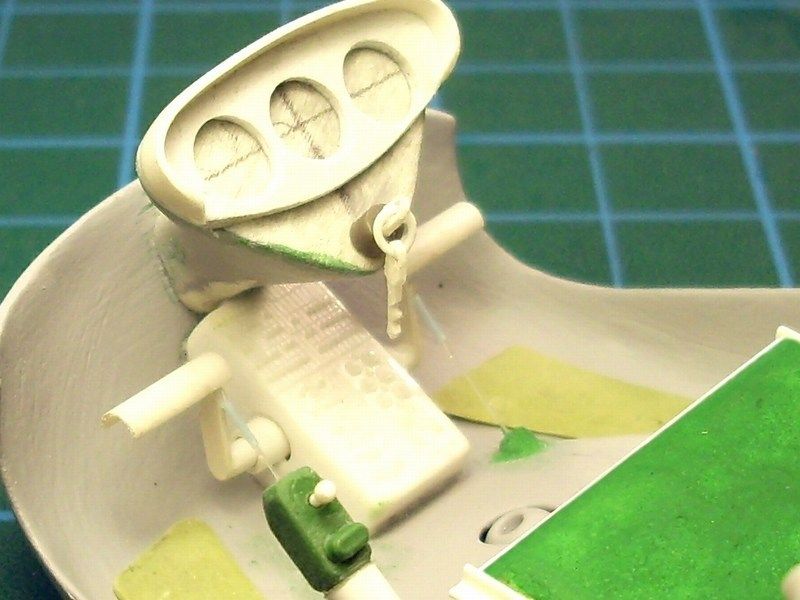
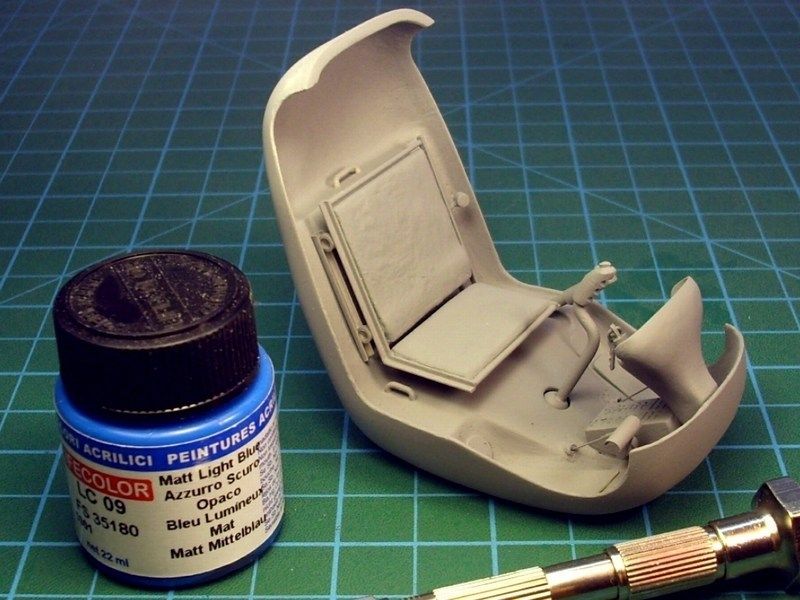
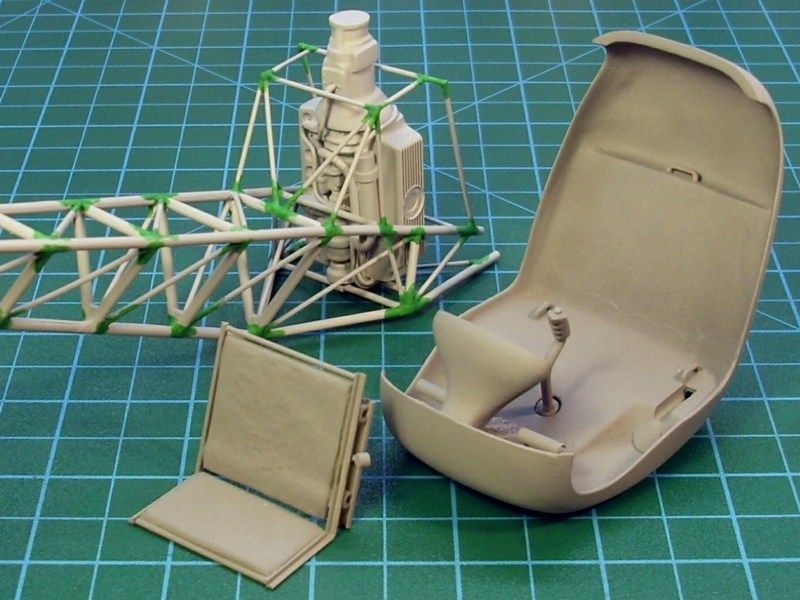
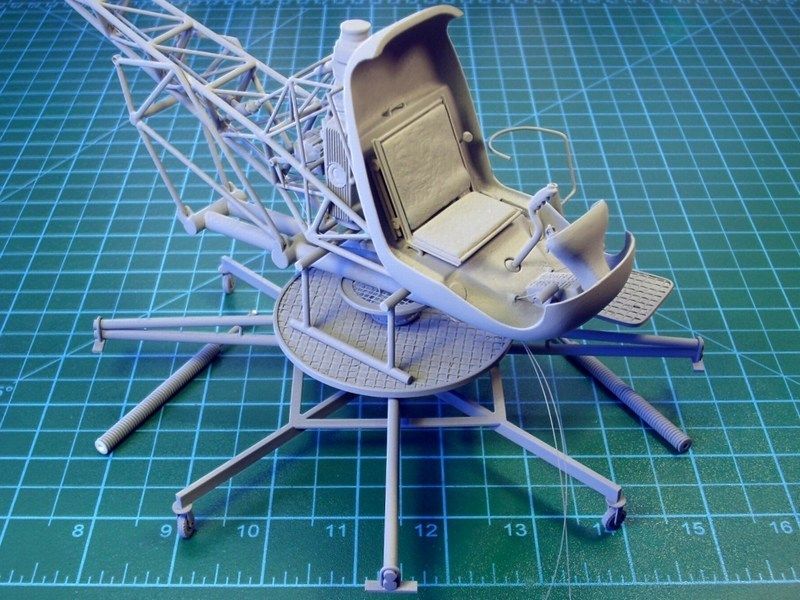
 An additional green putty layer applied and the cockpit surfaces carefully sanded to look as smooth as possible, before sprayed with Mr. Surfacer 1200 as a final touch.  The instrument panel is made of standard Milliput epoxy putty, which is popular among modelers and also useful in countless household & restoration applications. Switch board, tail rotor control pedals, cyclic control stick and collective lever are made of drilled & cut styrene plastic card. Wiring is made of 0.20mm diameter fishing line. 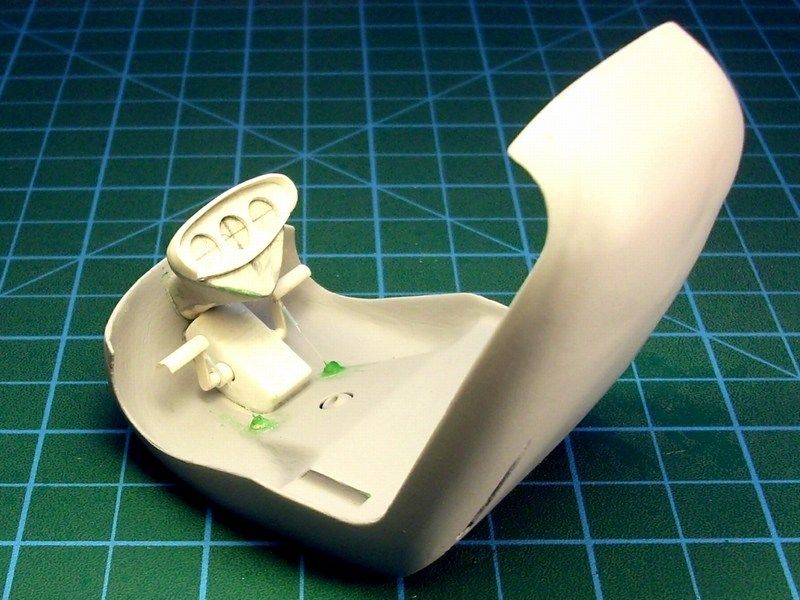
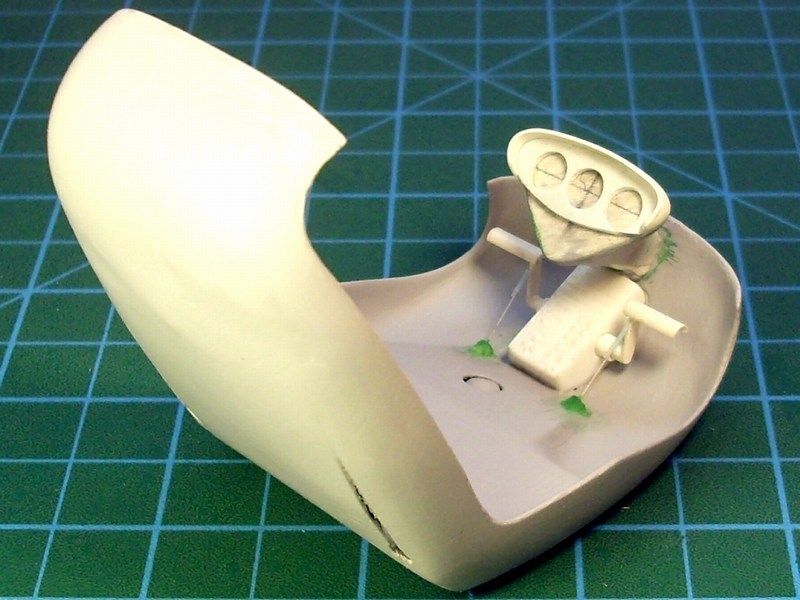
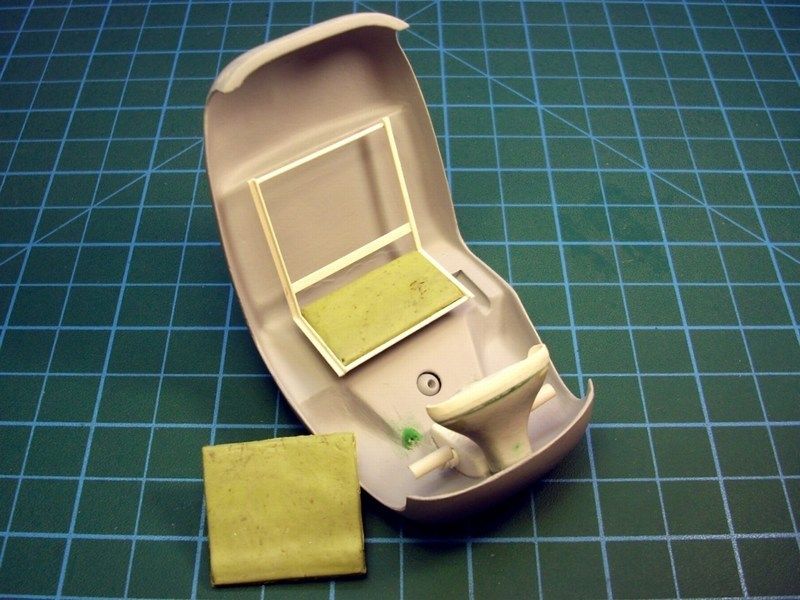
 Using styrene plastic card, I cut the basic lines to form into the student pilots seat. The dimensions and the shape are based on actual Bö-102 pictures. Standard Milliput epoxy putty was used to simulate the pillow. Finally, the cabin sprayed with Humbrol light grey acrylic primer to show up any possible scratches that I did not spot so far.. 
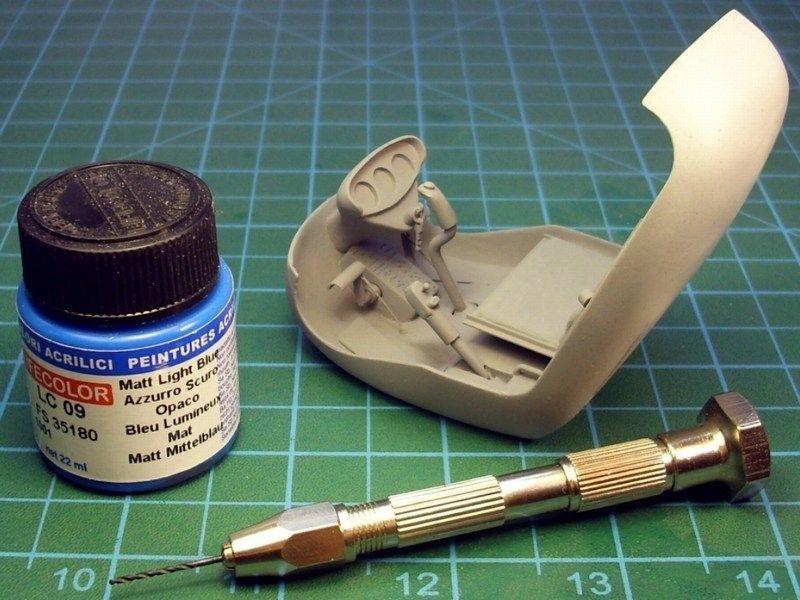
 Please keep in mind, that despite the fact that only 18 Bö-102s were produced, the available pictures show that there were many and obvious differences between them in several places. Different seats (some of them were not even seat), different cockpit and cabin colour, different fuel tank canisters, different tail boom frame construction, different landing pad and some of the Bö-102s, were not even equipped with landing skids. So, dont be surprised if you witness differences. Düzenleyen Nick_Karatzides - 30/01/2016 Saat 22:49 |
|
|
|
|
|
smkaraatli
Yeni Üye 
Kayıt Tarihi: 31/05/2011 Konum: Turkey Aktif Durum: Aktif Değil Gönderilenler: 10 |
Gönderim Zamanı: 24/06/2011 Saat 23:08 |
|
Magnificent work of absolute art and patience!
Thanks for the detailed explanations. Hope to see the finish as soon as possible .. |
|
|
|
|
|
Nick_Karatzides
Üye
Kayıt Tarihi: 06/06/2009 Aktif Durum: Aktif Değil Gönderilenler: 250 |
Gönderim Zamanı: 25/06/2011 Saat 09:48 |
|
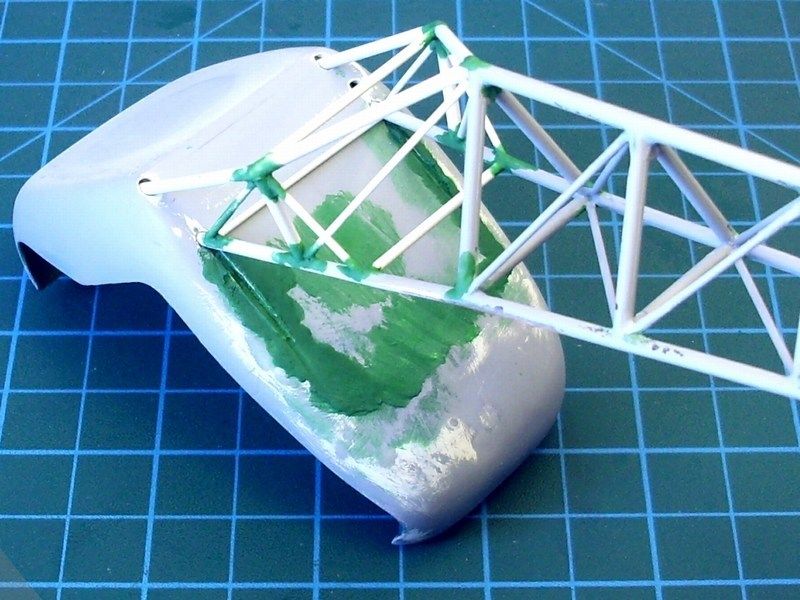
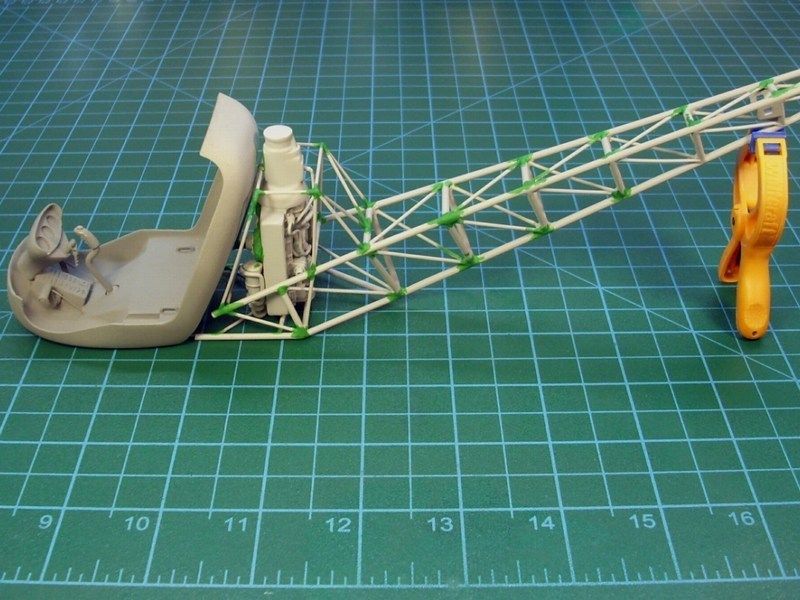
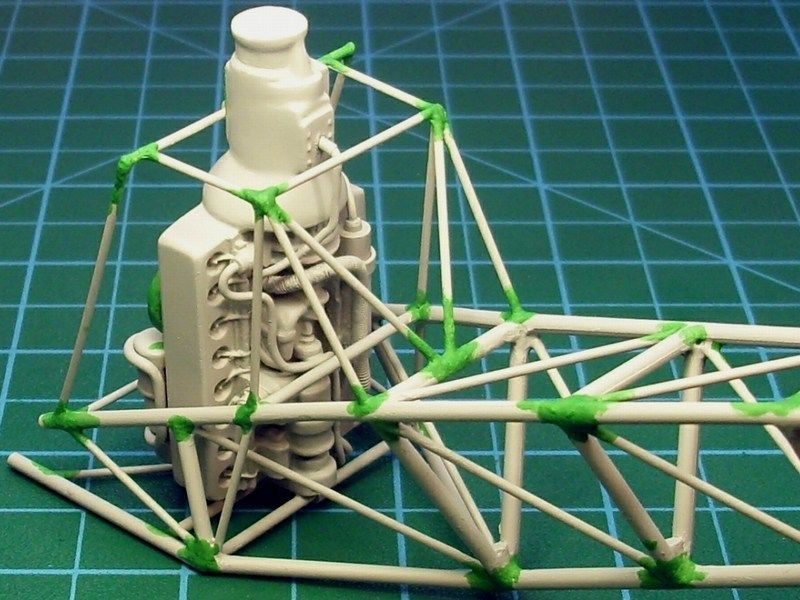
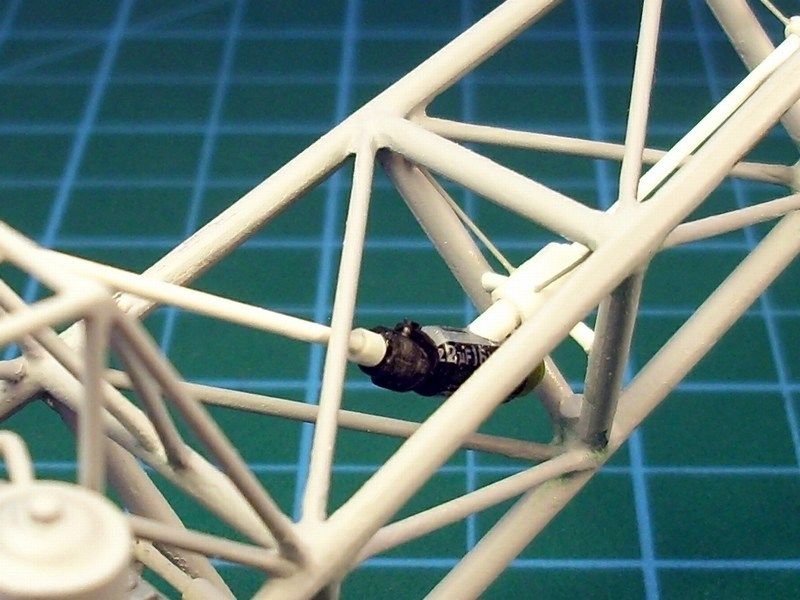
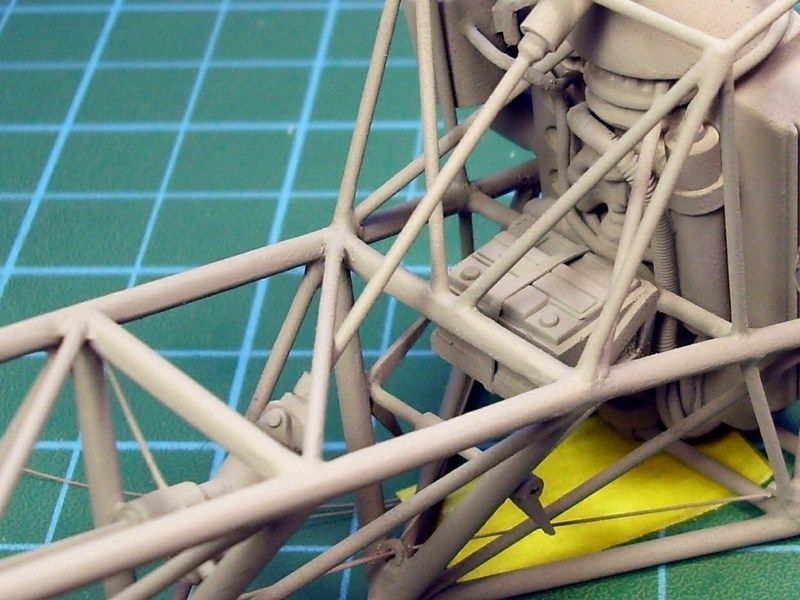
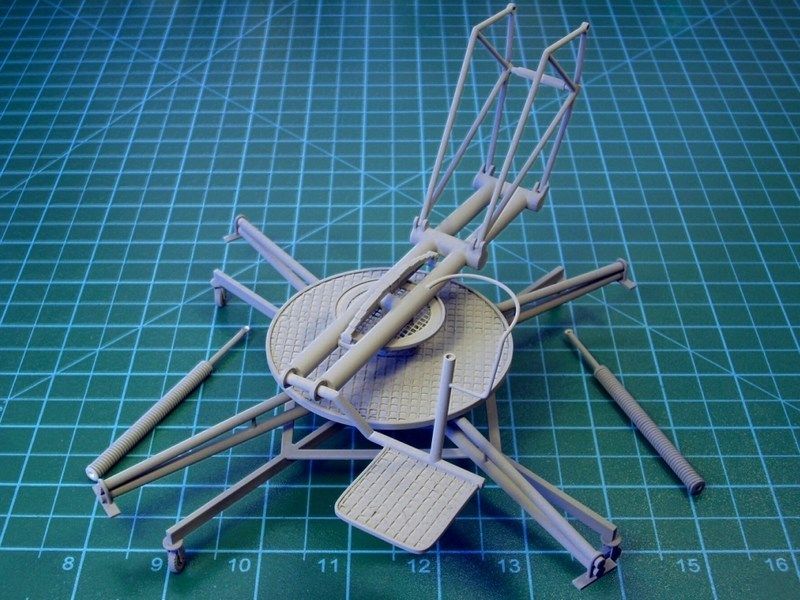
Following the 1/18 scale printed diagrams and using just a sharp #11 blade and superglue, it took about 2 hours to build the basic tail boom frame. The tiny gaps between the connections, were filled with a combination of Squadron MMD white & green putty, applied with an old brush. In order to make the putty liquid and let it spread naturally and fill the tiny gaps, I mixed it with lacquer thinner. As I wrote before, because the lacquer thinner is volatile, the liquid putty mixture took about 45 minutes to get fully dry and be safe to sand - carefully of course. Squadron MMD putty and lacquer thinner mixed into metal (glass is also OK) plate, because the most plastic materials cannot stand it and melt. 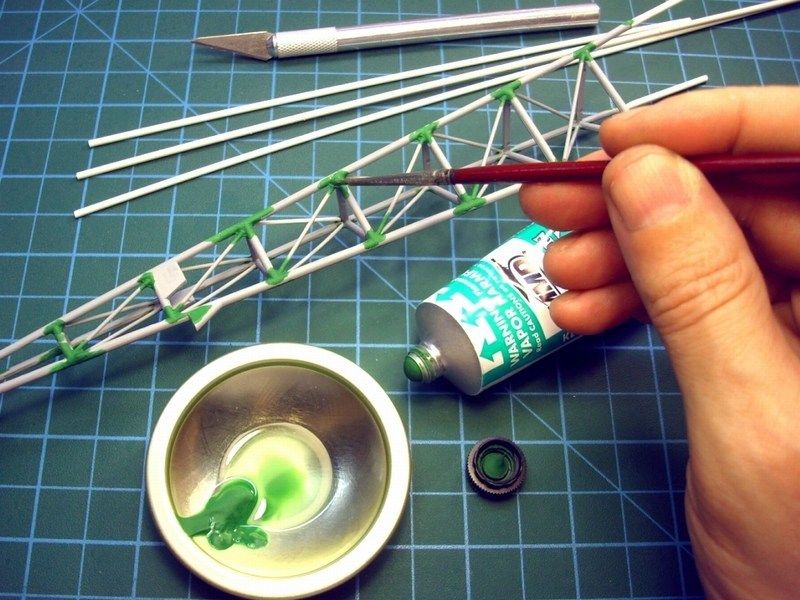 Because the Hirth 3-cylinder / 2-stroke 40hp ILO L3X375 piston engine is attached just behind the cabin, placed under the two fuel tank canisters, is clearly visible. Unfortunately, although I tried to avoid it because I am a lazy guy, the engine had to be built from scratch - keep in mind that engine building is my personal scale modelling nightmare. For this reason, I prayed to God to kindly send me a sign or even an ready built engine to fit in my 1/18 scale project. I was expecting for a miracle to happen, but waited in vain. That might means that God has a sense of humor and wanted to see me to spend inconvenience. So, after waiting some more time the miracle to happen and after I finally realized that it was impossible to rain free 1/18 scale engines on my bench, I decided to build one from scratch, using styrene, epoxy putty and a number of absolutely unidentified parts found into my spare box. After completing my attempt, placing the engine into place and airbrushing acrylic primer paint to look unified, I was happily surprised that the result did actually look like a Hirth ILO L3X375 piston engine! 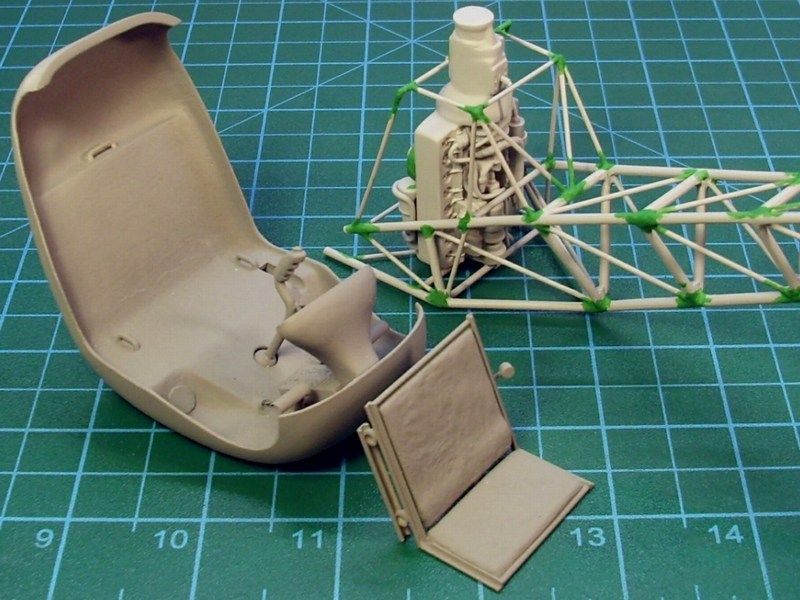

 Düzenleyen Nick_Karatzides - 30/01/2016 Saat 23:21 |
|
|
|
|
|
Nick_Karatzides
Üye
Kayıt Tarihi: 06/06/2009 Aktif Durum: Aktif Değil Gönderilenler: 250 |
Gönderim Zamanı: 26/06/2011 Saat 20:38 |
|
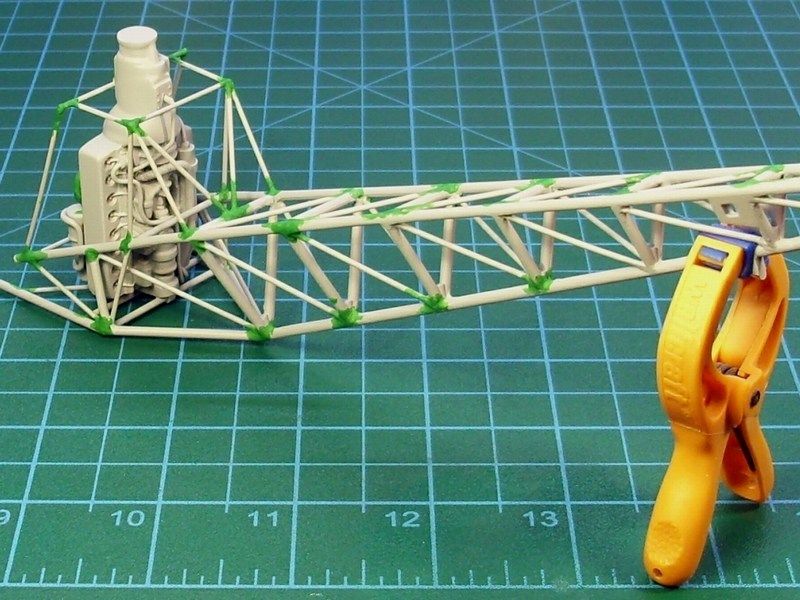
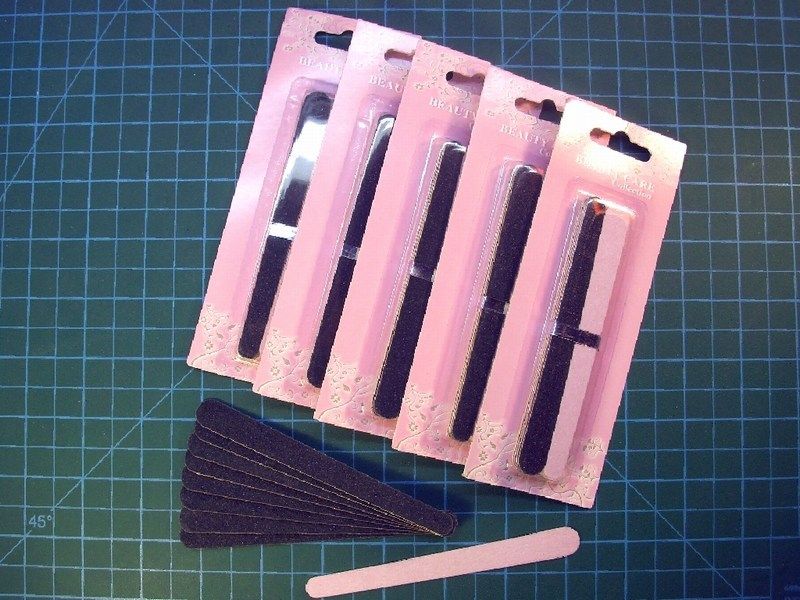
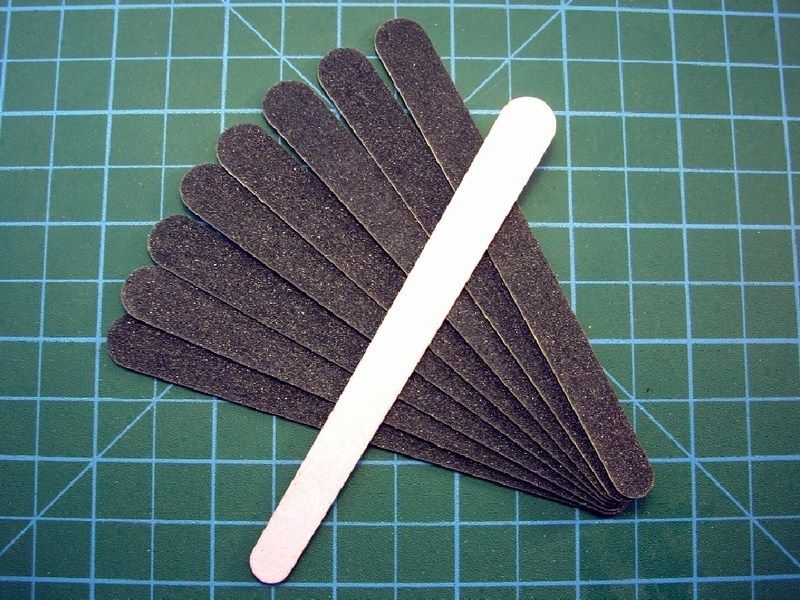
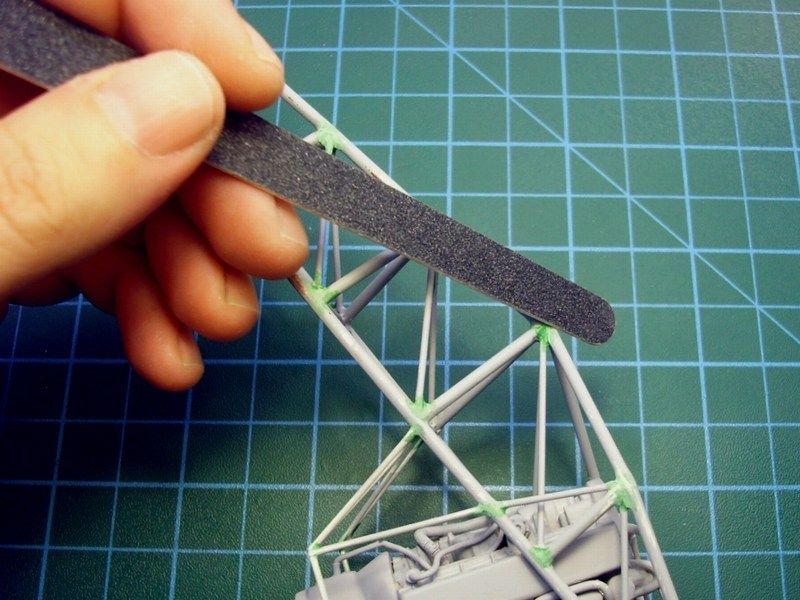
As soon as the joints between the tail boom parts were securely glued with combination of CA super glue and Humbrol liquid polysterine glue and later filled with Squadron MMD green putty on tiny gaps, it was carefully sanded with sand paper and nail files, found at the local supermarket and bought for less than 1 euro per 10 files.
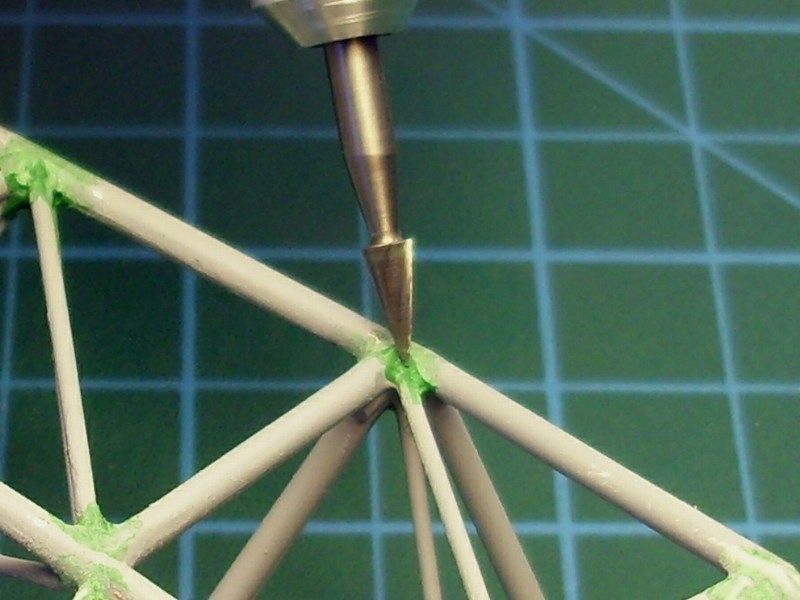
 The following toll attached to my miniplex to reach difficult spots and areas, that sand paper and nail files could not safely operate. 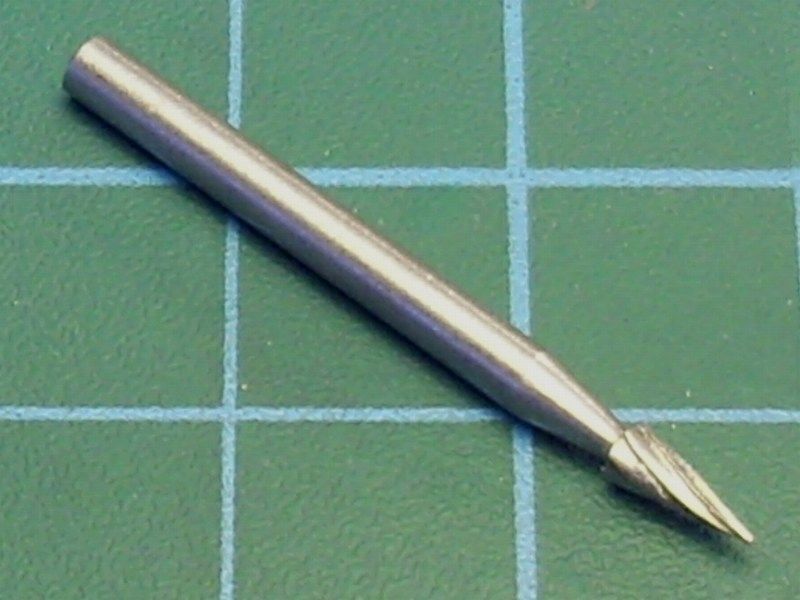
 Düzenleyen Nick_Karatzides - 30/01/2016 Saat 23:22 |
|
|
|
|
|
Nick_Karatzides
Üye
Kayıt Tarihi: 06/06/2009 Aktif Durum: Aktif Değil Gönderilenler: 250 |
Gönderim Zamanı: 27/06/2011 Saat 10:13 |
|
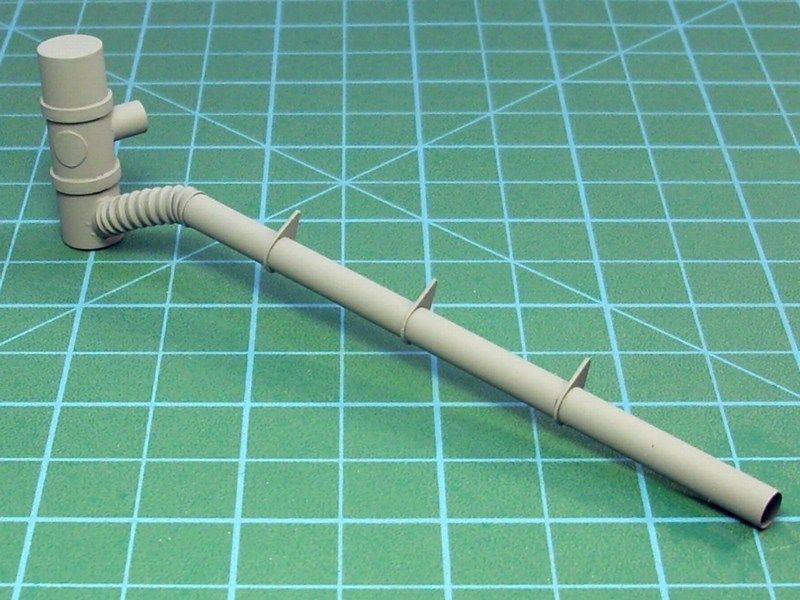
It was about time to sit back and take a break! I asked wife to prepare a nice cold café frappé for me. I had time for a close inspection on the model so far, while she was preparing this refreshment for me. For all you who do no clearly understand what is the café frappé, please let me explain that it is a foam-covered iced coffee drink made from spray-dried instant coffee. It is very popular in Greece especially during summer, but has now spread on to other countries. In French, when describing a drink, the word frappé means shaken and / or chilled; however, in popular Greek culture, the word frappé is predominantly taken to refer to the shaking associated with the preparation of a café frappé. For more infos, click HERE or visit a Greek island during this summer and relax on the beach enjoying a café frappé to feel the Greek way difference.
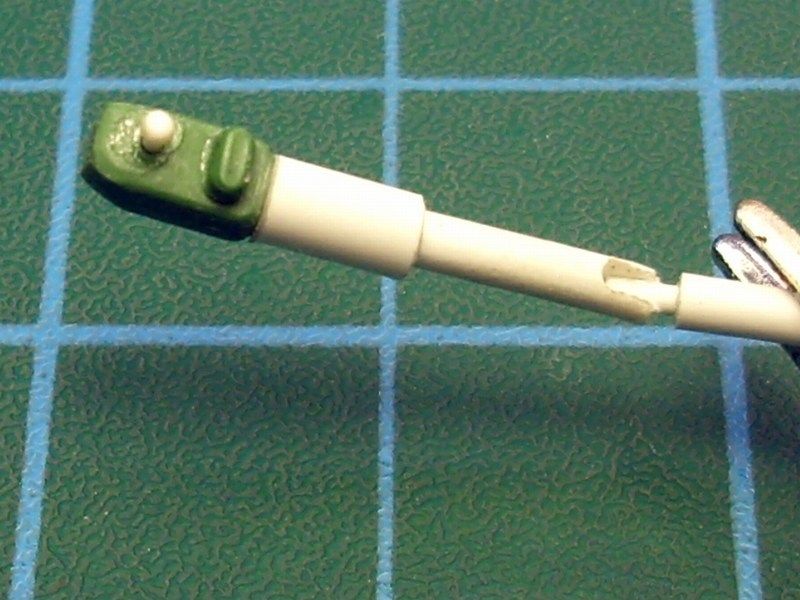
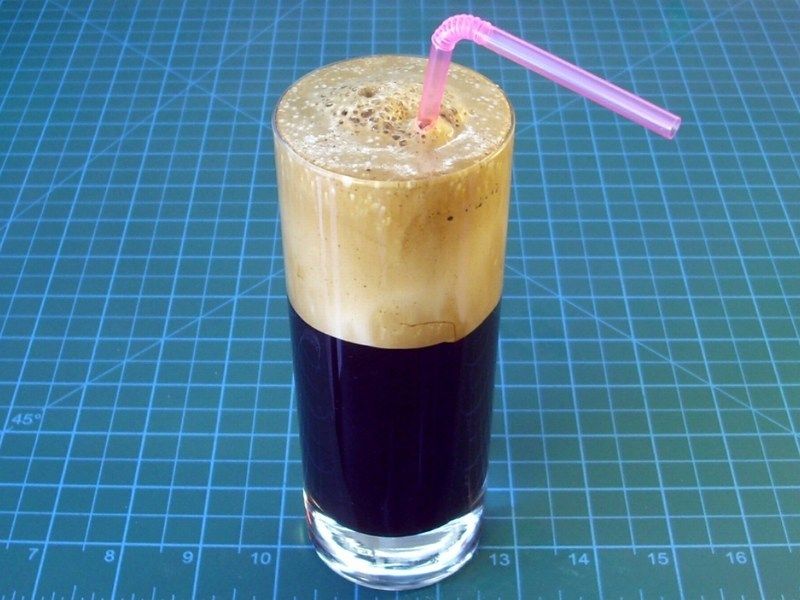 You might think that I throw away the plastic straw after drinking the coffee? Hell no! Just wash with water and I had the basic material to build the exhaust tube, right on scale. 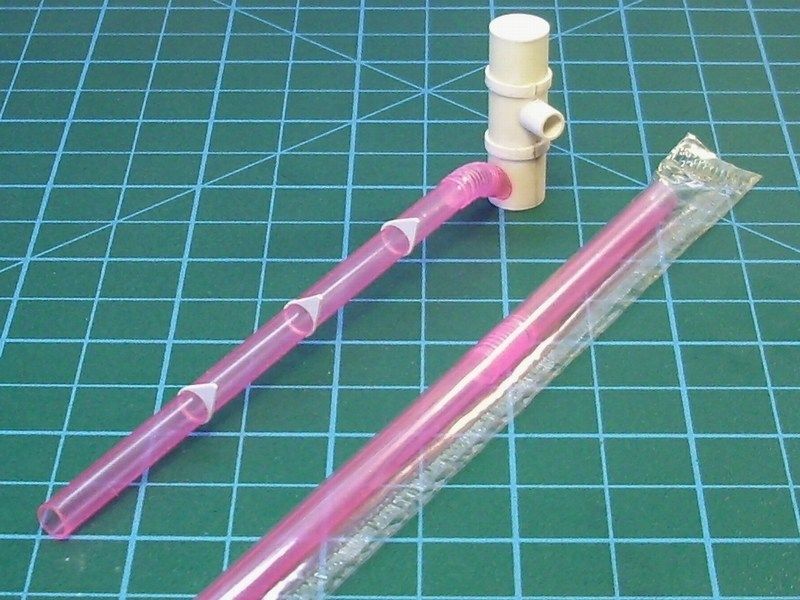

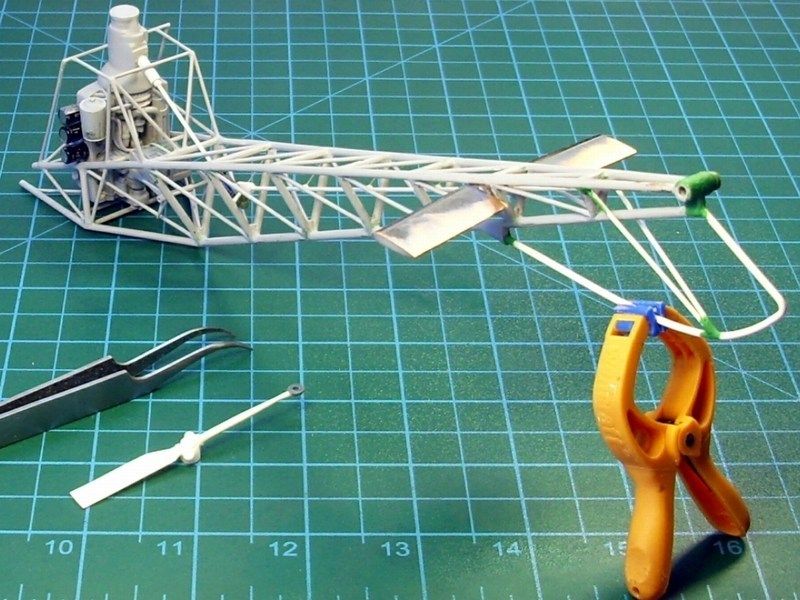
 The tail rotor blade was build by styrene & sprue, airbrushed and dry fitted into place to give me an idea if it looks right. 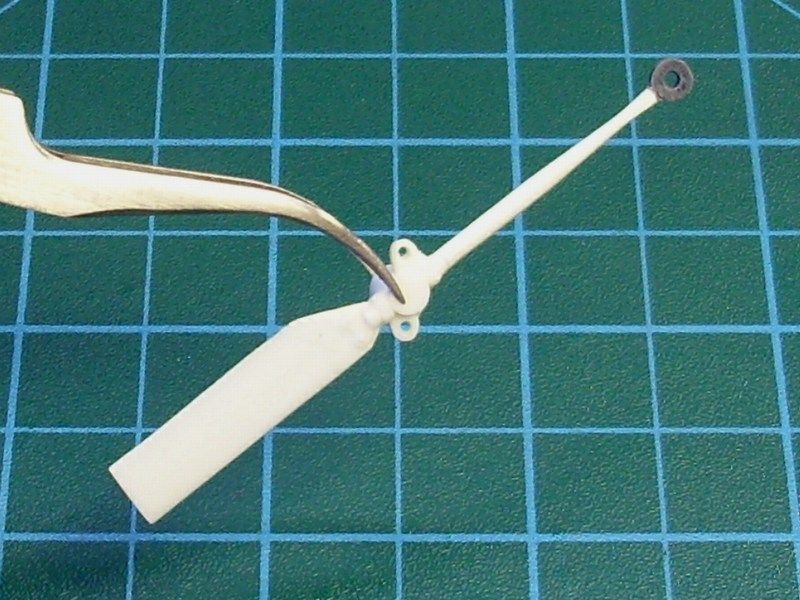
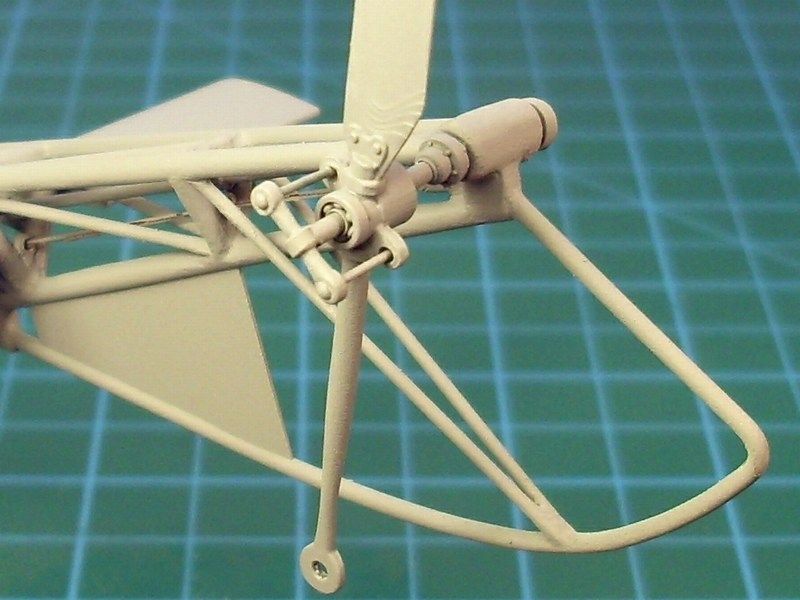 At last the battery pack was built of epoxy and some cables and flexible air intake hoses added too. Control cables and wiring made of 0.20mm fishing line. Tail boom fins are made of forded copper and styrene. The fuel tank canisters and the fuel lines will later described. Everything covered with a light grey acrylic and placed into box to wait the final painting. 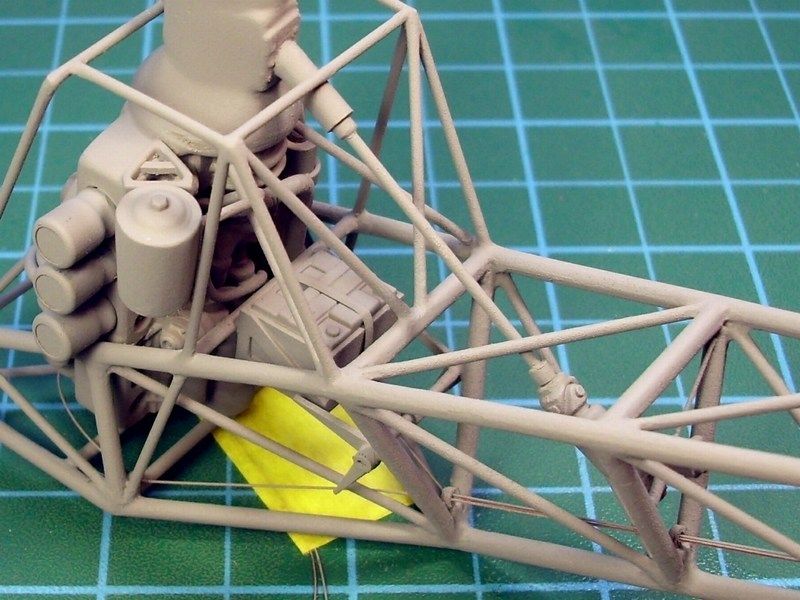
 Düzenleyen Nick_Karatzides - 30/01/2016 Saat 23:23 |
|
|
|
|
|
Nick_Karatzides
Üye
Kayıt Tarihi: 06/06/2009 Aktif Durum: Aktif Değil Gönderilenler: 250 |
Gönderim Zamanı: 28/06/2011 Saat 10:34 |
|
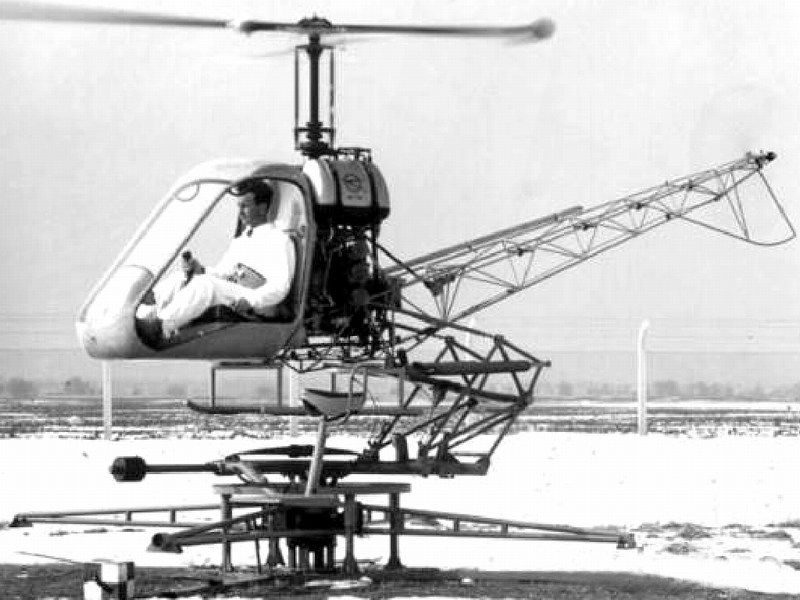
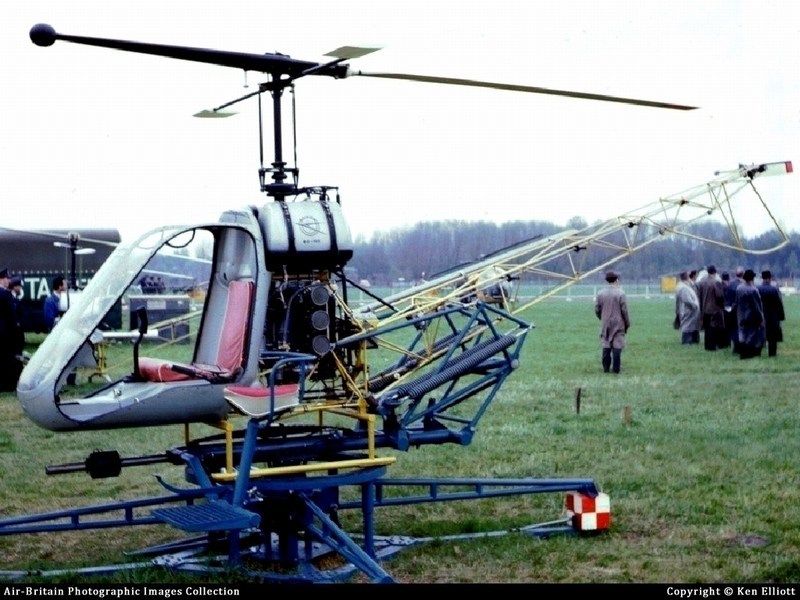
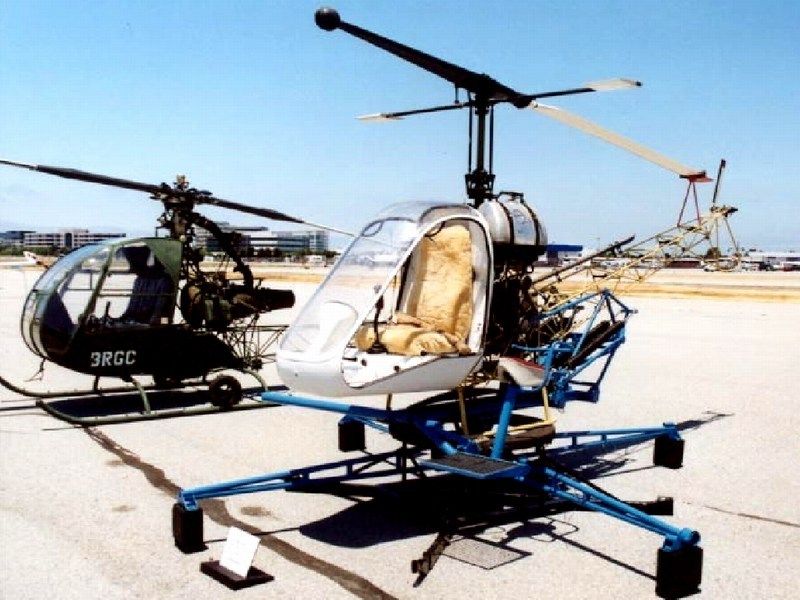
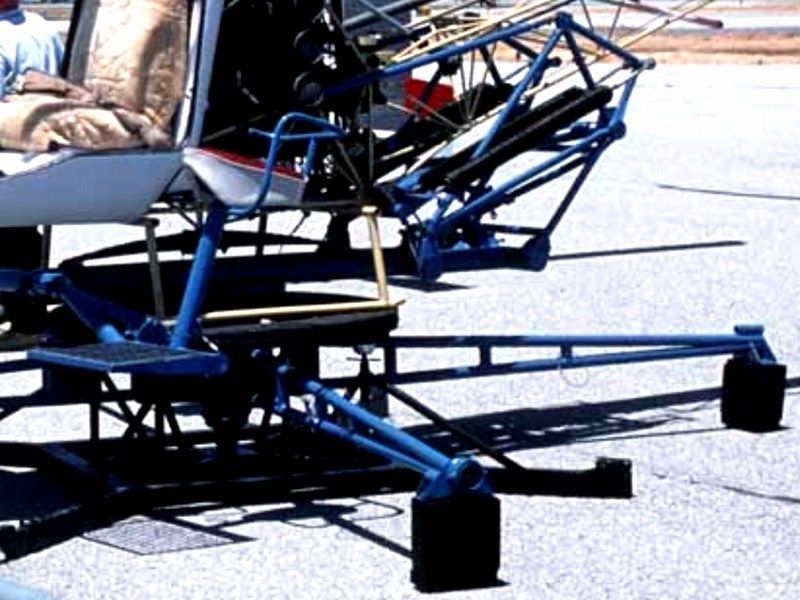
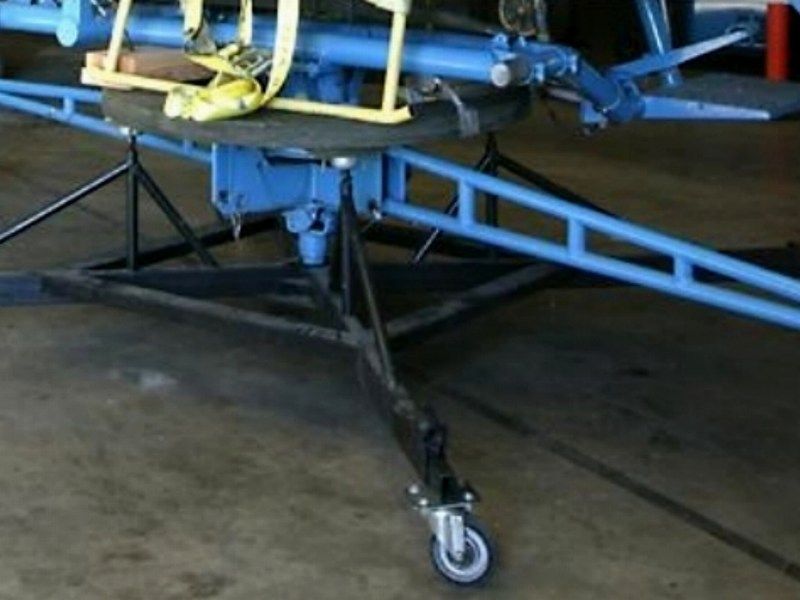
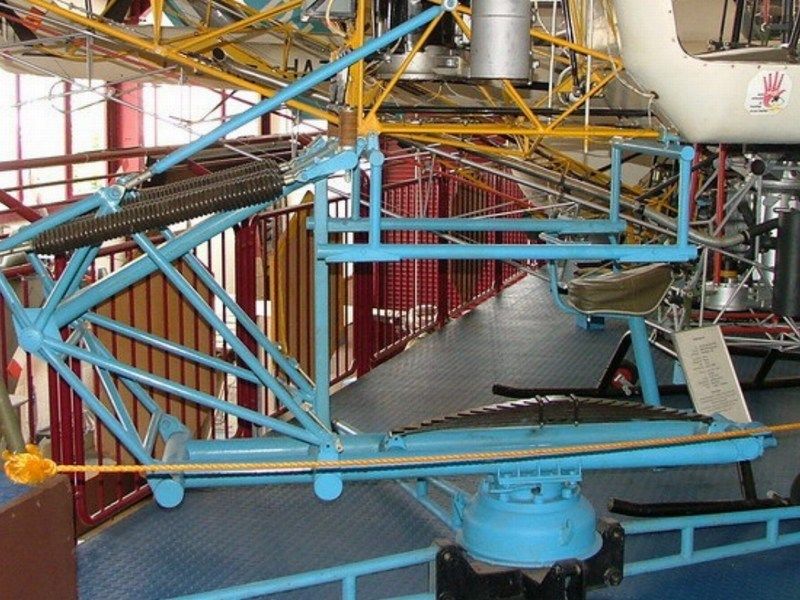
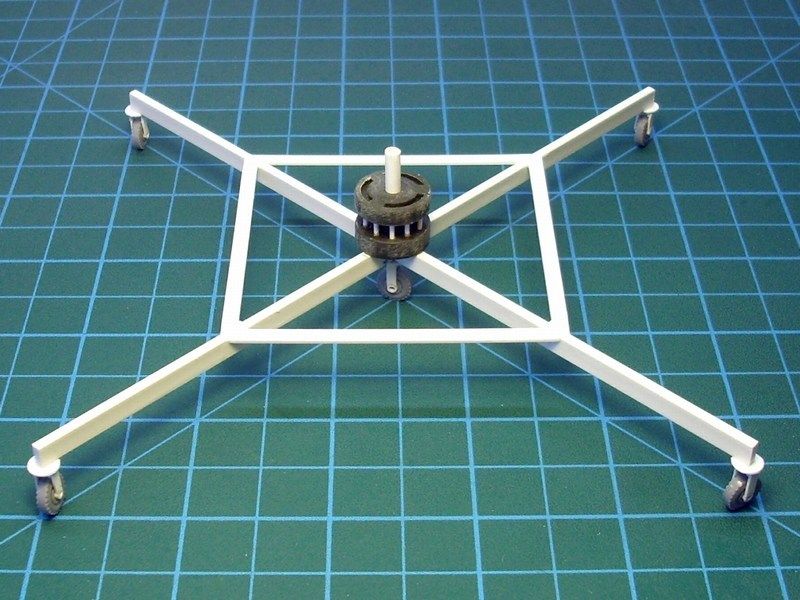
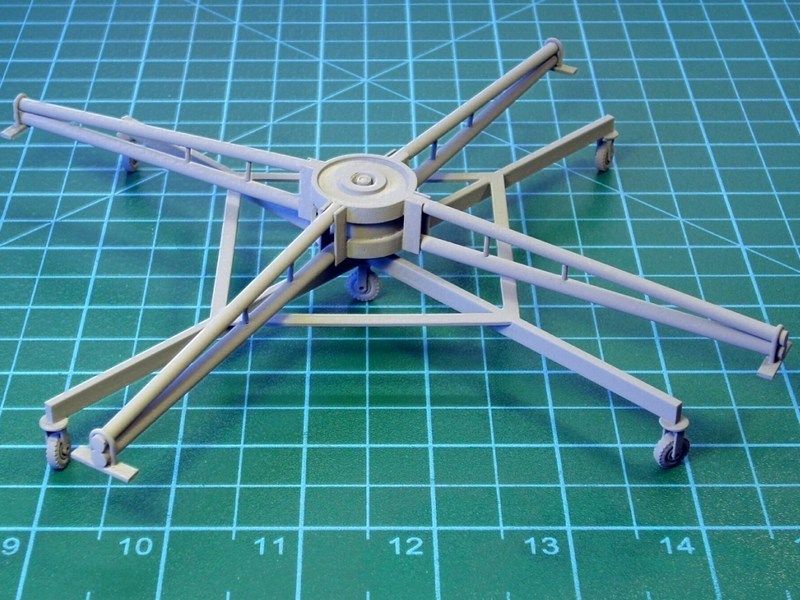
Having obtained a number of information data & pictures about the structure and functioning details of the Bölkow Bö-102 Helitrainer, I have concluded, that this training aid could be found in various versions. In most photographs, a solid land-fixed construction is visible, consisting of a system based on 4 sliding legs, stretched around, ensuring secure support. Nevertheless, both diagrams & photographs show that this was not the only version, as there were some Bö-102s which were based on inflatable rubber pads to float on water or wheeled bases which enabled transport of the device in different places, even into a hangar. Careful observation of the individual photographs and archive material showed that there are too many differences between these Bö-102s. Therefore, taking under account that only 18 were produced, I do not think too much to assume that each one of them was completely different from each other. 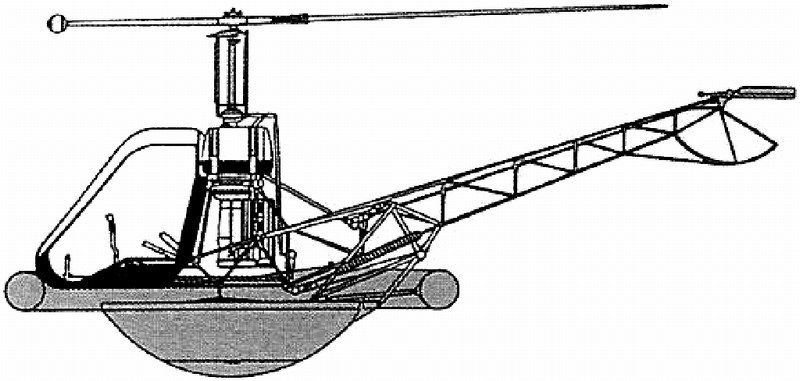
 Düzenleyen Nick_Karatzides - 30/01/2016 Saat 23:47 |
|
|
|
|
|
vayhan
Yeni Üye
Kayıt Tarihi: 20/02/2007 Aktif Durum: Aktif Değil Gönderilenler: 40 |
Gönderim Zamanı: 28/06/2011 Saat 17:29 |
|
Fantastic build.
|
|
|
|
|
|
Nick_Karatzides
Üye
Kayıt Tarihi: 06/06/2009 Aktif Durum: Aktif Değil Gönderilenler: 250 |
Gönderim Zamanı: 29/06/2011 Saat 11:02 |
|
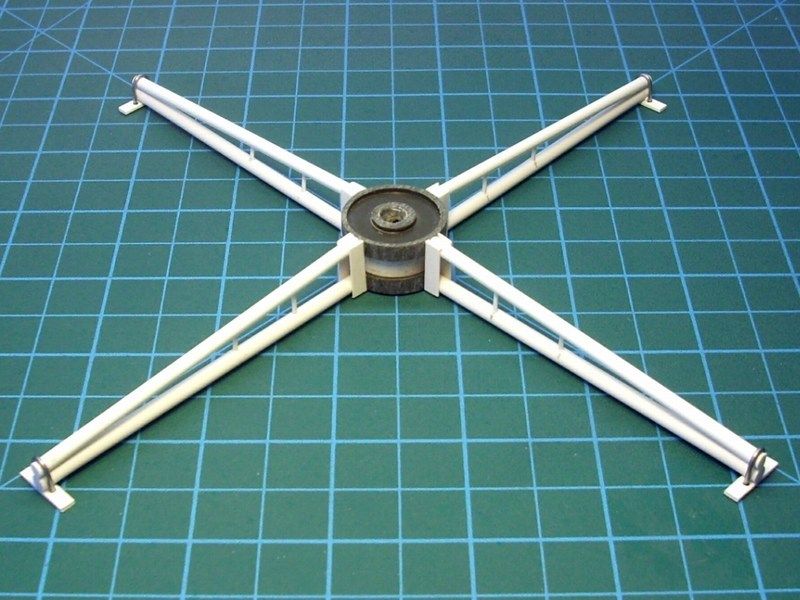
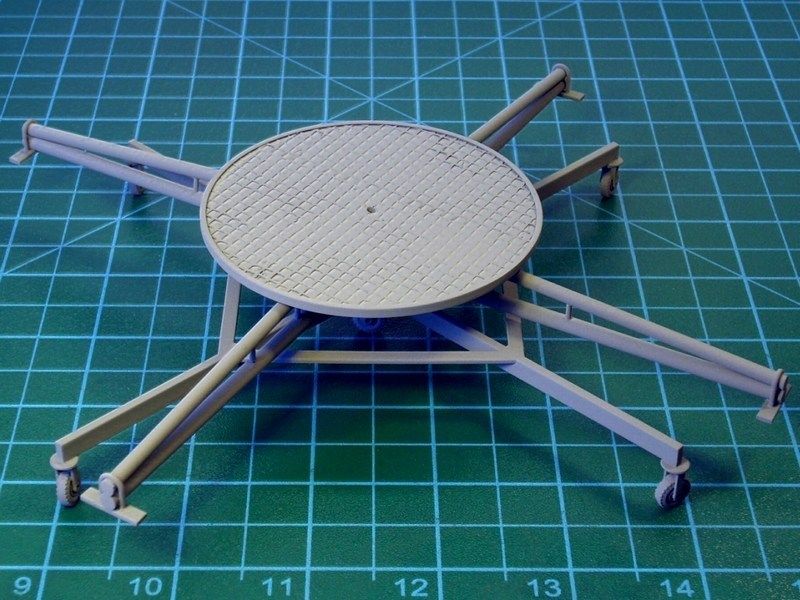
For my 1/18 scale project, I chose to recreate the wheeled version, which seemed to me as more interesting than others. As you can see in the following pictures, the landing pad & supporting base was built by styrene plastic, sprue, metal wire and glued with CA super glue and Humbrol liquid polysterine glue.
 Düzenleyen Nick_Karatzides - 30/01/2016 Saat 23:48 |
|
|
|
|
|
Nick_Karatzides
Üye
Kayıt Tarihi: 06/06/2009 Aktif Durum: Aktif Değil Gönderilenler: 250 |
Gönderim Zamanı: 30/06/2011 Saat 08:32 |
|
When it looked OK to me, it was sprayed over with Humbrol acrylic primer to spot any mistakes and be ready for final paint. Each part was fit tested to ensure that anything can be combined together as one piece.


 Düzenleyen Nick_Karatzides - 30/01/2016 Saat 23:49 |
|
|
|
|
|
Nick_Karatzides
Üye
Kayıt Tarihi: 06/06/2009 Aktif Durum: Aktif Değil Gönderilenler: 250 |
Gönderim Zamanı: 01/07/2011 Saat 14:03 |
|
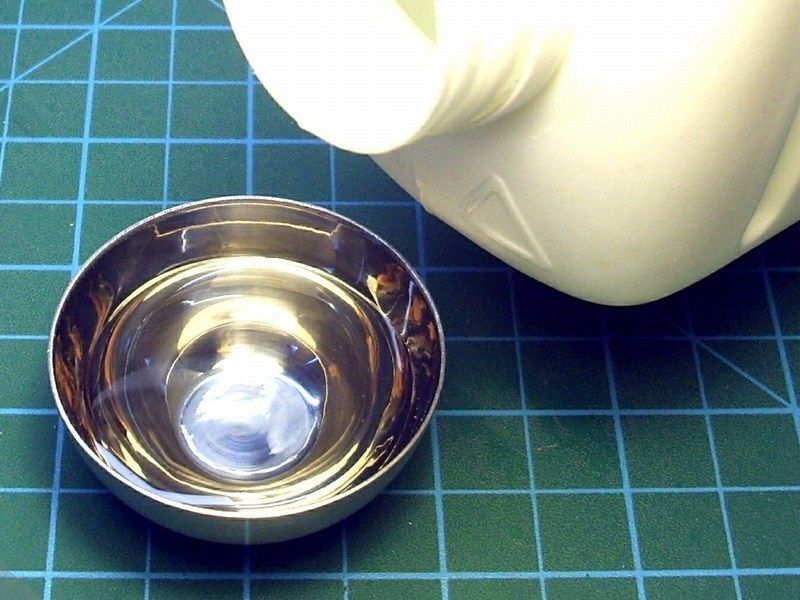
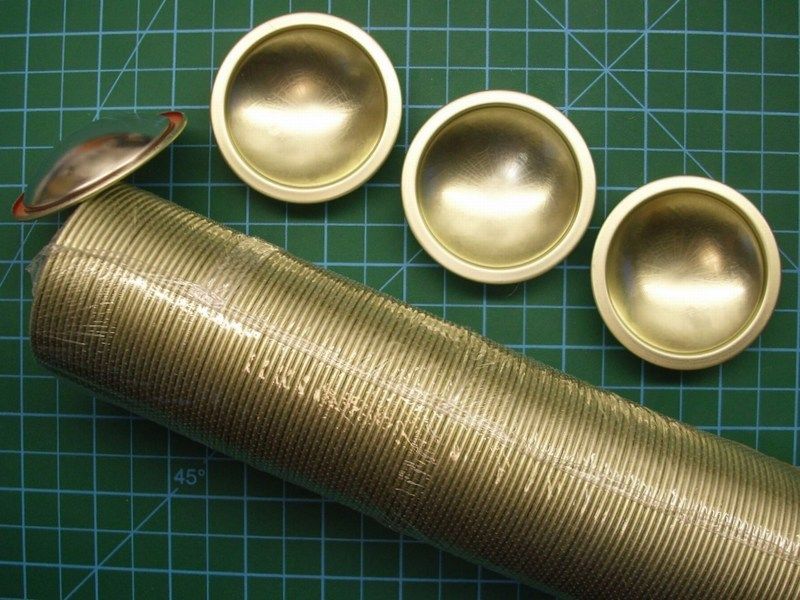
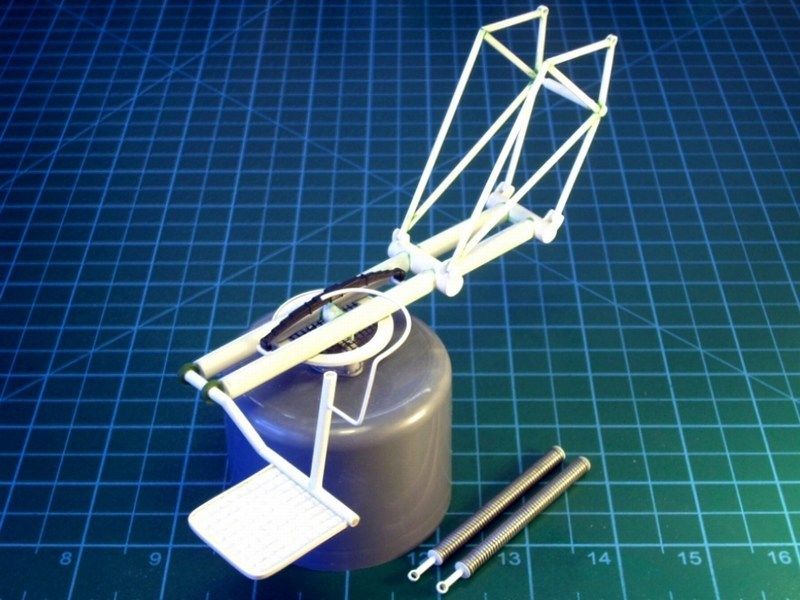
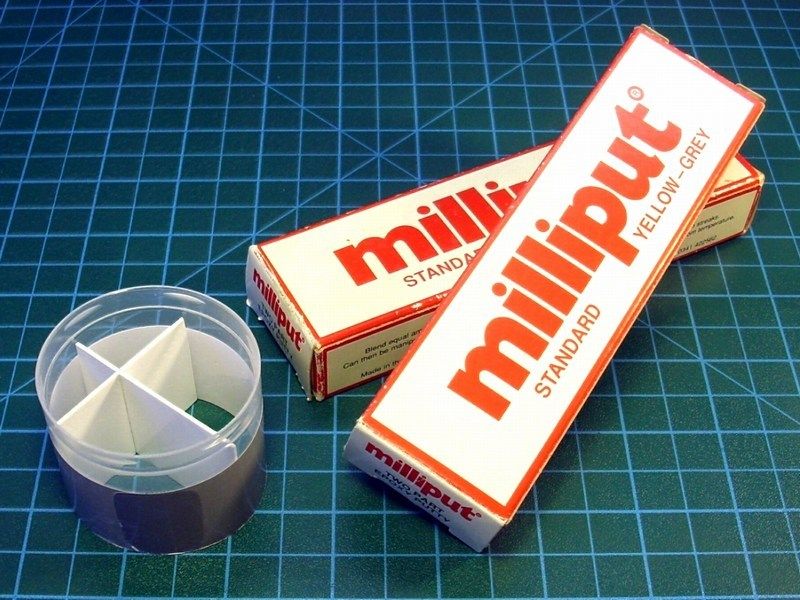
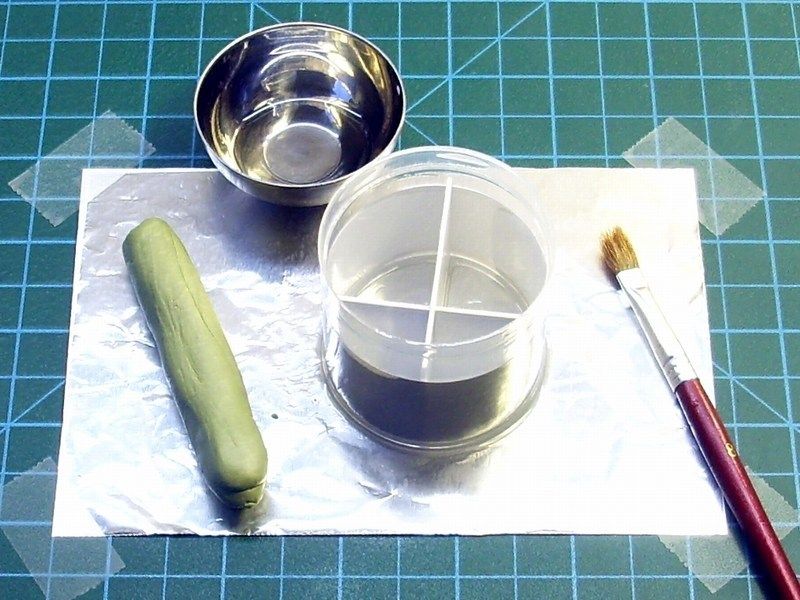
Once sprayed with the Humbrol acrylic grey primer the models constructed pieces so far, I thought it would be a good idea to use the spray cap in a productive way to construct two identical fuel tank canisters. The reason I chose to use this, is that the cup is made of a quite flexible polyamide material and the Miliput standard epoxy putty could hardly stack onto it. 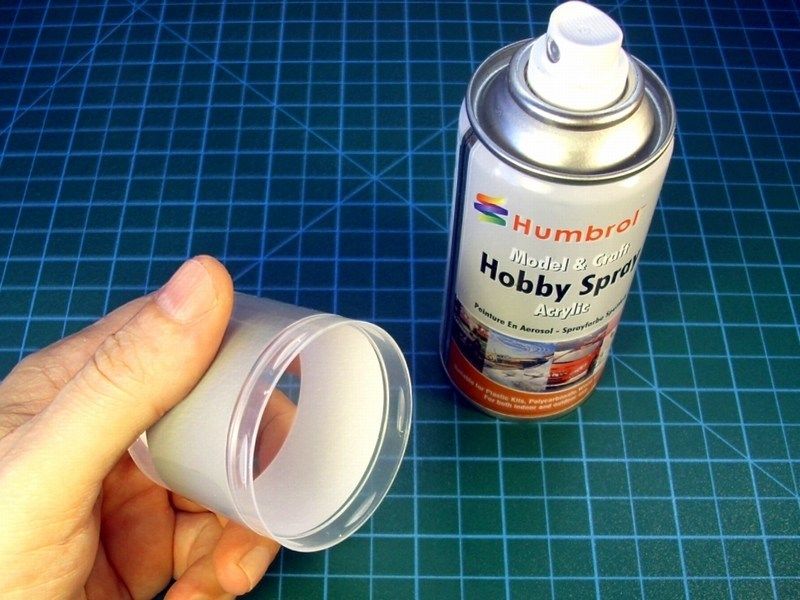
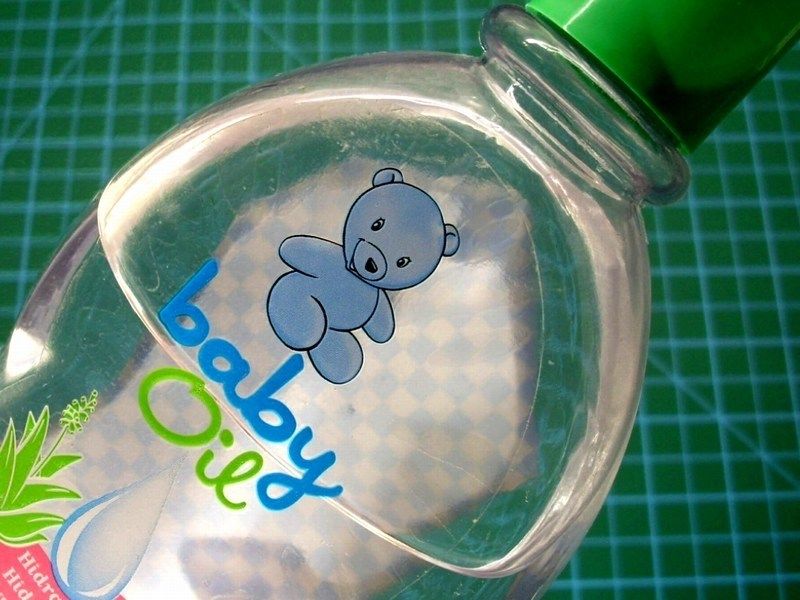
 Using styrene, I split the cap cylinders inner area into 4 quadrants. The space of two of these quadrants, would be used as molds, filled with Miliput standard epoxy putty. To ensure that the epoxy putty would be easily removed after the polymerization, a generous coat of baby oil was applied on the contact surfaces. Johnson's baby oil or similar, is well know to anybody who have children in house. If you are not a father yet, ask your sweet girlfriend - all girlfriends have a tiny baby oil bottle in their cosmetics drawer, especially the beautiful and those who pay particular attention to their beauty & appearance. If you don't have a girlfriend, close this web page at once, shut down your PC/laptop and get your feet out of house to meet one! Scale modeling is nice & productive hobby, but feeling a beautiful female next to you, is much better. Thin layers of vaseline based mixtures can be also used instead of baby oil to apply with a soft brush as a segregative material between the styrene side walls and epoxy putty. 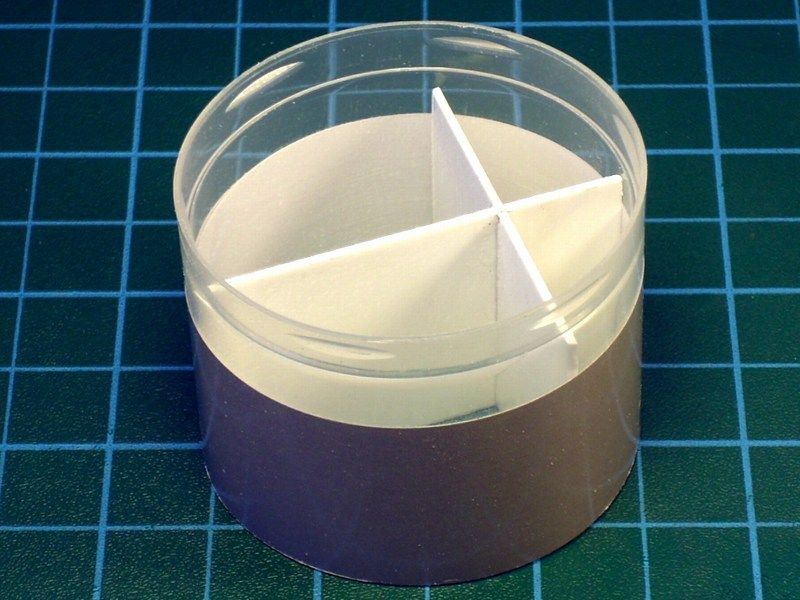
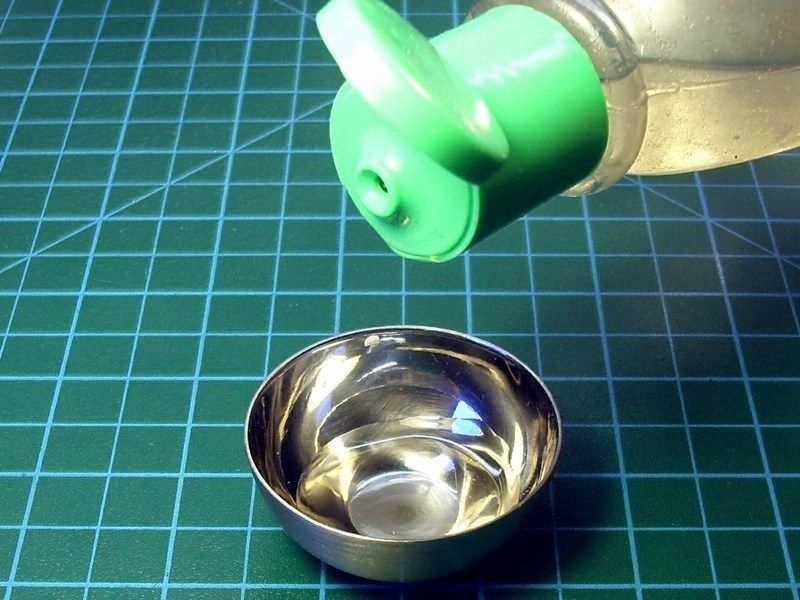
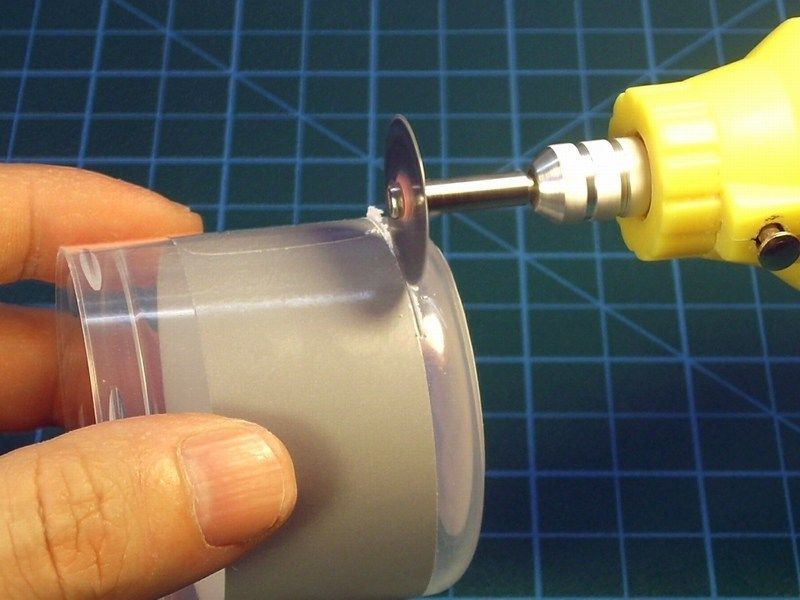
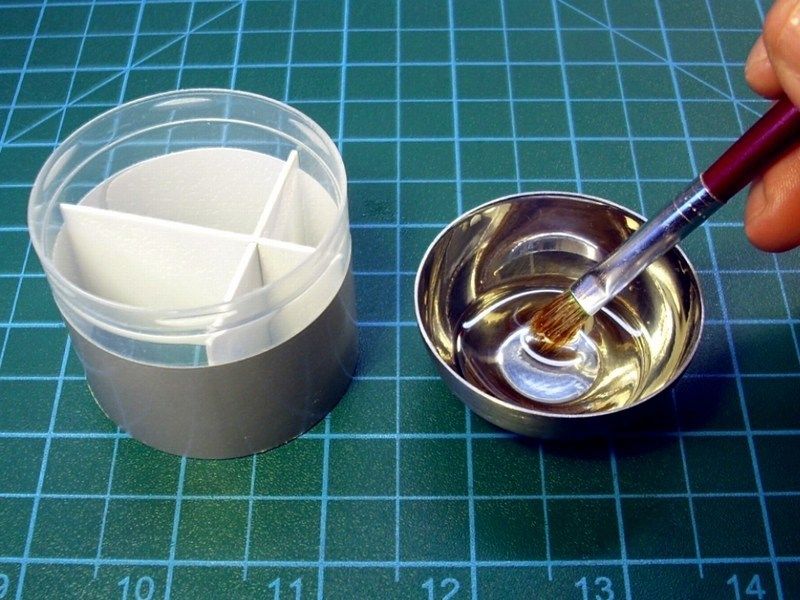 For those who feel like pioneers and might want to go one step further, you can also use aviation oil.  Aluminum foil was placed underneath to avoid spilling the cut surface and to prevent the epoxy material to stick to the green cutting surface. 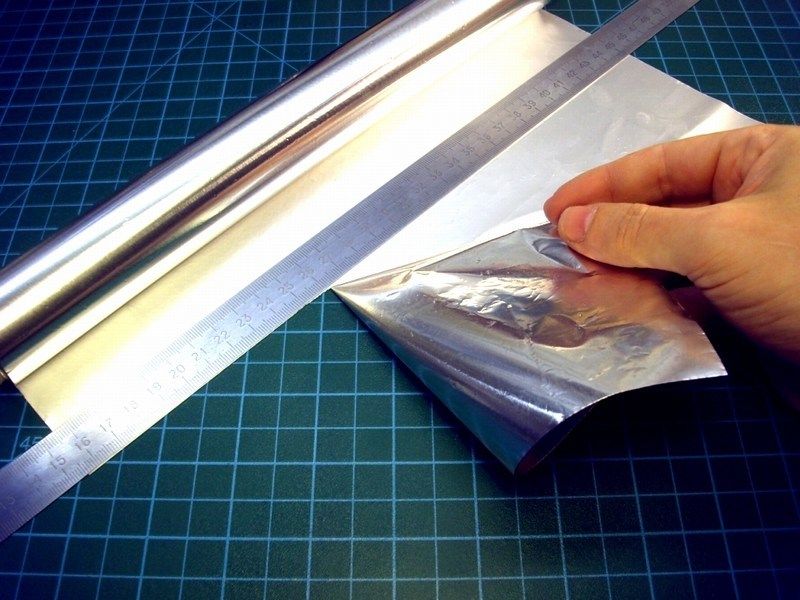
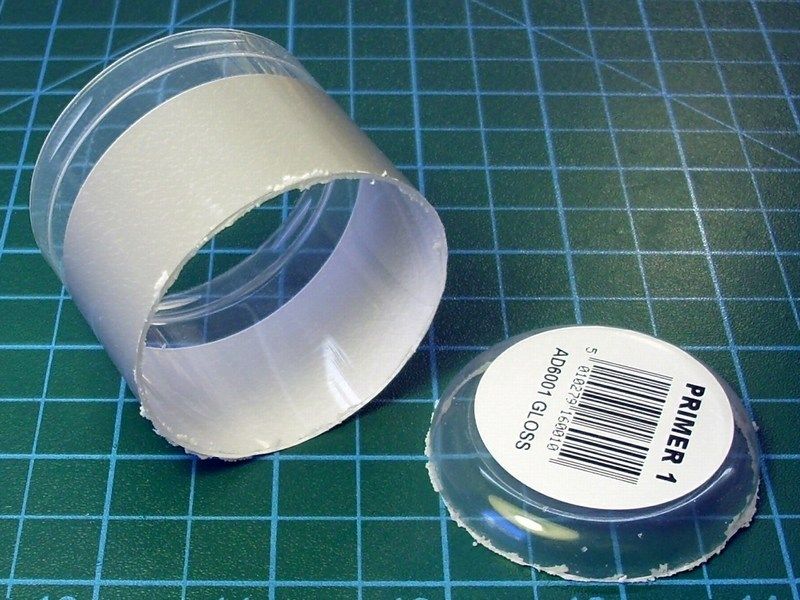
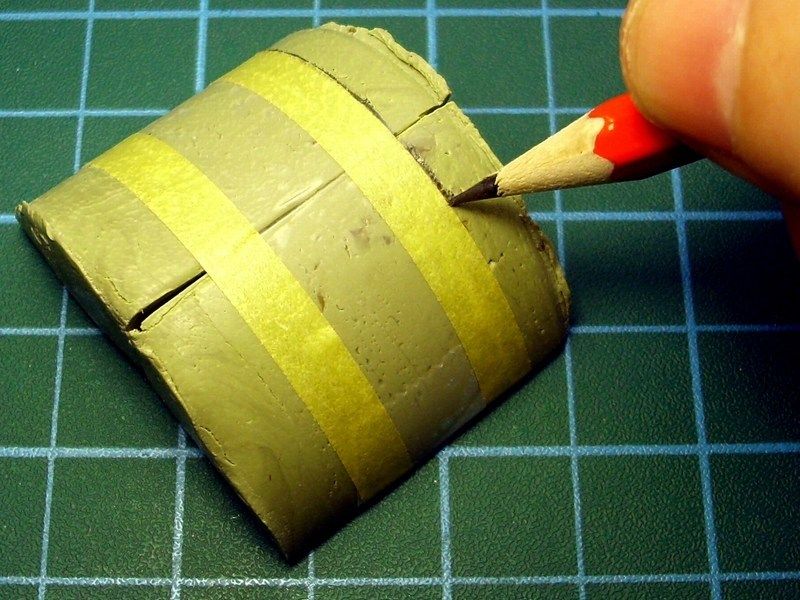
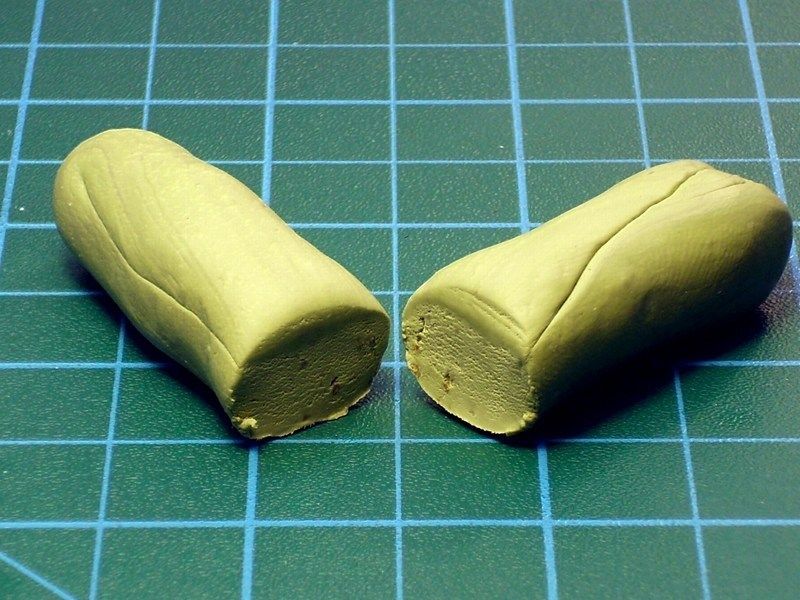 When the cap cylinder, was filled with epoxy putty and had enough time to polymerize and get solid rock, it was slightly pressed and the epoxy cast removed easily. Thats the reason why it would be nice for the cylinder to be made of flexible polyamide material. 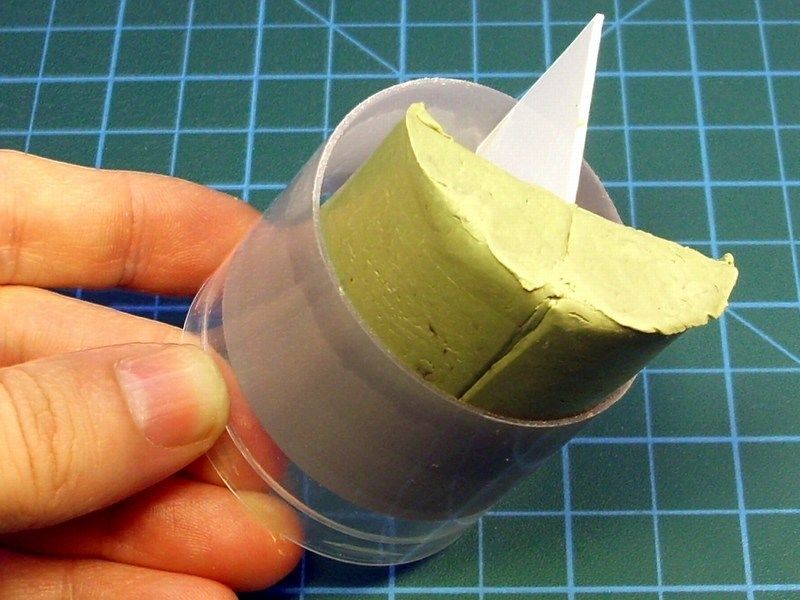 With this simple and easy way, two identical pieces with the exact same curvature and volumetric dimensions, were built in just a few minutes. These twin epoxy parts, can be now used as a base to shape into the Bö-102 fuel tanks. Having measured the desired dimensions, the two identical epoxy blocks were cut the same length. Few epoxy overcast remains that were left, were also removed during cutting process. 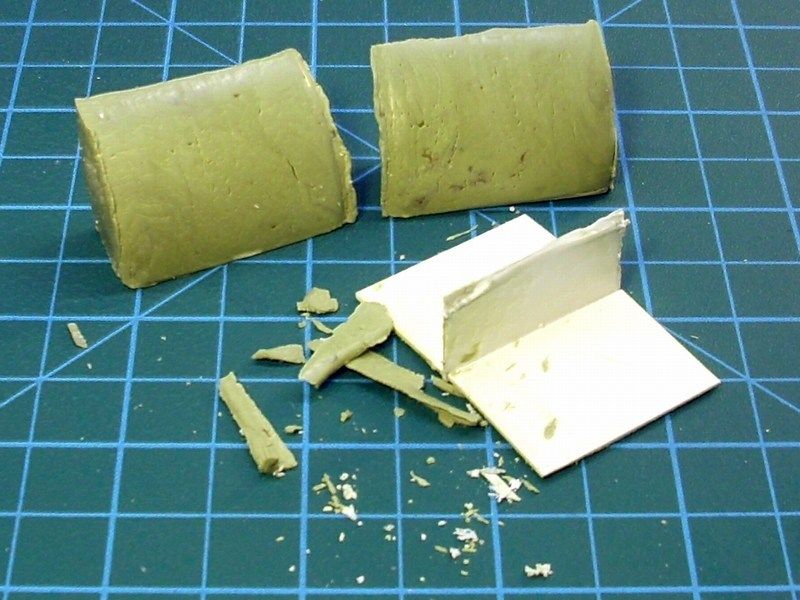
 Remember that epoxy materials are dangerous when breath or shallow and could result skin, eyes or lungs severe problems or even cancer when used for long period with no precaution measures. Always keep in mind, that a powerful vacuum system to suck away the epoxy dust should be used all time to keep the workbench area clean while sanding or milling epoxy or resin materials. Using an issued breathing mask and a pair of surgery latex gloves to prevent dust contact with lungs and fingers while sanding or milling epoxy, is also an important matter that you should seriously take care of! My recommendation is to also wear an overall working suit (as I do) to keep your clothes dust free while sanding epoxy. Some people might find it too much, but I wouldn't like to bring epoxy dust & grains from my workbench into living room and my beloved. 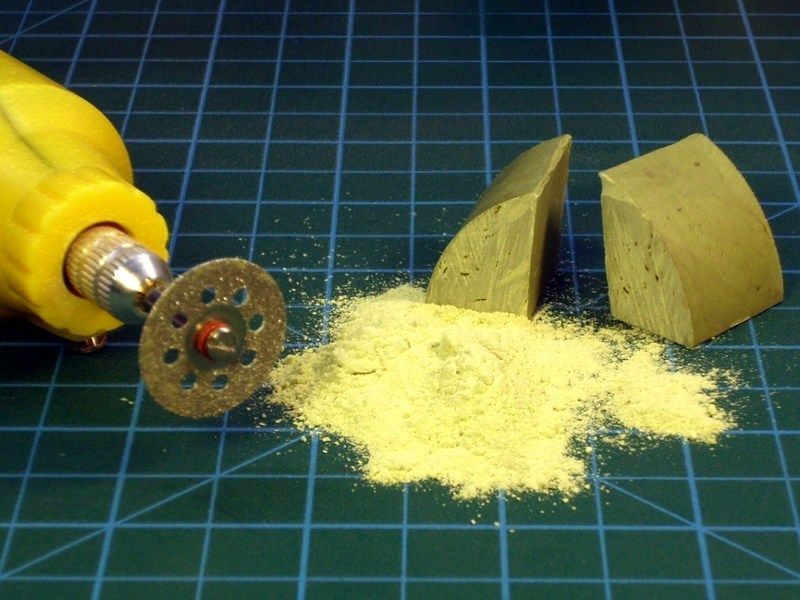 if you are still reading the WIP article so far, you are a proud father already or you have a beautiful girlfriend to spend your money faster than you earn it. Düzenleyen Nick_Karatzides - 31/01/2016 Saat 00:33 |
|
|
|
|
|
nezih
Üye

Kayıt Tarihi: 02/09/2005 Aktif Durum: Aktif Değil Gönderilenler: 1077 |
Gönderim Zamanı: 01/07/2011 Saat 15:17 |
|
Great work! This is a really good lesson for me :)
|
|
|
Sweat saves blood!
|
|
|
|
|
|
Nick_Karatzides
Üye
Kayıt Tarihi: 06/06/2009 Aktif Durum: Aktif Değil Gönderilenler: 250 |
Gönderim Zamanı: 05/07/2011 Saat 21:39 |
|
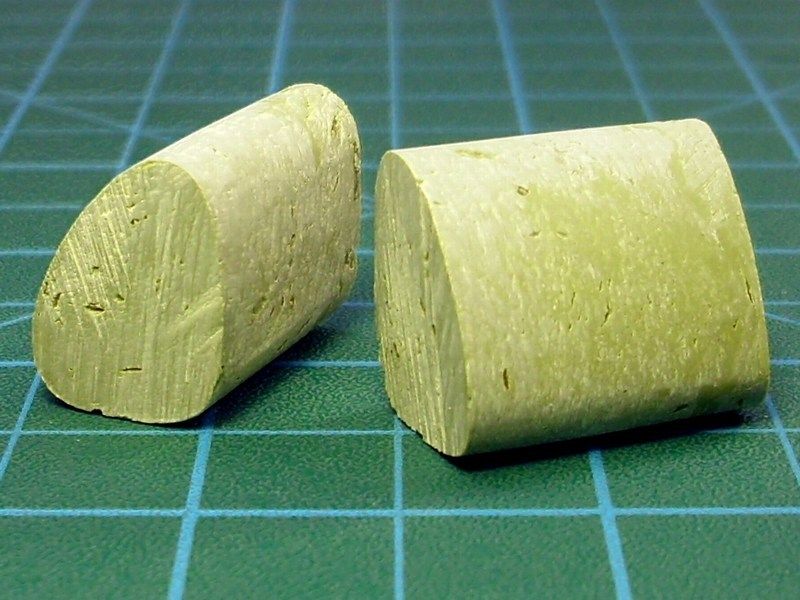
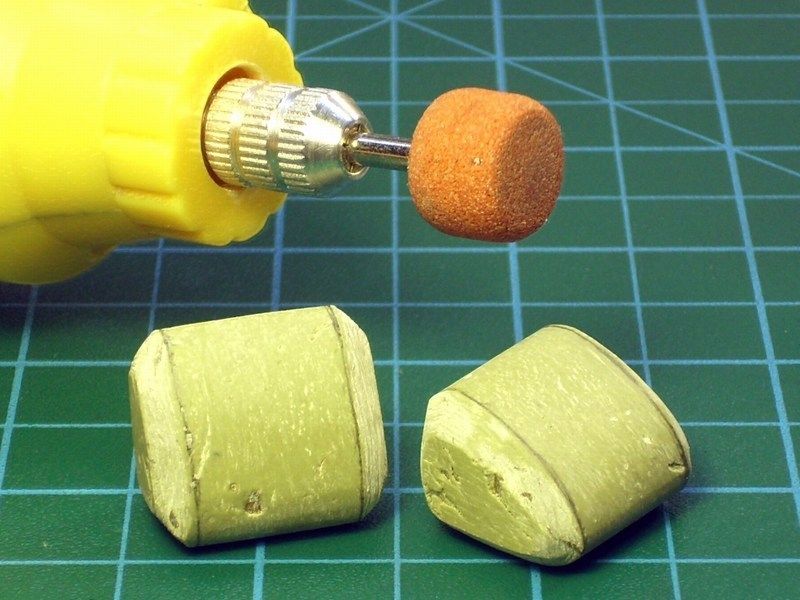
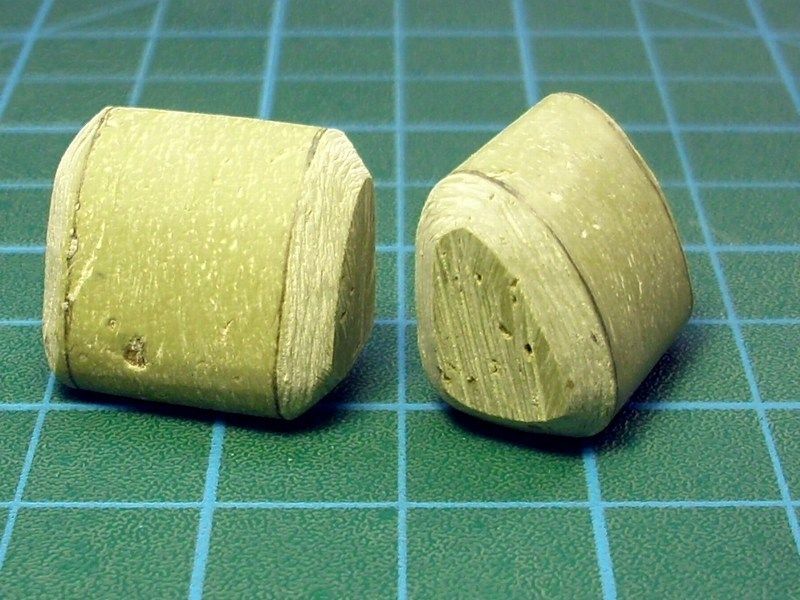
The twin epoxy blocks got trimmed and sanded gradually to shape into the desired form and look realistic Helitrainer fuel tanks into scale. Later, few thin layers of liquid scale modelling filler applied over the epoxy to smooth out small imperfections and be seen as a comprehensive outcome.
 Düzenleyen Nick_Karatzides - 31/01/2016 Saat 00:34 |
|
|
|
|
|
Nick_Karatzides
Üye
Kayıt Tarihi: 06/06/2009 Aktif Durum: Aktif Değil Gönderilenler: 250 |
Gönderim Zamanı: 14/07/2011 Saat 01:08 |
|
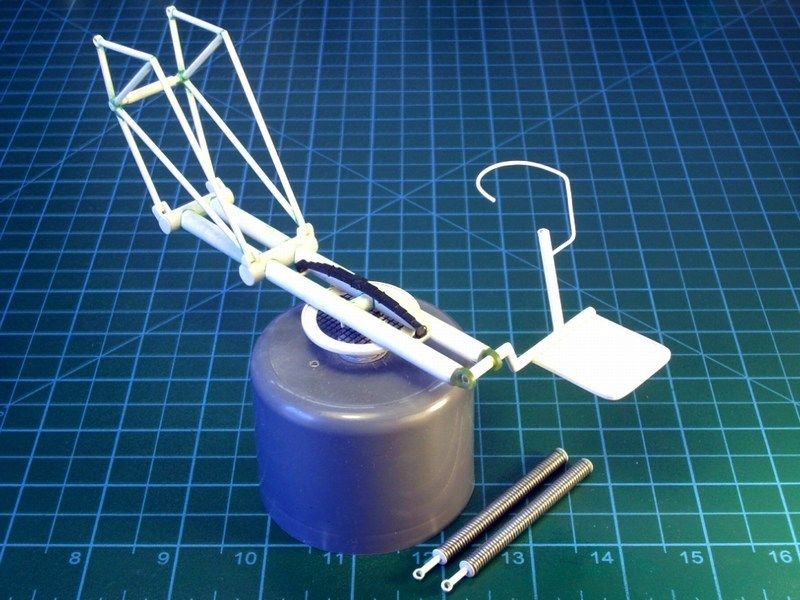
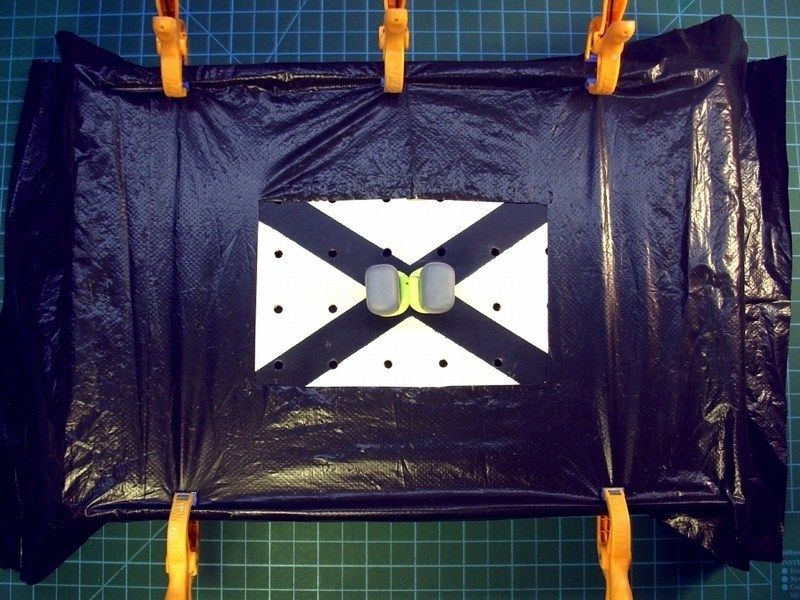
Each fuel tank, is placed on metal plate / receiver base and secured in place by hoops and tensioners, as seen into the following picture.
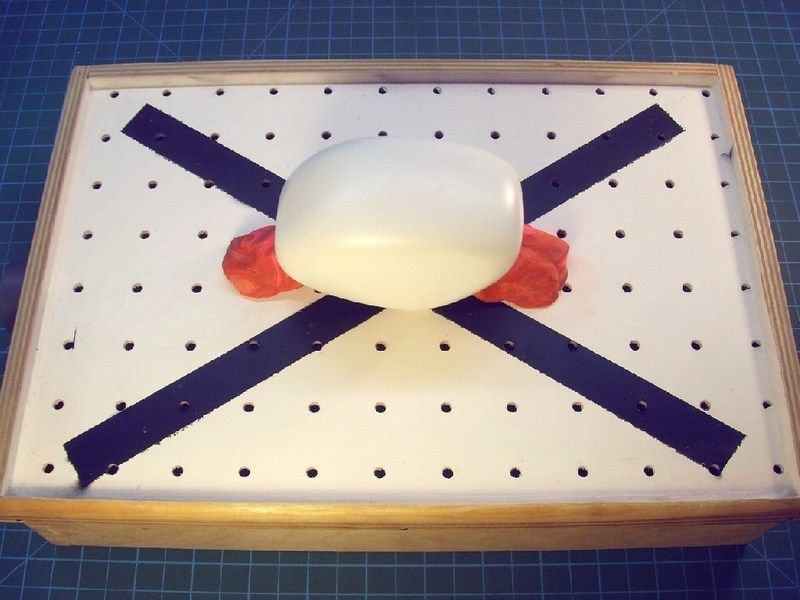
 In order to reproduce, these metal plate / receiver bases, I tried vacuum forming. Because I was planning to use smaller wooden frame to secure the styrene (the pieces to be vacuum formed are small and there is no need to spend big styrene sheet), I had to close the outer holes on the hardboard high-density fibreboard plate. To do so, I cut a plastic bag in shape and covered as required the desired area. 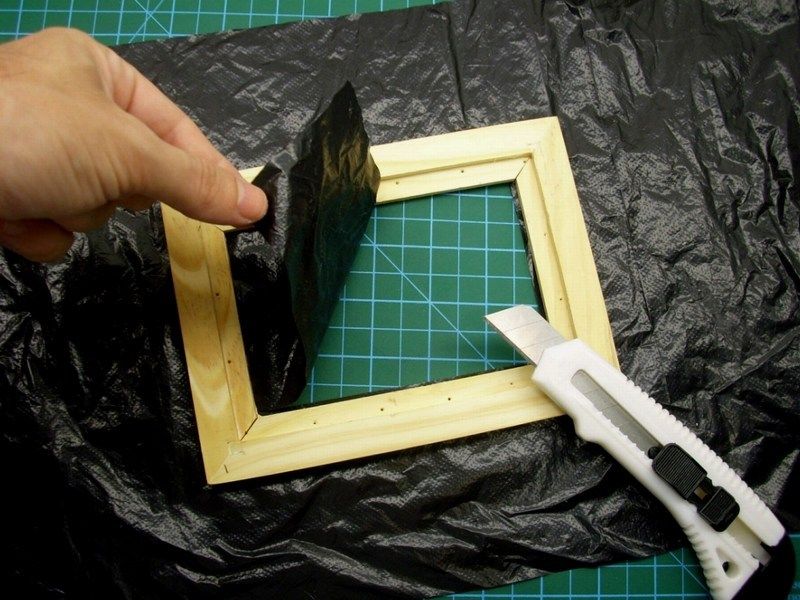
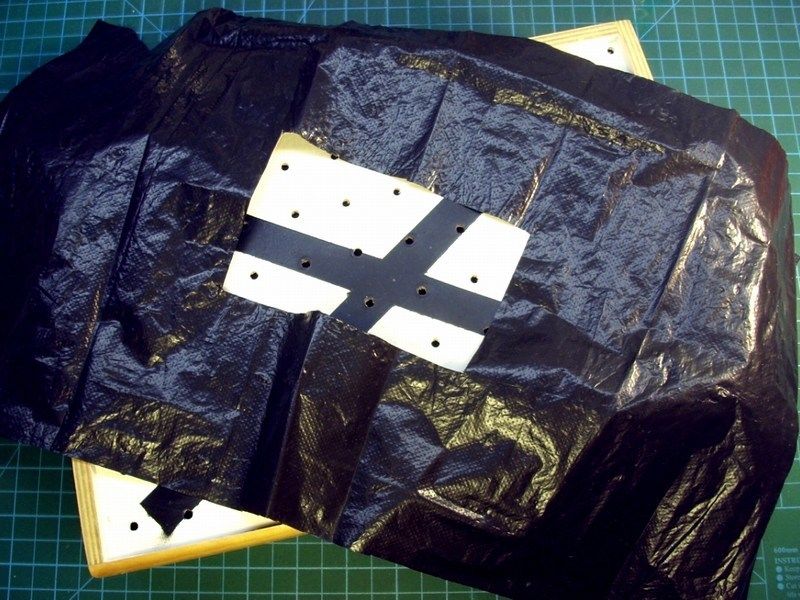 The twin fuel tanks, wedged halfway into plasticine and placed on the vacuum former plate to form the fuel tanks receivers. 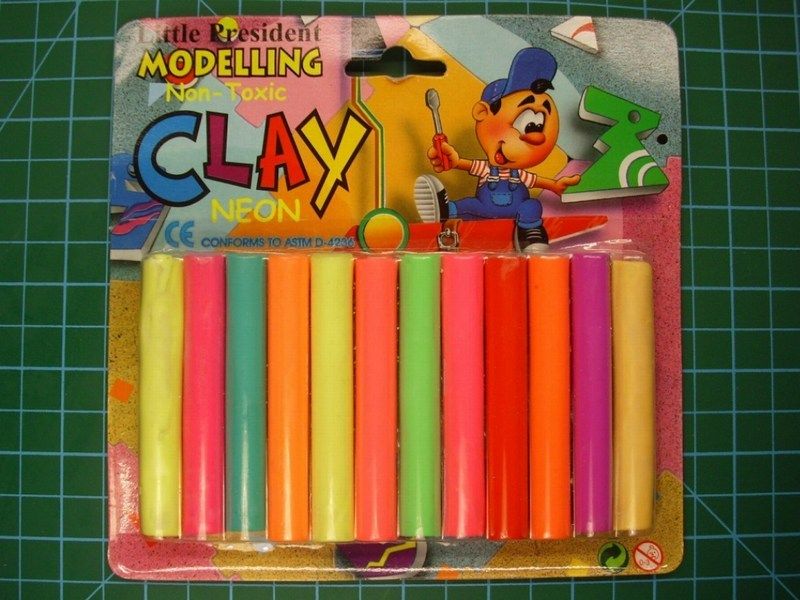

 Düzenleyen Nick_Karatzides - 31/01/2016 Saat 00:37 |
|
|
|
|
| Sayfa 2 Sonraki >> |
| |
||
Forum Atla |
Kapalı Foruma Yeni Konu Gönderme Kapalı Forumdaki Konulara Cevap Yazma Kapalı Forumda Cevapları Silme Kapalı Forumdaki Cevapları Düzenleme Kapalı Forumda Anket Açma Kapalı Forumda Anketlerde Oy Kullanma |
|
