
 Aktif Konular
  Üye Listesi
  Takvim
  Arama
Arama  |
 Aktif Konular Aktif Konular  Üye Listesi Üye Listesi  Takvim Takvim  Arama Arama |
| |
| Tayyareler | |
| |
  |
| << Önceki Sayfa 2 |
| Yazar | Mesaj |
|
Nick_Karatzides
Üye 

Kayıt Tarihi: 06/06/2009 Aktif Durum: Aktif Değil Gönderilenler: 250 |
  Gönderim Zamanı: 16/08/2013 Saat 11:20 Gönderim Zamanı: 16/08/2013 Saat 11:20 |
|
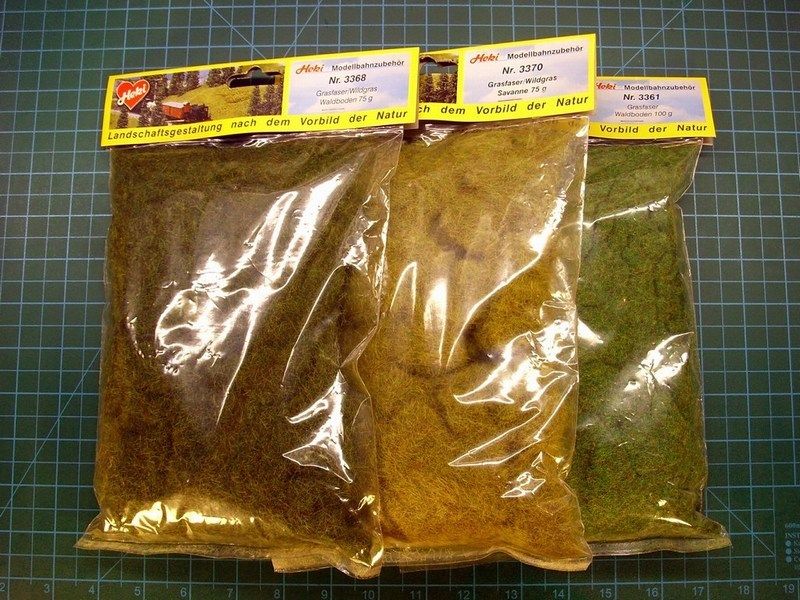
As previously stated, the scene supposed to takes place in Spring. Next job is to plant an additional static grass layer over the grass carpet. To do so, I used different colours of Heki static grass found at my local hobby shop. Heki, also specializes mostly in train dioramas. Someone might ask, why I had to apply the grass carpet first and then spread additional layer of static grass, rather than just settle for 2nd option only. The reason that I followed this tactic, is to ensure that the density of the grass would be satisfactory, such that the soil underneath, would not be visible. It could be arguable, that this tactic might be double work for nothing. Well, I only hope that the final result will worth the experimentation & risk taken.
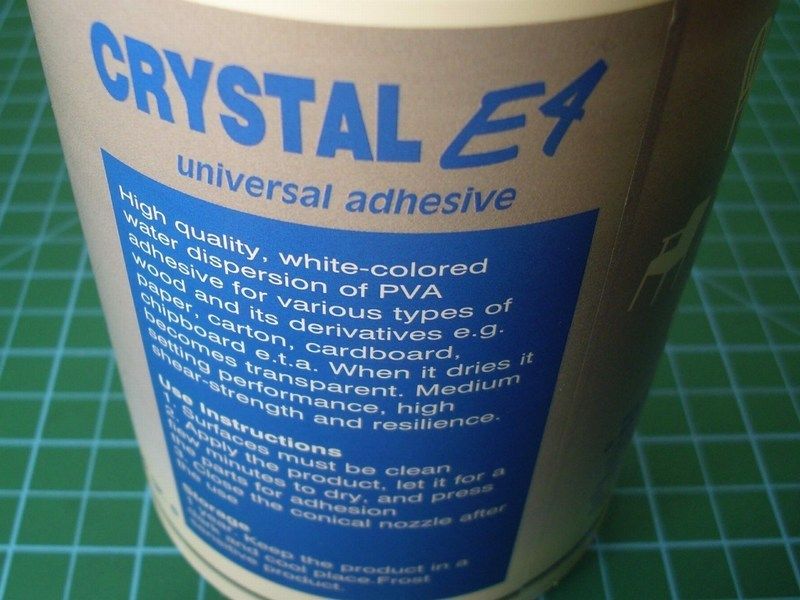
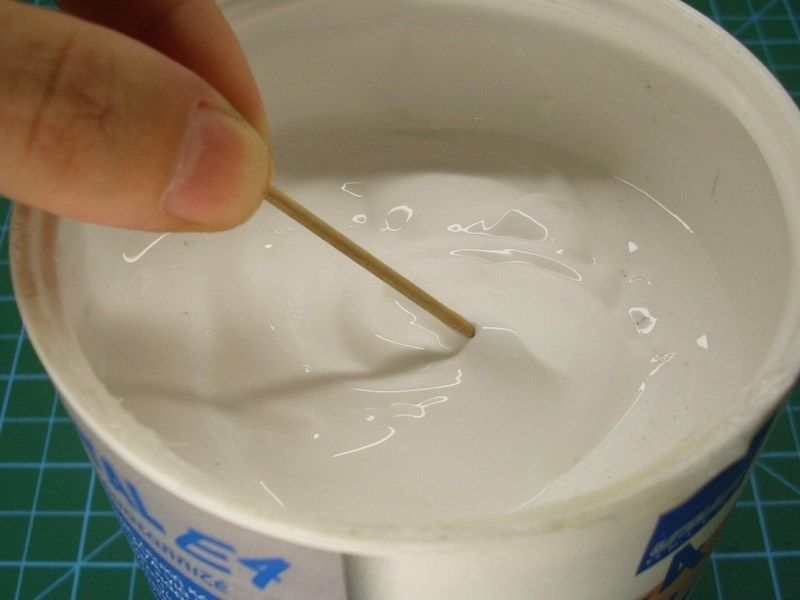
 So, I pick a small quantity of water based white glue, placed it into a small metal container, add just few drops of water with a syringe to make the right mixture and finally I applied on the desired areas to be filled with additional static grass & plants, using a wet brush. Because the mixture is enriched with water based glue, it is easy to correct possible mistakes. 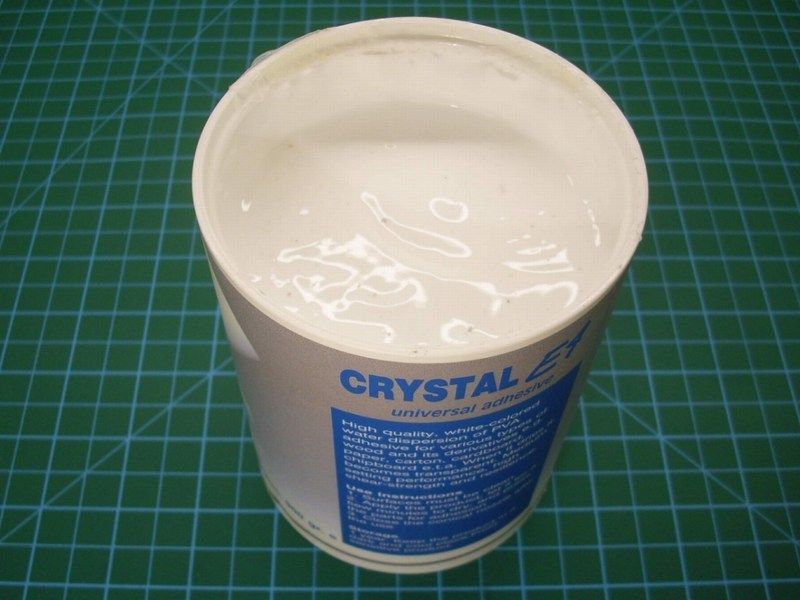
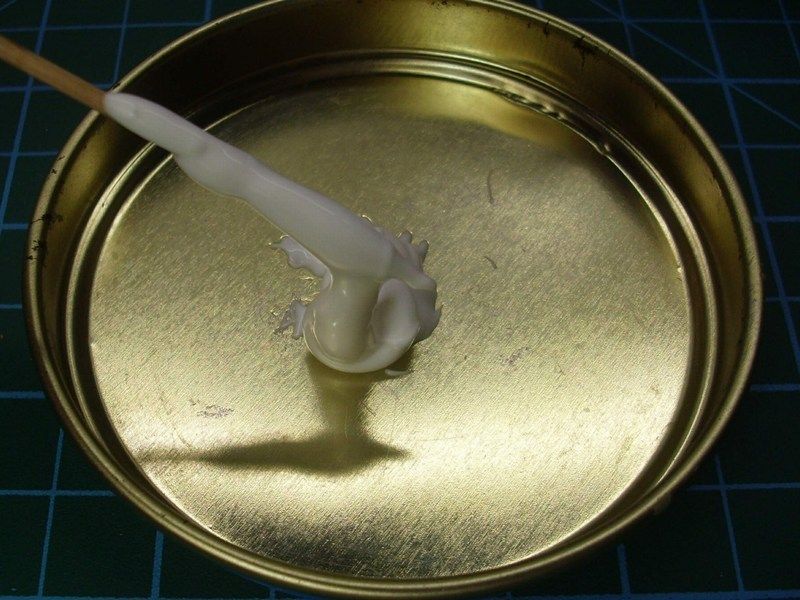
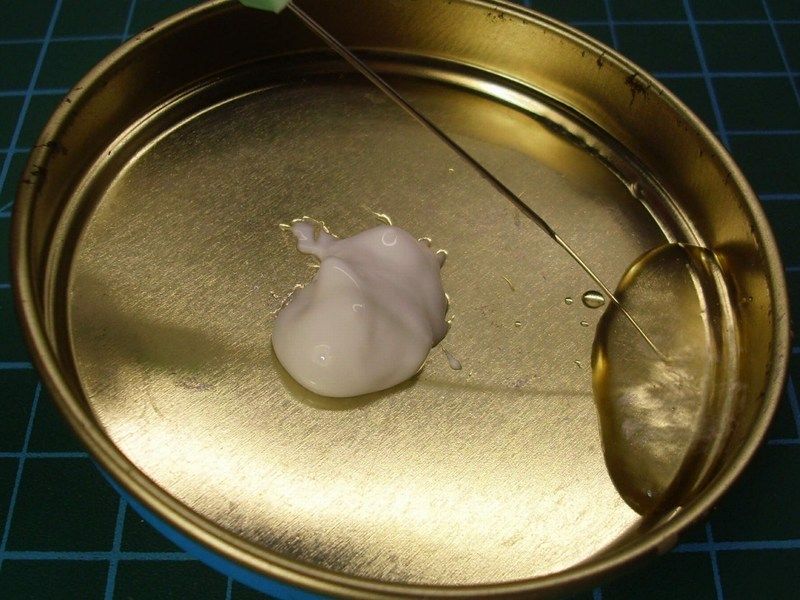
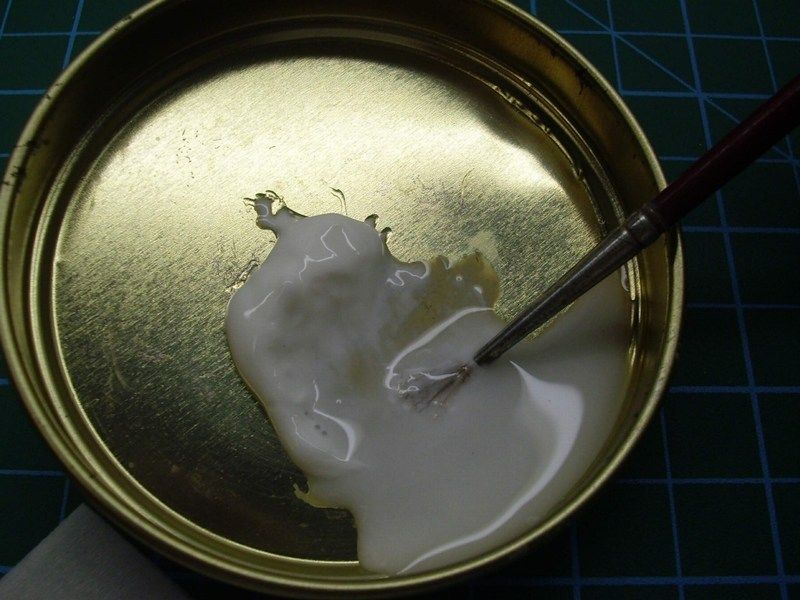
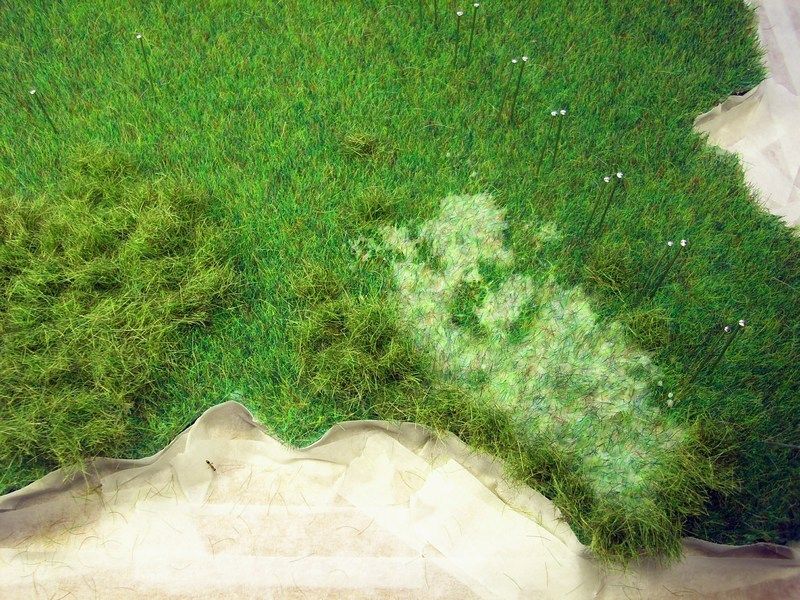
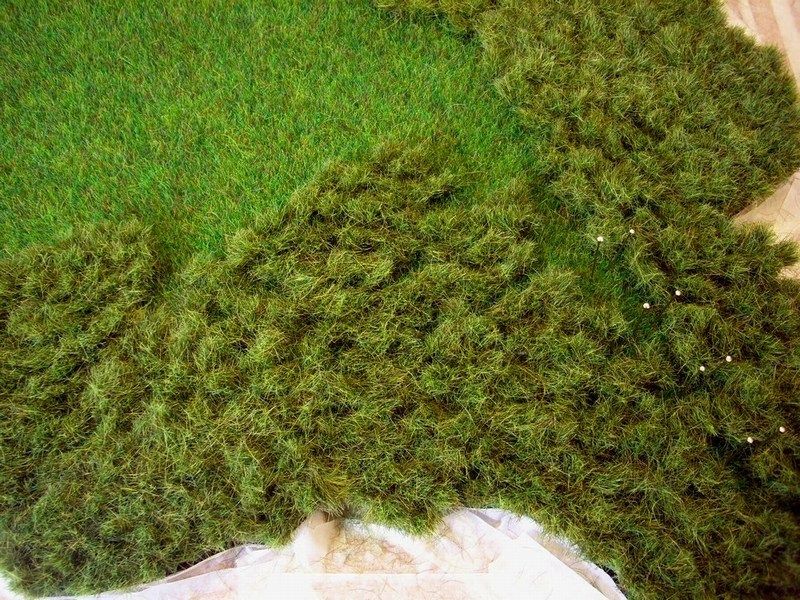
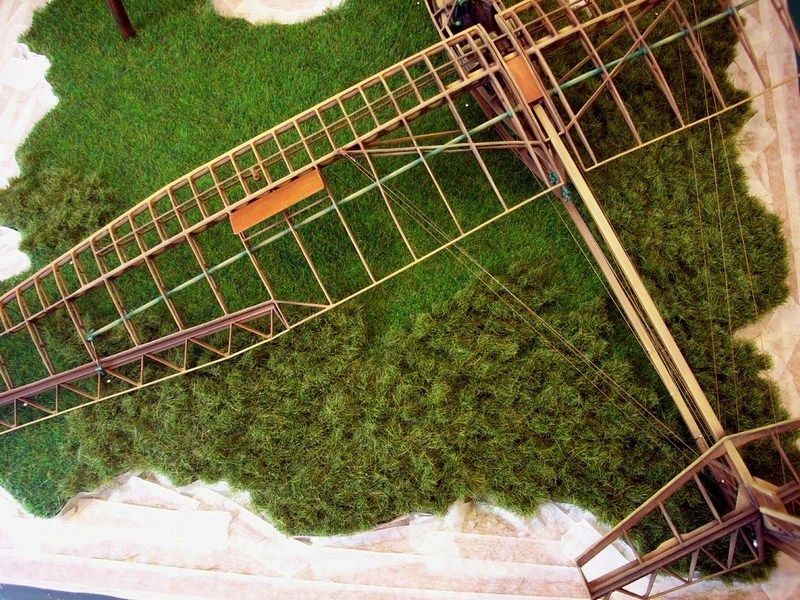 No, this is not the final form of grass - be patient for next WIP updates. For the moment, I am watering the base twice a day, hoping the grass to grow soon. Düzenleyen Nick_Karatzides - 29/01/2016 Saat 04:57 |
|
 |
|
|
Nick_Karatzides
Üye 

Kayıt Tarihi: 06/06/2009 Aktif Durum: Aktif Değil Gönderilenler: 250 |
  Gönderim Zamanı: 17/08/2013 Saat 09:28 Gönderim Zamanı: 17/08/2013 Saat 09:28 |
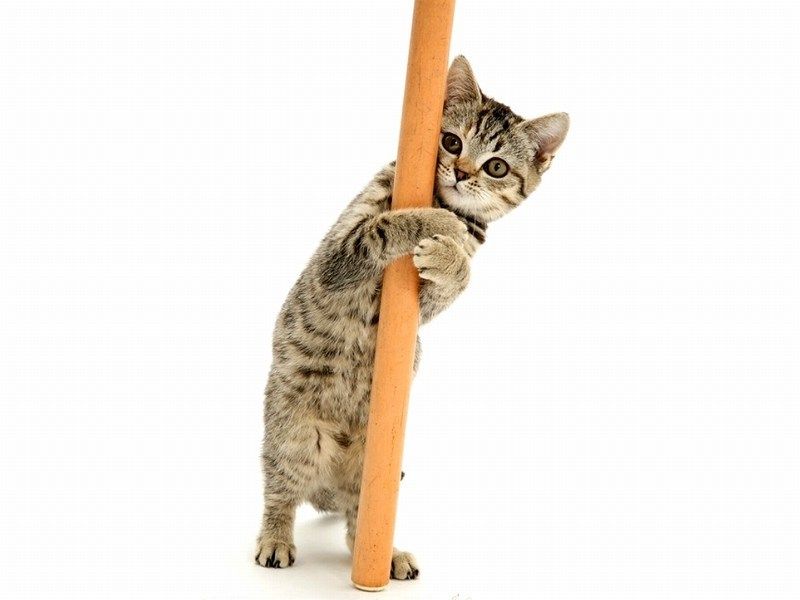 The windsock presented earlier, needed a pole to be placed on. I thought it would be a good idea to build the windsock pole to look like it's made of weathered wood, instead of some metal structure. To achieve the wanted effect, I used a 7.5 mm diameter wooden rod, which I managed to scribe with a wire brush, to obtain wood traces and look more realistic. Later, the radomly scribed wooden rod, repeatedly washed with diluted mixture of 5% "Raw Umber" oil colour and 95% White Spirit thinner, until get the desired tonality. Once the result was OK for me, I left it alone to dry for two days and then I tried some drybrushing with "Yellow Ochre" oil colour, to slightly tone up over selected areas that IMHO should look more enlightened. Finally, I sprayed over with hairspray - the cheapest I found at my local supermarket - to prepare the surface for paintscratching. 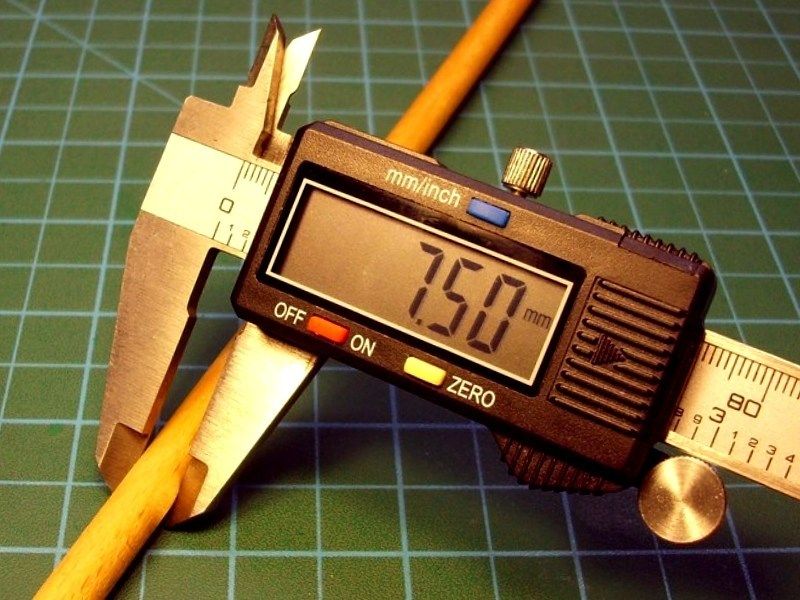
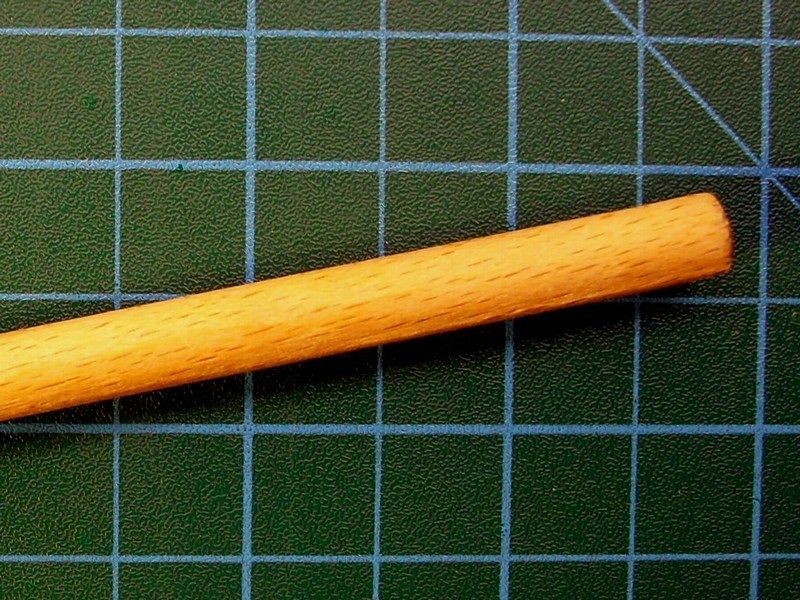
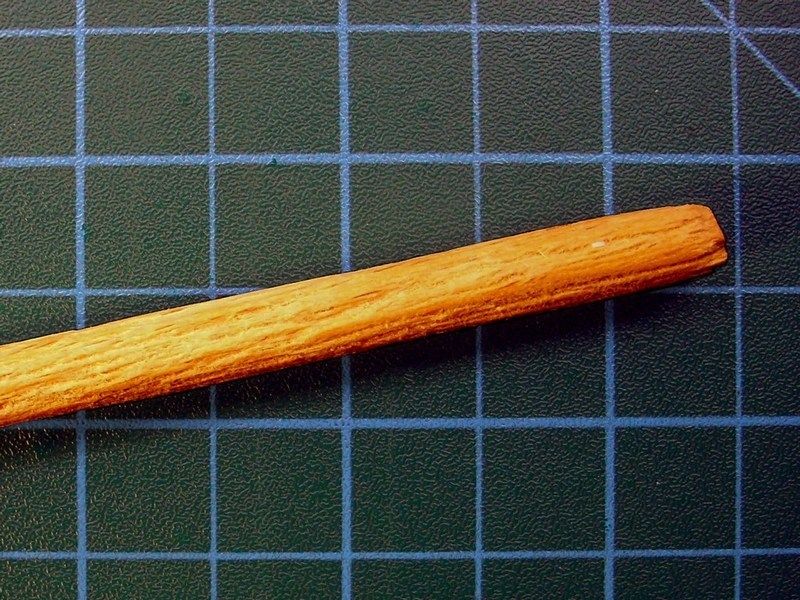
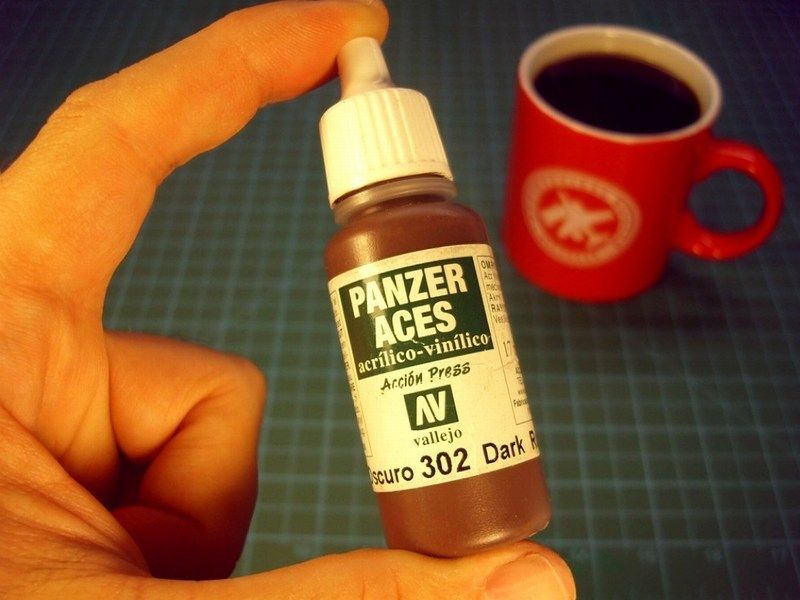
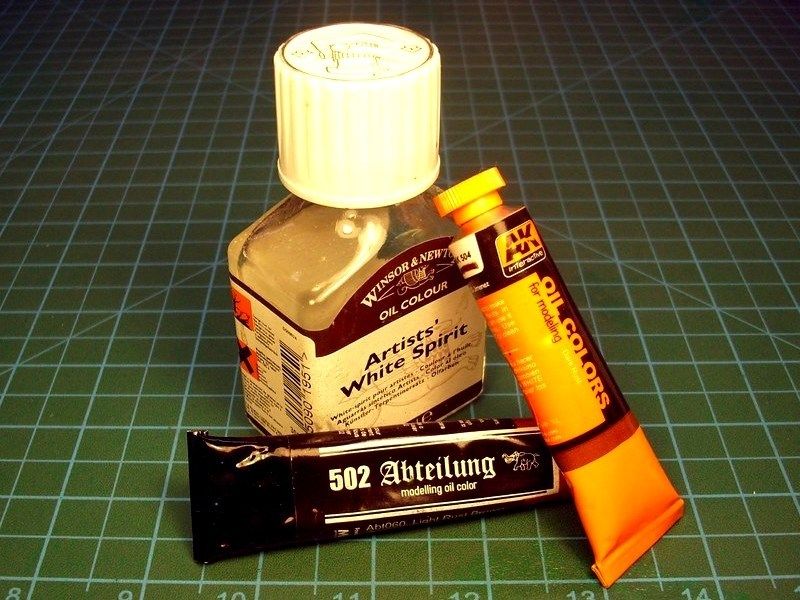
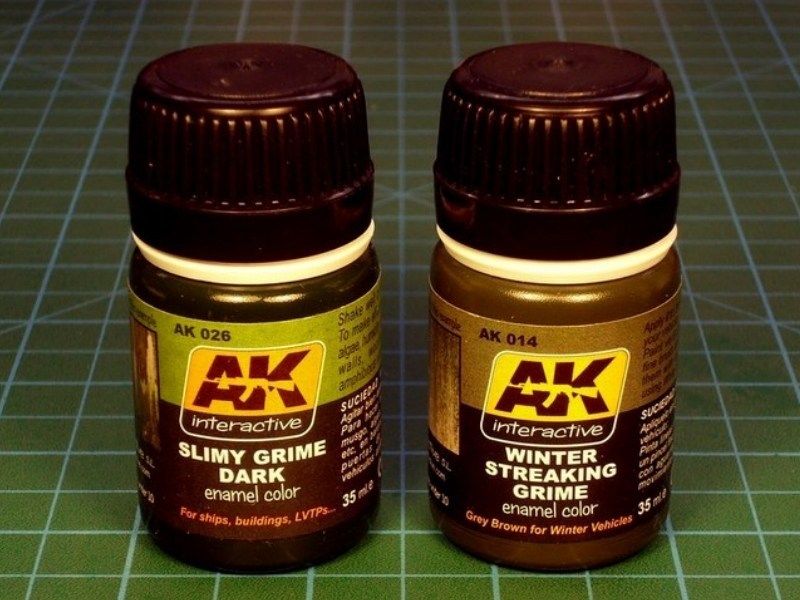
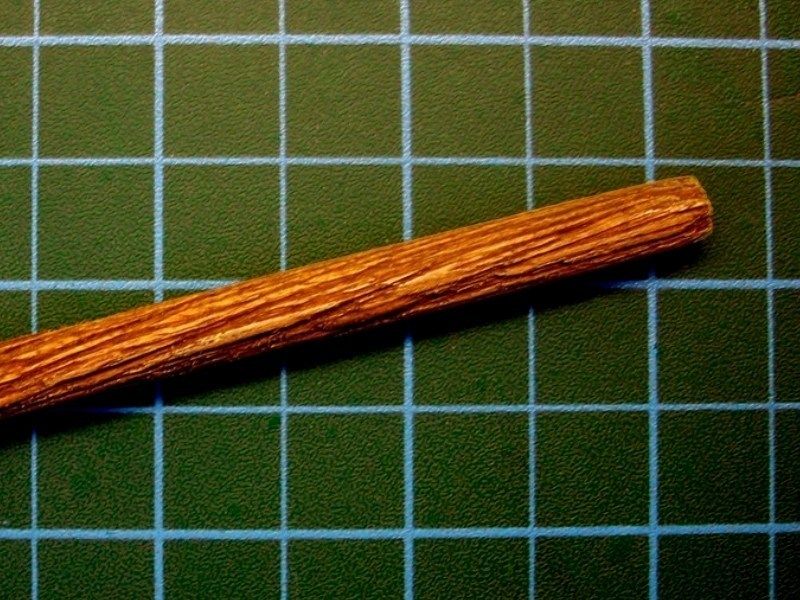 To paint the pole, I used the FS37925 "Matt White" and the FS31302 "Matt Red", available by Life Color as LC01 and LC06 acrylics, applied with a soft brush. I would say the pole is drybrushed more, than painted actually. 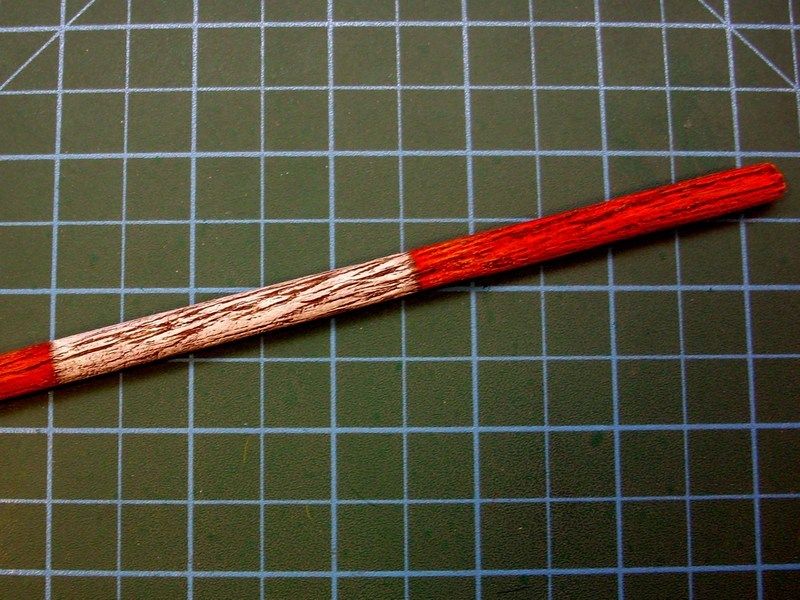 I left the red & white acrylic paint on windsock pole to dry for few hours and then I tried some paint scratching with an old toothbrush, previously moistened with water. The hairspray layer onto which the red & while acrylics had been dyed, began to dissolve and to drift along the overlying paintjob, giving the impression of weathering on wood pole. Additional details such as bolts were also placed and painted with the "Dark Rust", available by Vallejo as 302 acrylic. Rust stains and slimy grime streaking, later apllied on selected areas, using the "Light Rust Brown" & "Dark Rust" oil paints by 502 Abteilung & AK Interactive series and the "Slimy Grime Dark" & "Winter Streaking Grime", available by AK Interactive as AK026 and AK014 filters. 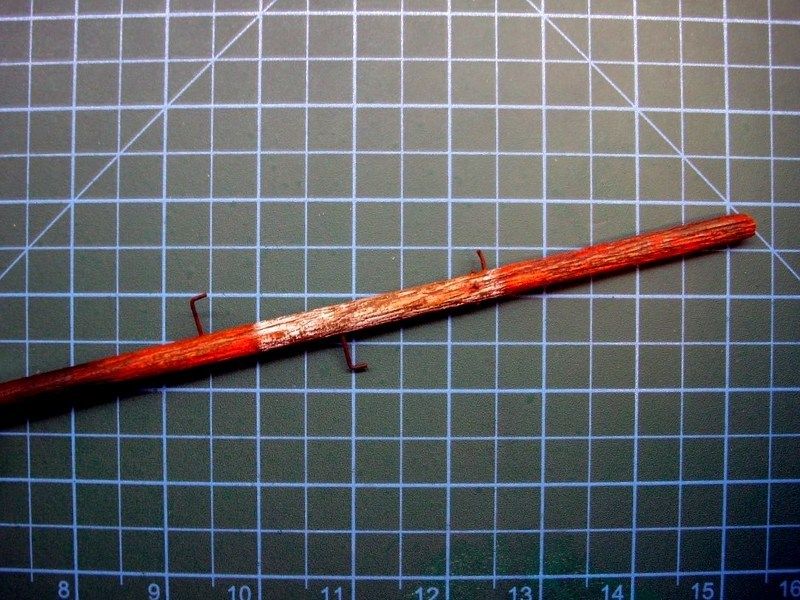
 Düzenleyen Nick_Karatzides - 29/01/2016 Saat 05:16 |
|
 |
|
|
Nick_Karatzides
Üye 

Kayıt Tarihi: 06/06/2009 Aktif Durum: Aktif Değil Gönderilenler: 250 |
  Gönderim Zamanı: 23/08/2013 Saat 06:25 Gönderim Zamanı: 23/08/2013 Saat 06:25 |
|
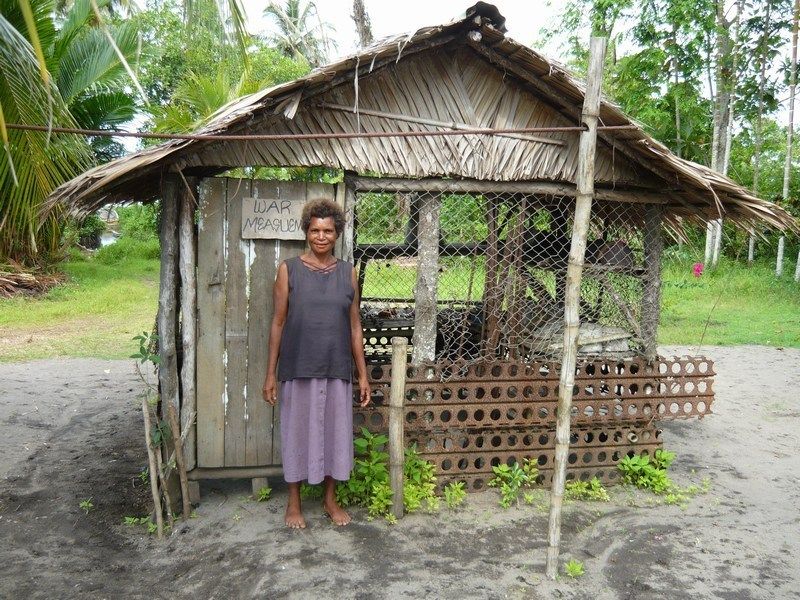
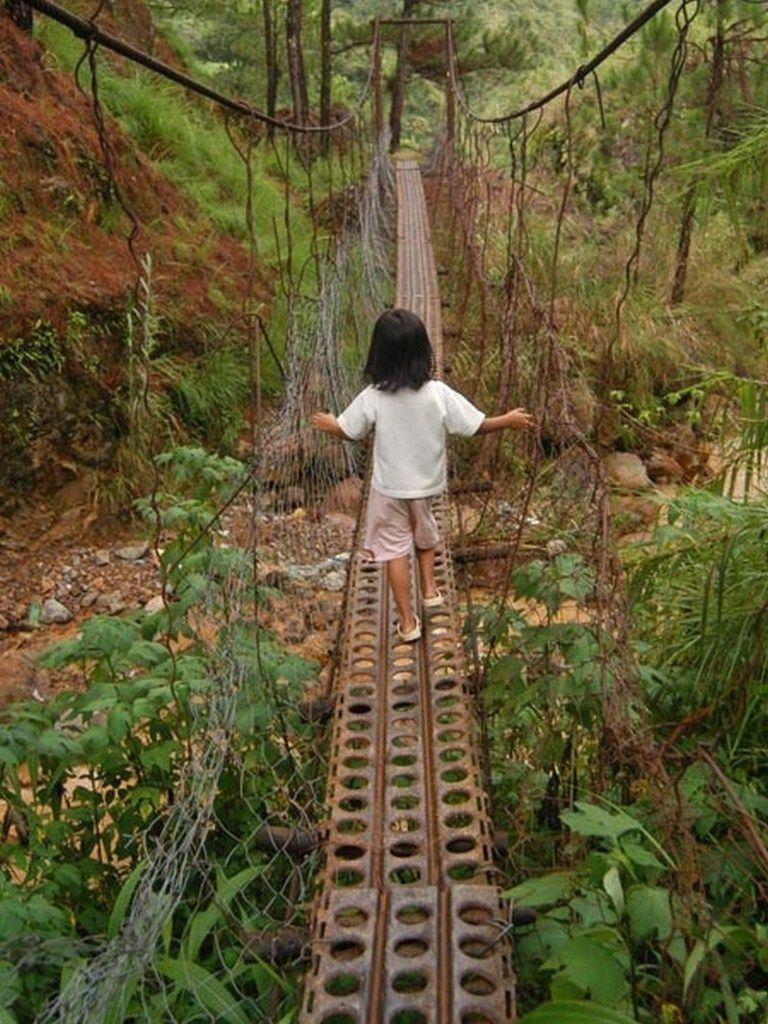
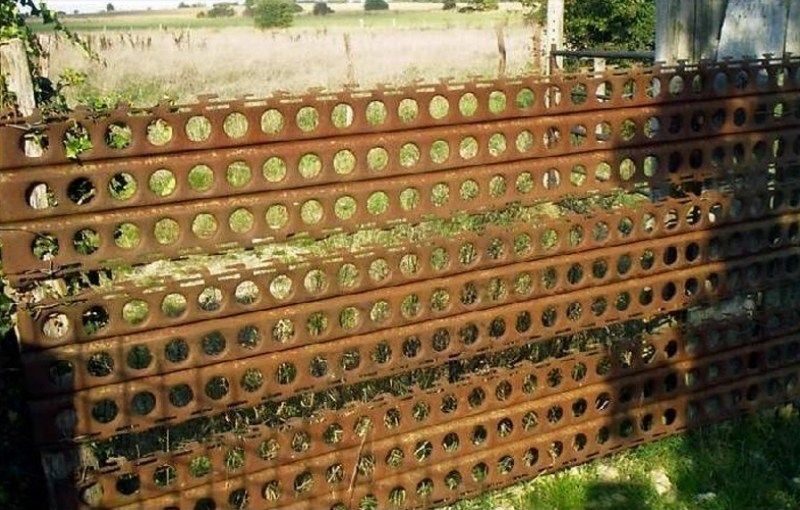
As previously wrote, my objective is to establish a scene of terse abandonment, without extreme features that could distract viewers attention, keeping the glider as the main protagonist of the story. The addition of a deflated windsock and a couple of Marsden matting / PSP - Pierced Steel Planking plates, seemed good idea to me. The PSP plates, were used during WWII to lay down airstrips. These mats were large perforated steel sheets each measuring 300x30 cm and weighing around 30 kg. They quickly interlink and with a bulldozer for levelling and enough manpower for the laying, an airstrip could be created overnight. The post WWII years, farmers and home owners used them to build garden fences, pig sties, chicken coops, benches, improvised bridges & ramps or as reinforcing panels in concrete buildings. 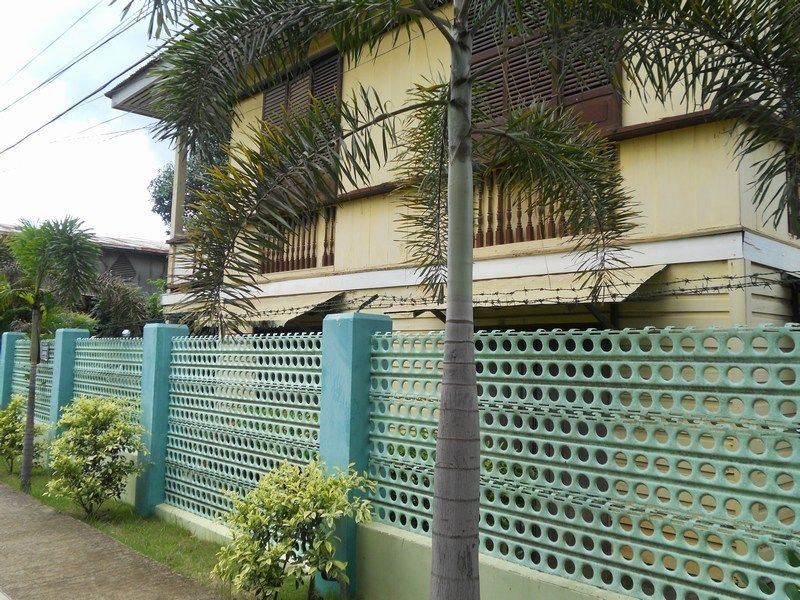
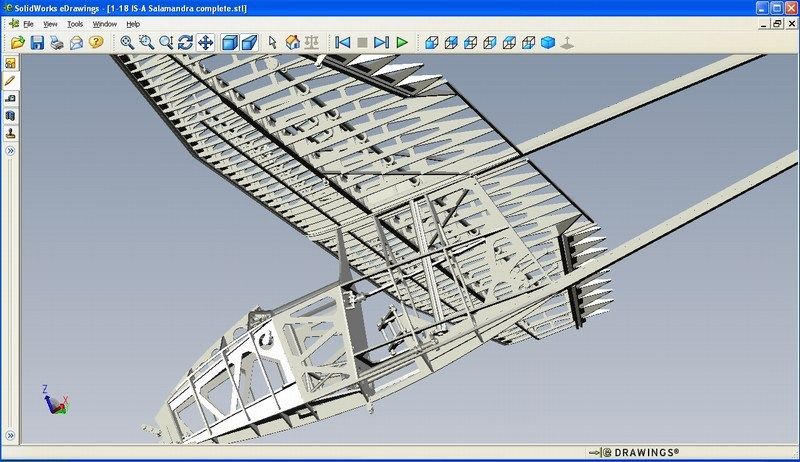
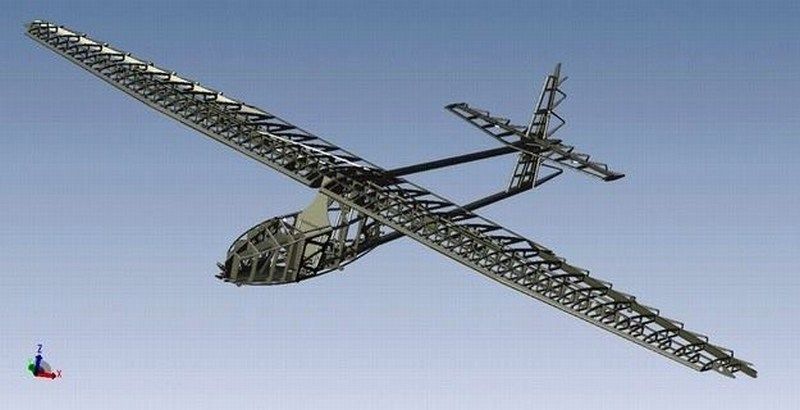
 As earlier described in detail. the windsock was built by Milliput putty. On the other hand, the PSP plates construction, would follow the 3D printing way. It took only 15 minutes of CAD work on my laptop and voilà, we have a winner! A new 1/18 scale PSP plate virtual model, is ready to be forwarded to the 3D printer and become an actual object, within few minutes only. As previously described, the file can be scaled up or down to reach the desired dimensions, with few mouse clicks only and later be 3D printed under any scale. Yes, I could scratchbuild some PSP plates with my own hands, using metal foil or by vaccumforming styrene sheet, but I would surely spend much more time. The easier, the better! Actually, I'm not really sure if the handmade result would be so accurate in scale or if I could possibly build it within few minutes only. 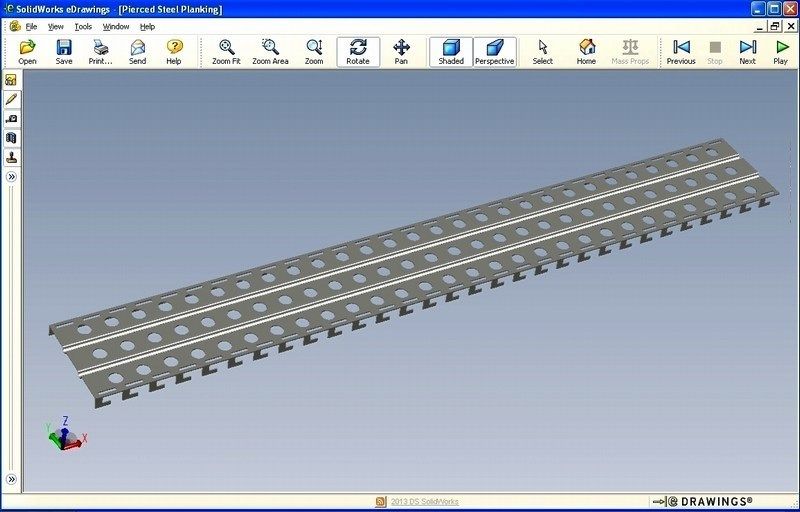
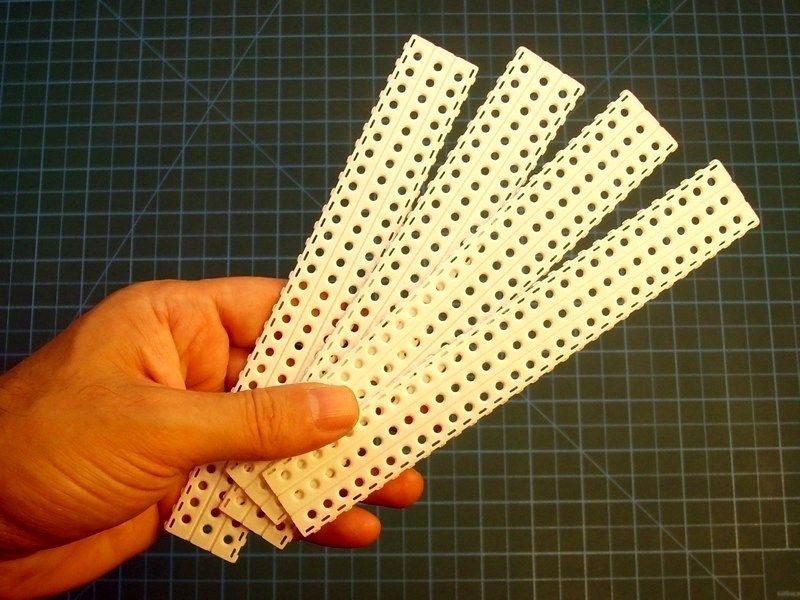
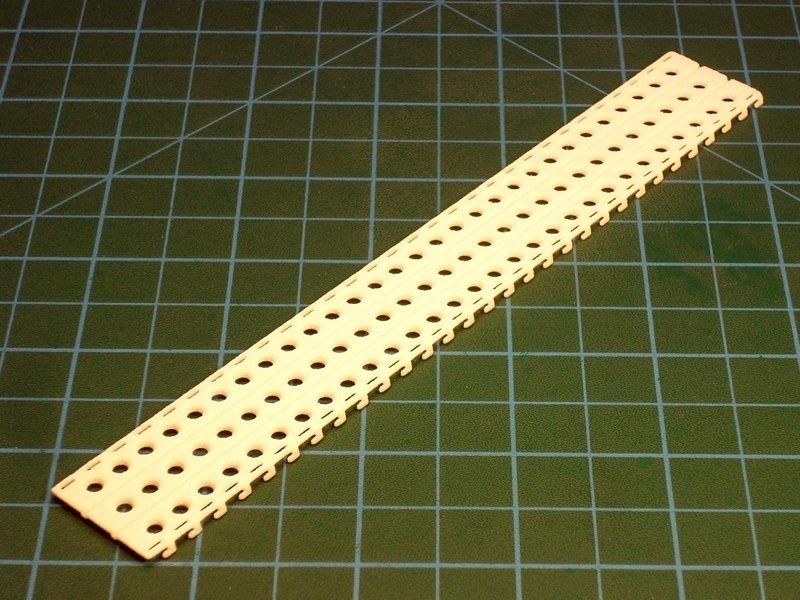
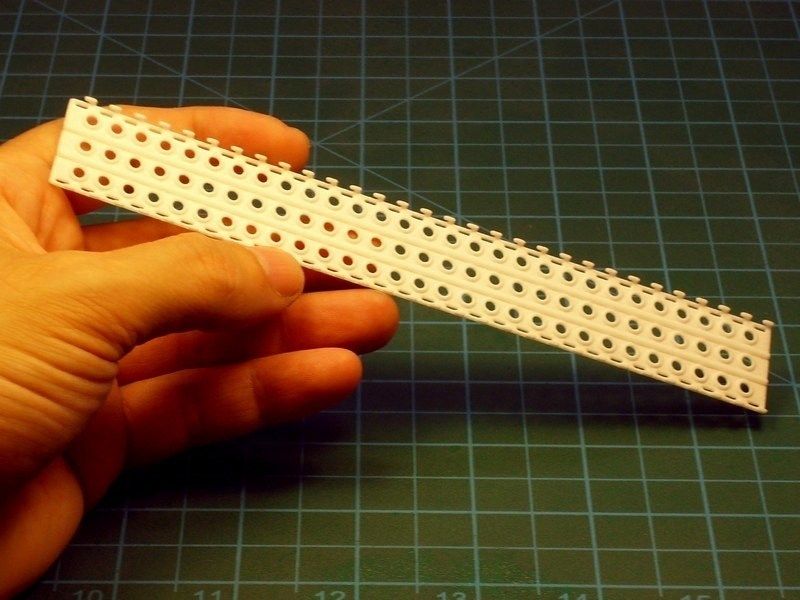 The material used for the 3D printing, is a white plastic (not rubber) that can be handled just like any other styrene part, but its surprisingly durable and incredibly flexible. Additionally, the side hooks on 3D printed PSP plates, can be used to interlink the parts - just like the real one. 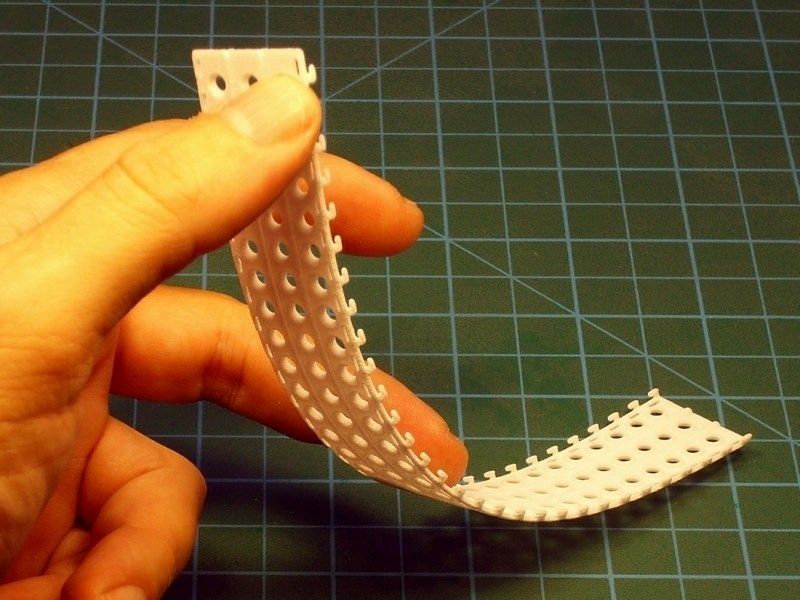
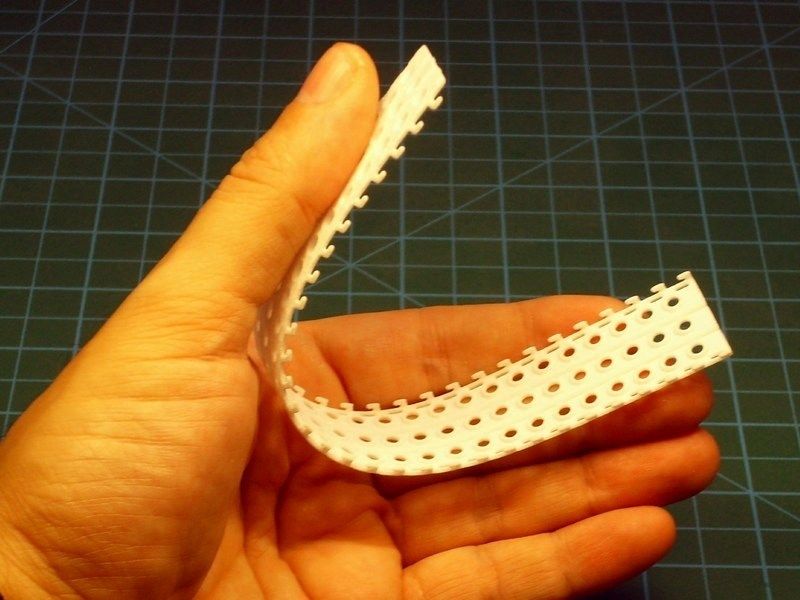
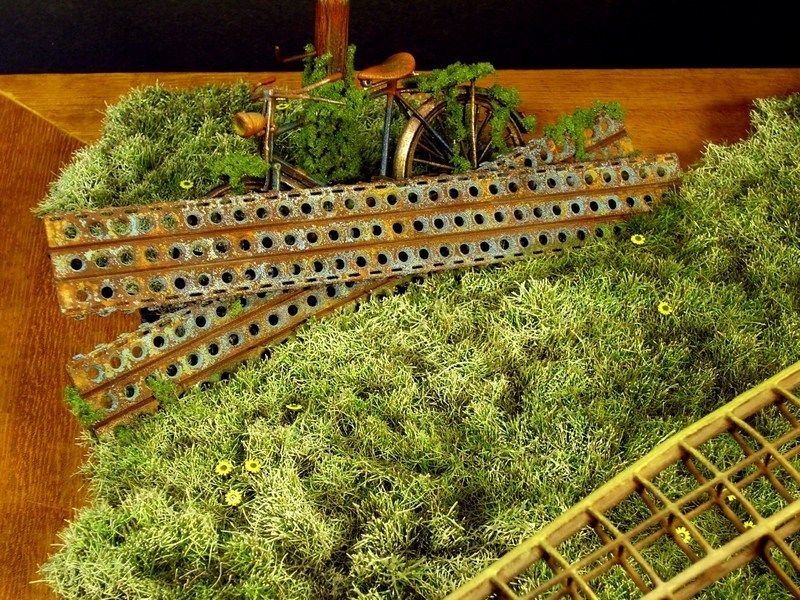
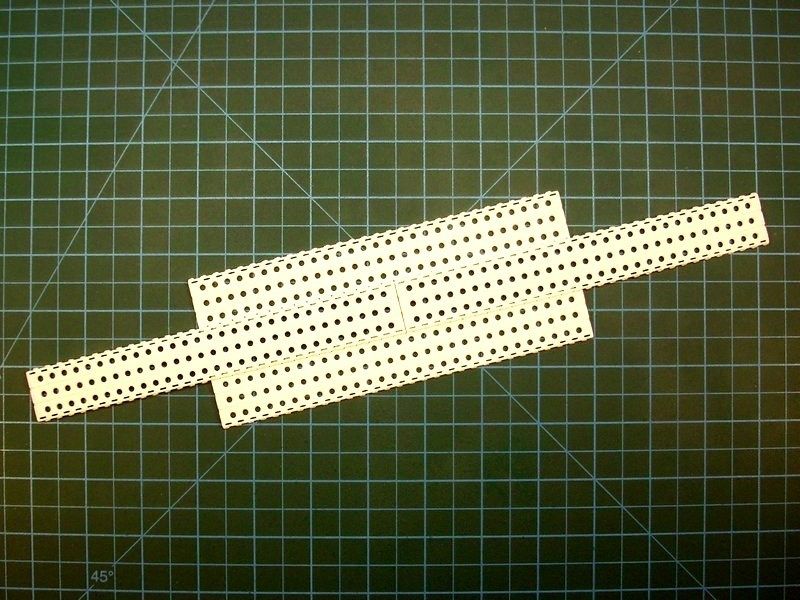 The 3D printed PSP plates washed with liquid soap and warm water and sprayed over with Humbrol acrylic primer to spot any mistakes and prepare for painting. At first, I was planning to leave the PSP plates on ground and let the grass grow through the perforated sheet. Considering the dense green grass covering, I thought that it would be better idea to place them as a part of a rusty fence. The fact is that actual PSP plates do rust when left abandoned for long period of time and available photographs proove it. Since I had in mind to build these plates to look abandoned, I had no reason to avoid an overall rusty colour tones & weathered effects painting. 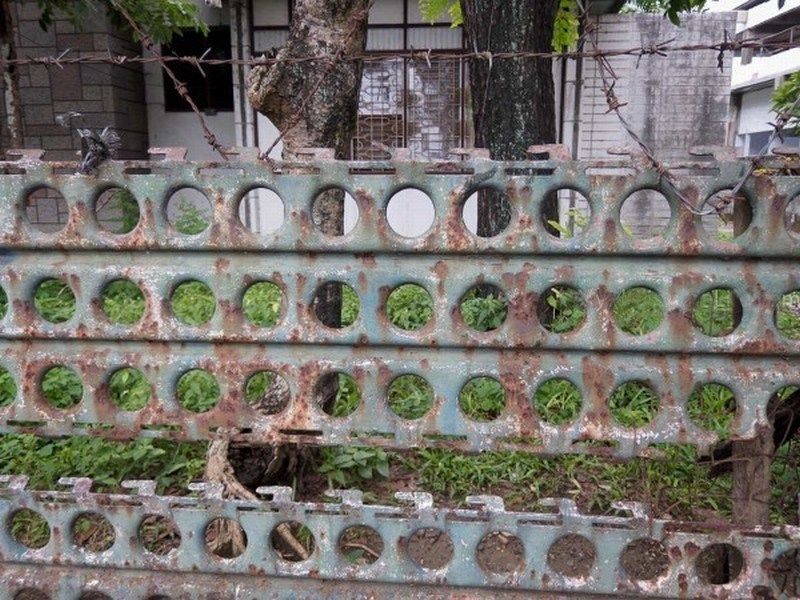
 Düzenleyen Nick_Karatzides - 29/01/2016 Saat 05:51 |
|
 |
|
|
Nick_Karatzides
Üye 

Kayıt Tarihi: 06/06/2009 Aktif Durum: Aktif Değil Gönderilenler: 250 |
  Gönderim Zamanı: 25/08/2013 Saat 16:59 Gönderim Zamanı: 25/08/2013 Saat 16:59 |
|
Replicating rusty metal, sounds like the Quest for the Holy Grail for an average scale modeler like me. Of course, the books, the videos and the tutorial seminars provided by famous scale model masters, helps a lot to understand some basic principles. Furthermore, the available tools & materials today, makes our life much easier. However, whenever I attempt to recreate rusty metal, I feel like a rookie and I'm never entirely satisfied with the result. In my attempt to recreate rusty PSP plates, I did use the Life Color's "Dust & Rust diorama" 6-pack set, of 22 ml bottles.
[*]Life Color UA702 "Rust Base Color" acrylic, [*]Life Color UA703 "Rust Light Shadow 1" acrylic, [*]Life Color UA704 "Rust Light Shadow 2" acrylic, [*]Life Color UA705 "Dust Type 1" acrylic and [*]Life Color UA706 "Dust Type 2" acrylic. 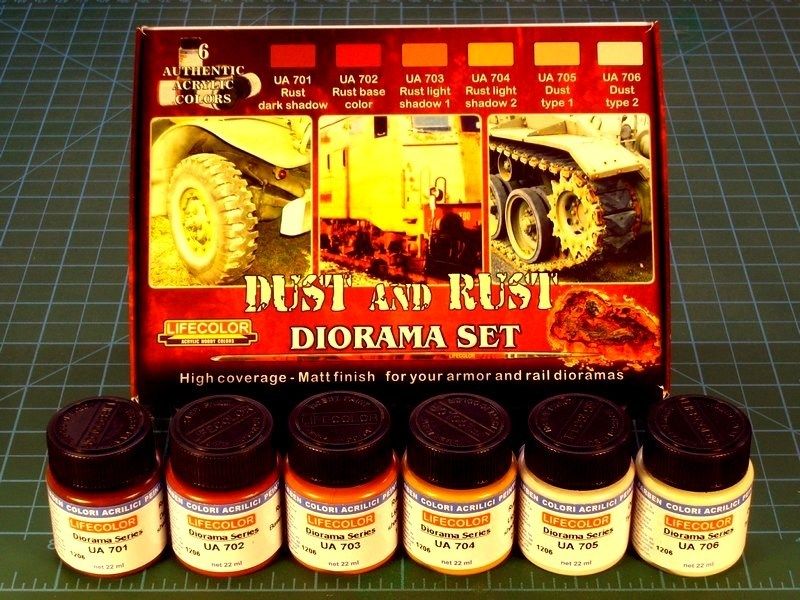 The first thing I had to do, was apply a base colour on the PSP plates. For a base colour of steel plate I did use the FS3004 "Matt Burnt Umber" available by Life Color as LC37 acrylic. 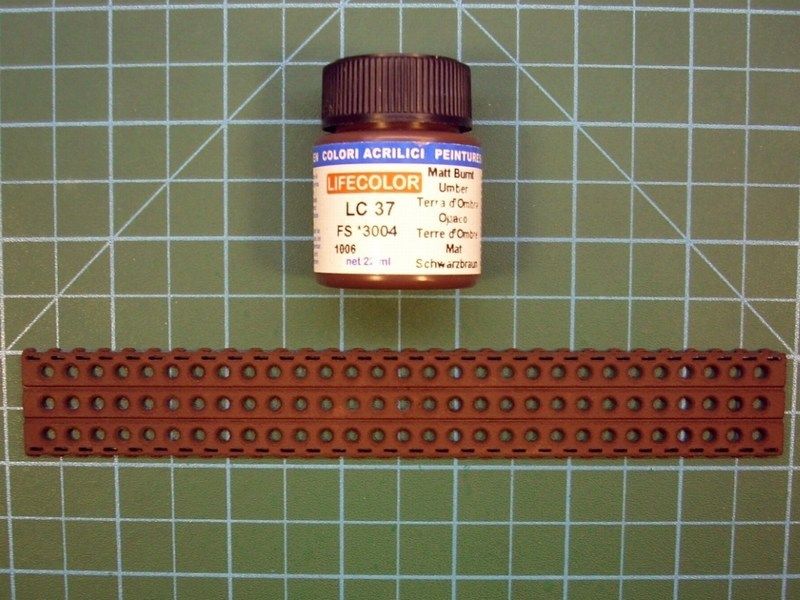 Later, using a fine brush and the Life Color UA702 "Rust Base Color" acrylic, from the previously mentioned "Dust & Rust diorama" 6-pack set, I covered the area with irregular spots. What I noticed while using the Life Color's rust shades, is that although the paints appear to be bright in color, they dry darker and are a perfect match to the real thing. 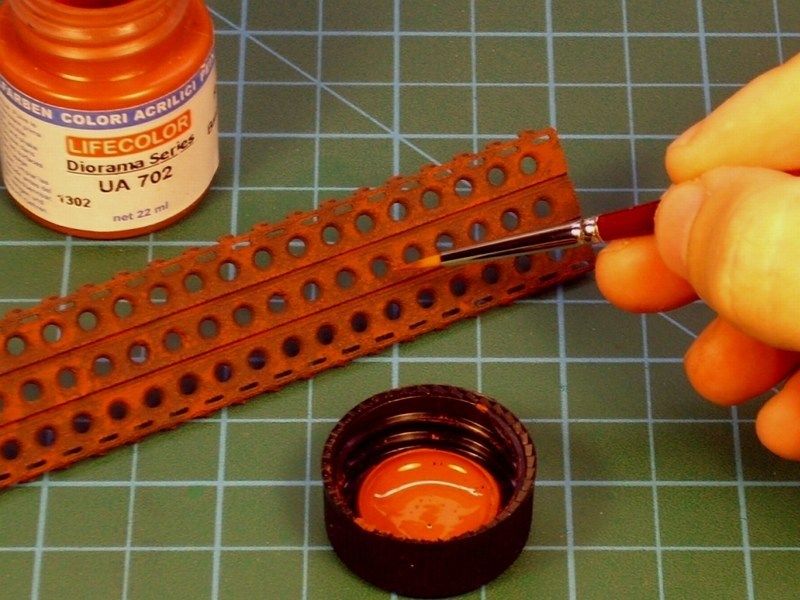
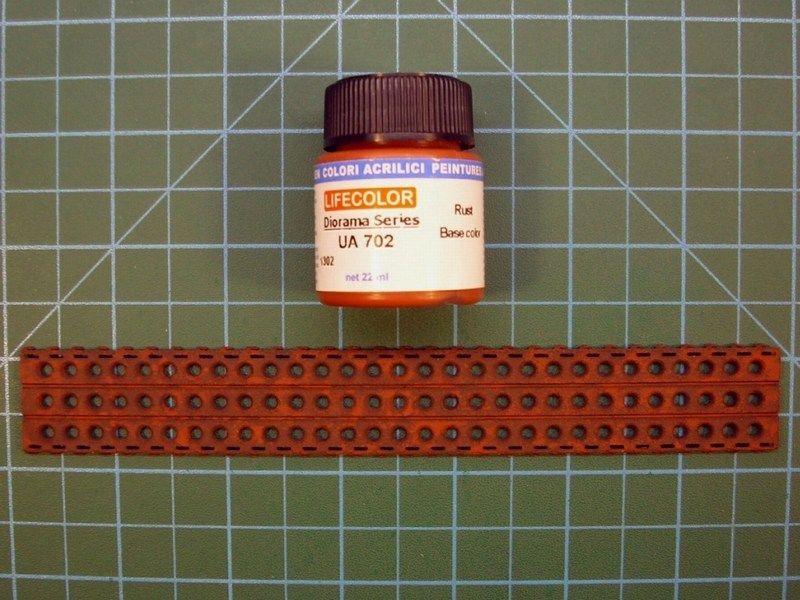 The next two steps involve the use of the sponge technique to add the small chips, which will give visual interest to the base colour. To get best results, I did use a fine textured sponge like those used for packing of electrical items. 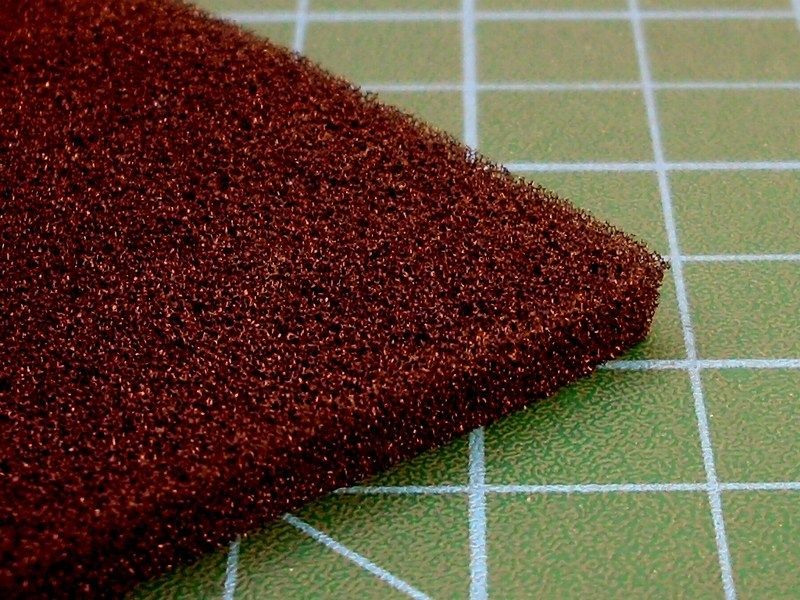
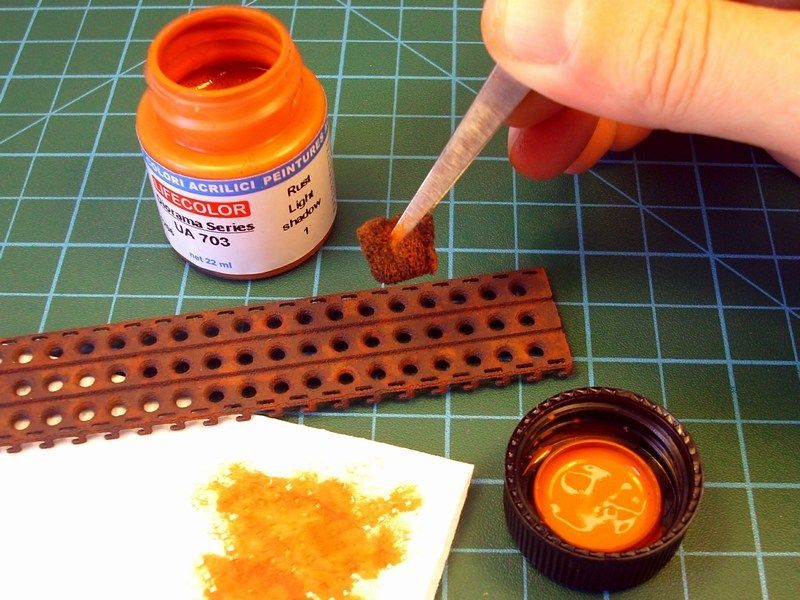
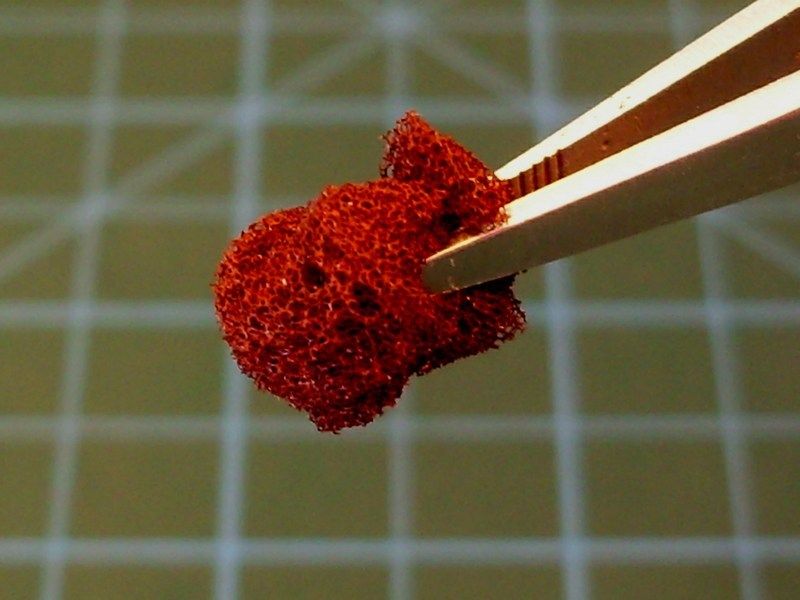 For the first colour, I chose the Life Color UA701 "Rust Dark Shadow" acrylic. For the second colour, I chose a rust tone that is brighter and lighter than the previous base colours. First dipped the sponge in the Life Color UA703 "Rust Light Shadow 1" acrylic, then remove the excess on a paper towel - otherwise it would end up with large blobs of paint on surface instead of a chipping effect. 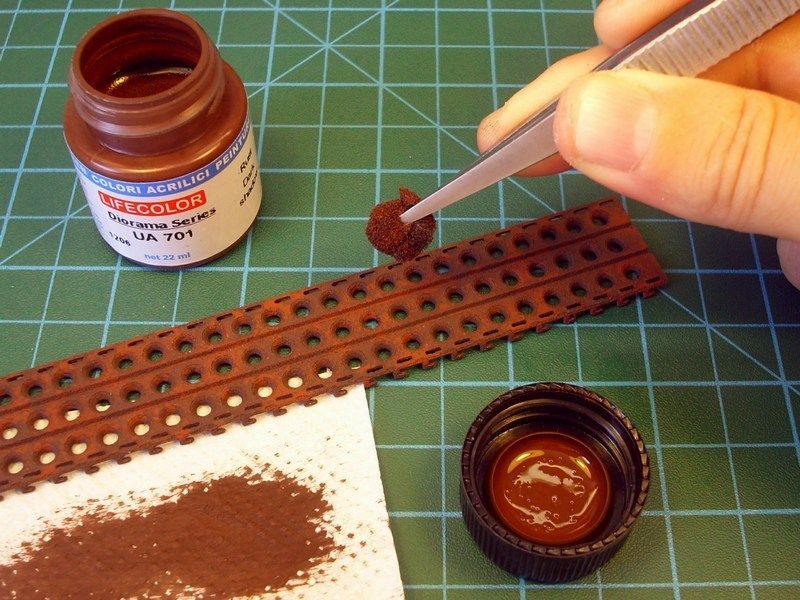
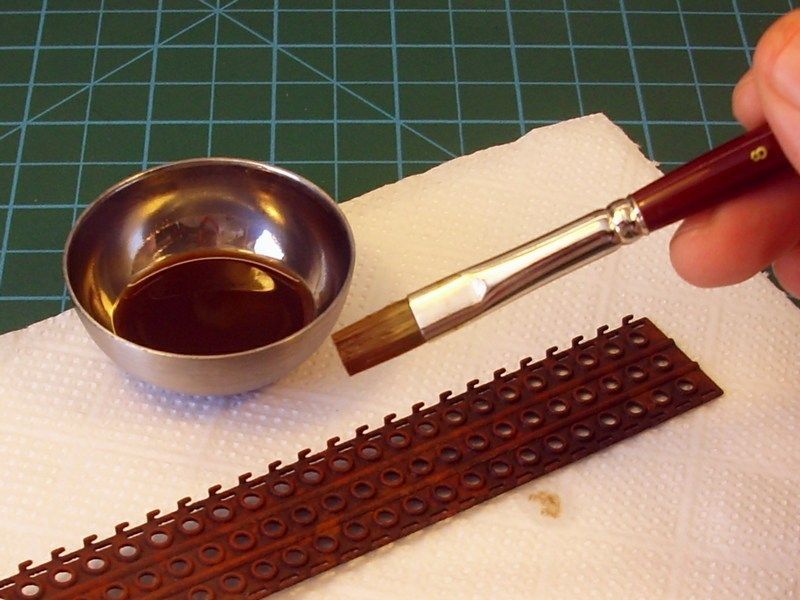
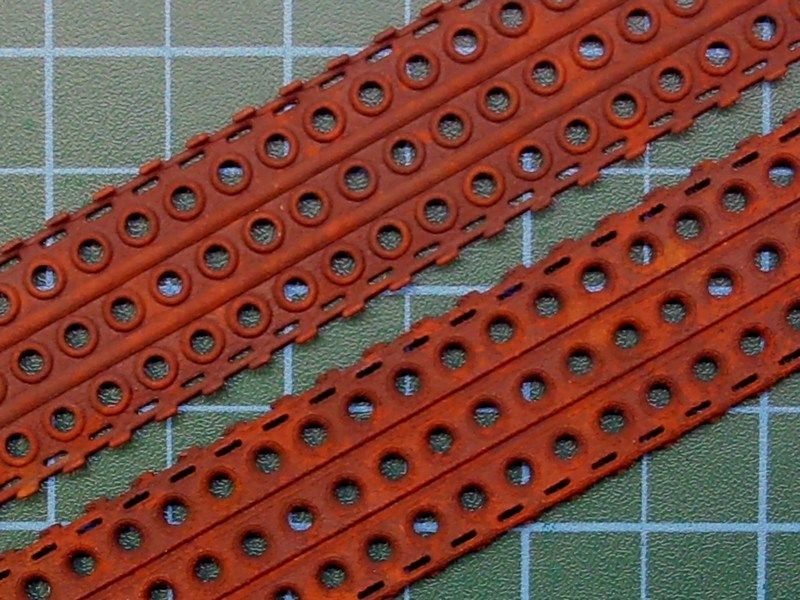
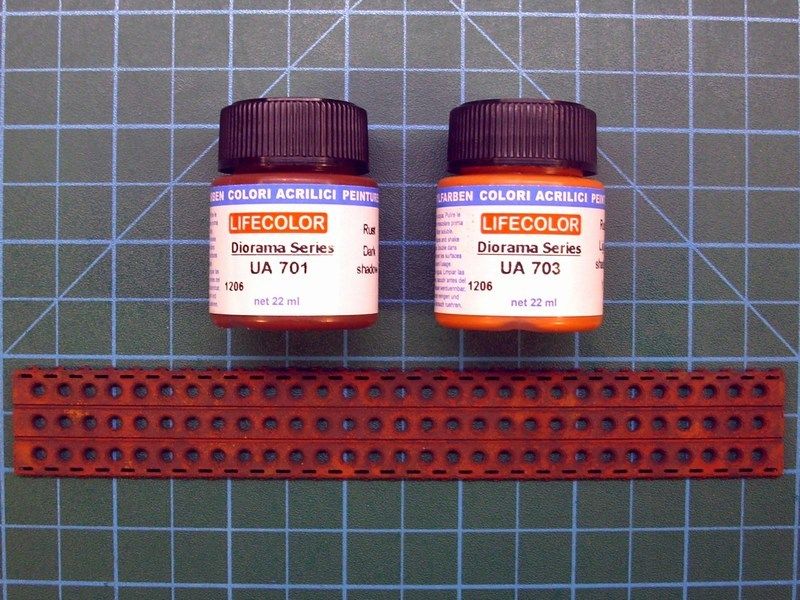 Following, a dense oil paint filter should be applied. In this case, I did use "Vandyke Brown" available by Winsor & Newton, thinned with White Spirit thinner to a consistency between a filter and a wash. This would help to unify the previous effects and tones. 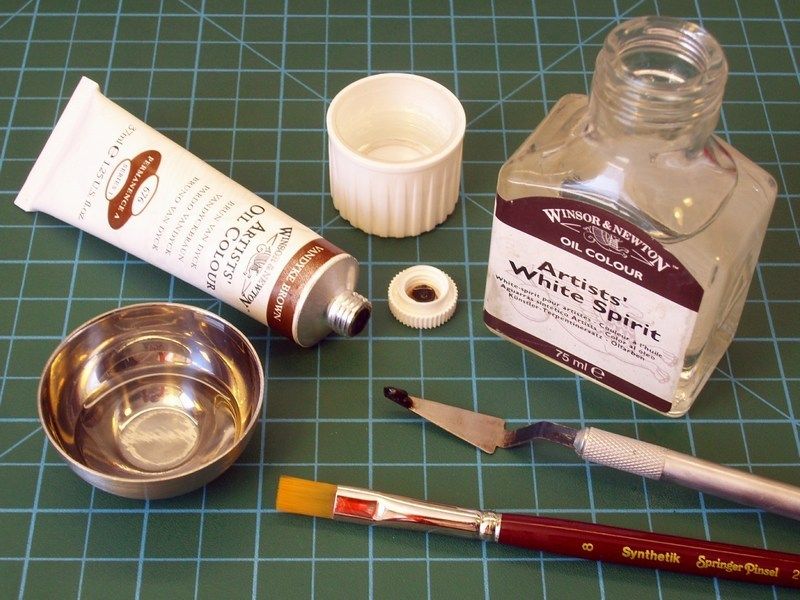
 Düzenleyen Nick_Karatzides - 29/01/2016 Saat 05:53 |
|
 |
|
|
Nick_Karatzides
Üye 

Kayıt Tarihi: 06/06/2009 Aktif Durum: Aktif Değil Gönderilenler: 250 |
  Gönderim Zamanı: 26/08/2013 Saat 11:53 Gönderim Zamanı: 26/08/2013 Saat 11:53 |
|
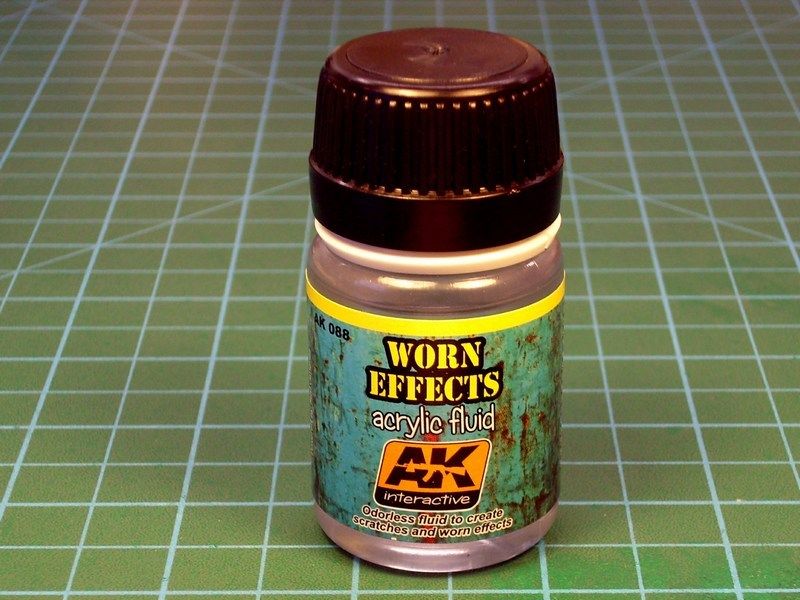
Once the "Vandyke Brown" filter was fully dry, the next step was to apply a paint layer, to create the chipping effect. This could be done using the hairspray technique and in this case I did use the AK Interactives "Worn Effects" which has been developed for exactly this type of effect and would guarantee consistent results.
 With the "Worn Effects" coat dry, some Life Color UA512 "Light Blue RLM 78" acrylic airbrushed on, in a random cloud pattern. Once dried, more sponge chipping added, using the Life Color UA704 "Rust Light Shadow 2" acrylic. 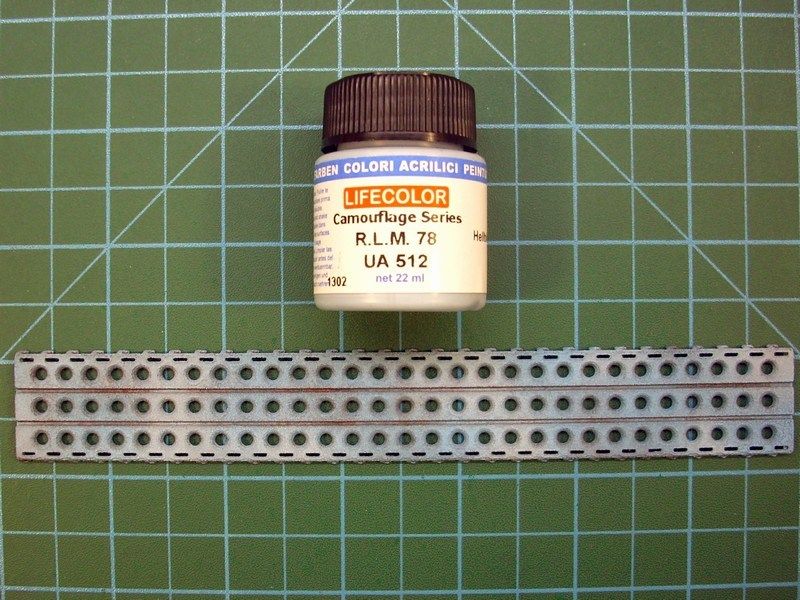 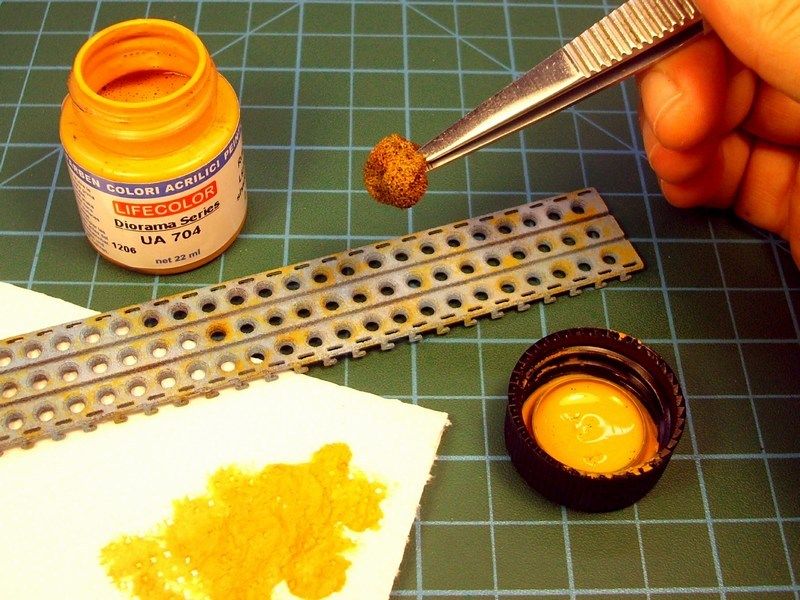
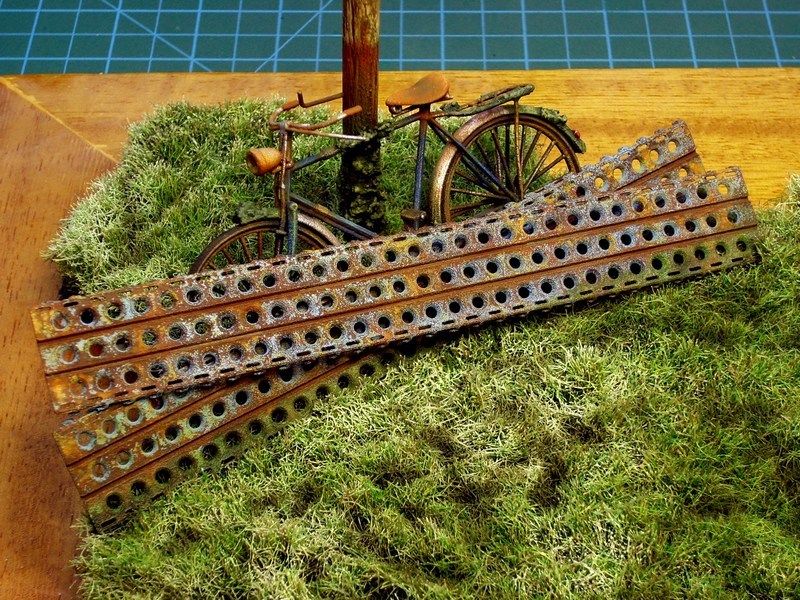
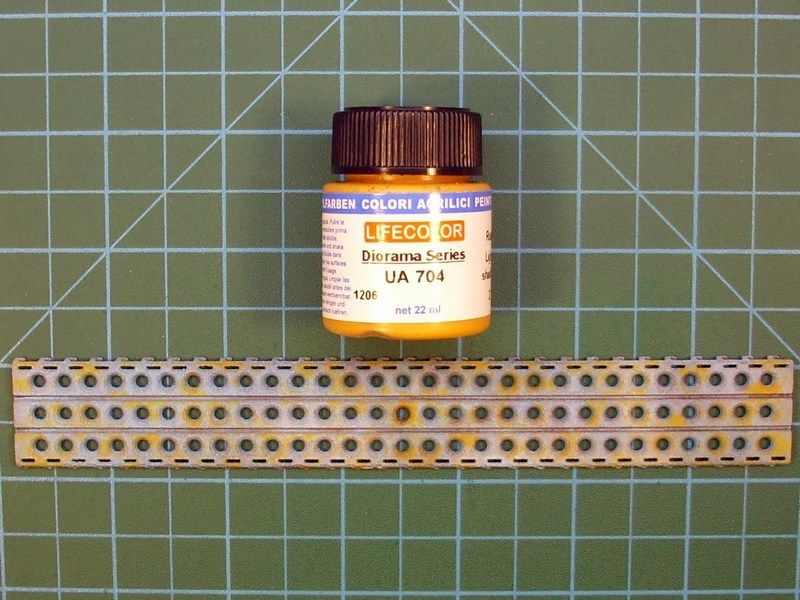 The paint allowed to dry for about an hour before starting the chipping process. To chip the paint, I simply wet the PSP plate surface with warm tap water and let it soften the paint. Some old stiff bristled brushes & toothpicks were used to scrub and dab the plates surface, to create the chipping effects on the light greyblue areas. 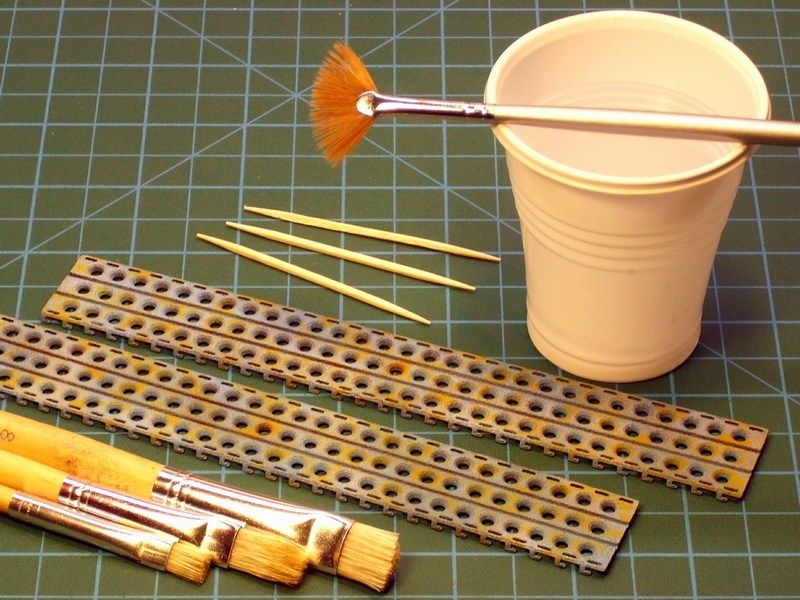 Fresh rust marks also added in some selected points, with some of the Life Color UA704 "Rust Light Shadow 2" acrylic. Using a fine tipped brush, the "Light Rust Brown" & "Dark Rust" oil paints by 502 Abteilung & AK Interactive series painted in vertical lines from various chips and scratched added earlier. Once the oil paints had been allowed to dry for a short while, a brush dampered in White Spirit used to blend and soften these streaks for a more subtle effect and obtain visible signs of wear & oxidation. 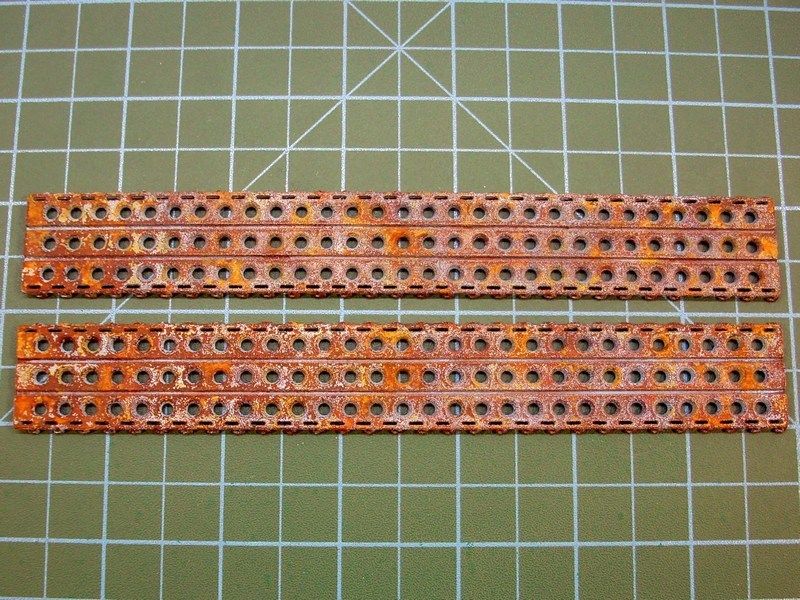 Hmmm, is the camera too far to see details? OK, lets zoom and get a closer look on oxidation effects & light greyblue paint chipping. To be honest, I'm starting to believe, that my attempt to turn a pigs ear to silk purse, is quite possible to succeed. 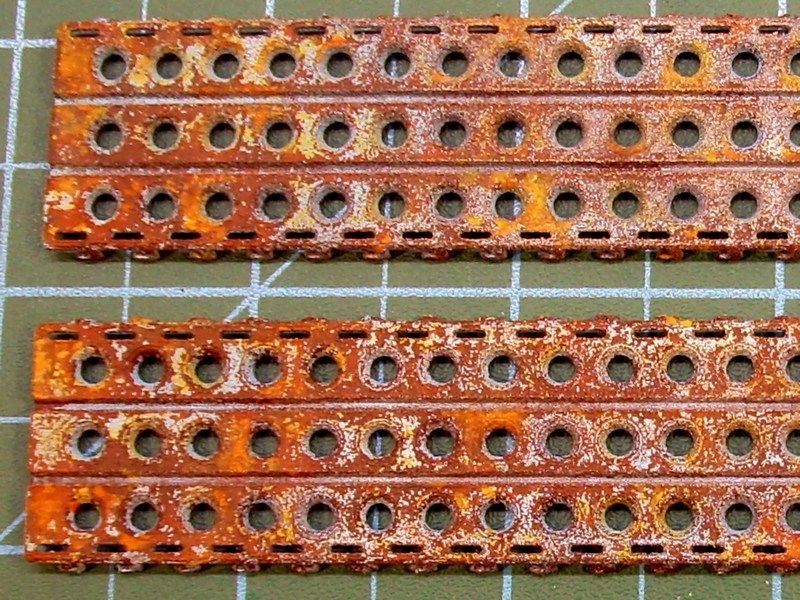 Düzenleyen Nick_Karatzides - 29/01/2016 Saat 05:54 |
|
 |
|
|
Nick_Karatzides
Üye 

Kayıt Tarihi: 06/06/2009 Aktif Durum: Aktif Değil Gönderilenler: 250 |
  Gönderim Zamanı: 28/08/2013 Saat 09:34 Gönderim Zamanı: 28/08/2013 Saat 09:34 |
|
I 've noticed that pilots & airfield supporting personel, use a number of improvised anchors types, to tie down the gliders, ultralights or even single engine aircrafts such as Cessna 172s, especially when operating from some grass covered airfield, without any permanent anchorage points & lashing hoops installation on ground. These improvised anchors are made of concrete filled tires or cement block bricks also known as CMU - Concrete Masonry Units). 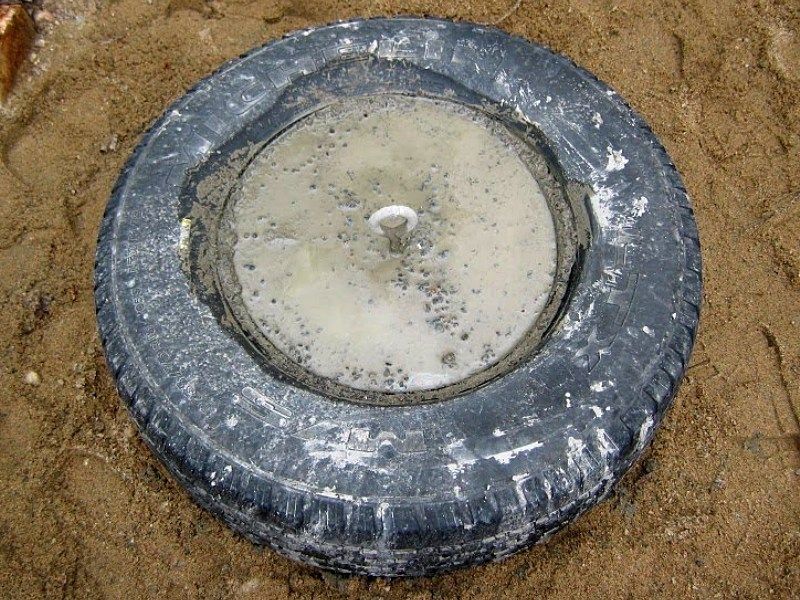 The tying is part of the checklist and therefore gliders, ultralights, gyrocopters etc, should remain tied and with wheel chocks instaled when grounded, because even the slightest breeze can cause to aircraft start rolling or flip the wings and hit wingtips on ground or worst. I've watched a video on YouTube, where a RAF's BAe Harrier GR.7 aircraft with no wheel chocks installed, began trundling because the wind gust, gone away from the apron and finally stopped on the grass, several meters away from the initial parking position. During this special "ride", the ground personnel just stood and watched the embarrassing view. Fortunately, no big damage caused that day, if we exclude some taxiway sign & the fence fell down and of course the groundcrew chief's pride. So, if this can happen on a mighty fighter jet that weighs 13 tons, why not also happen on a glider or an ultralight? 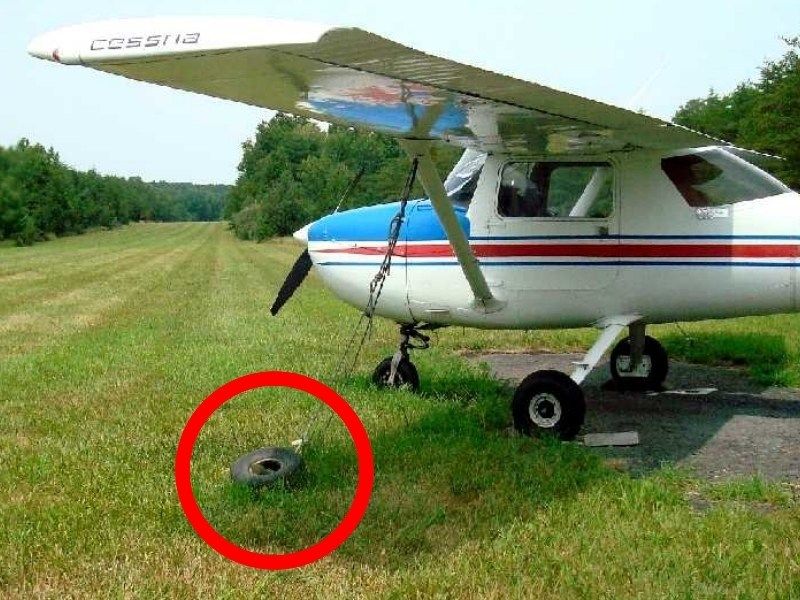
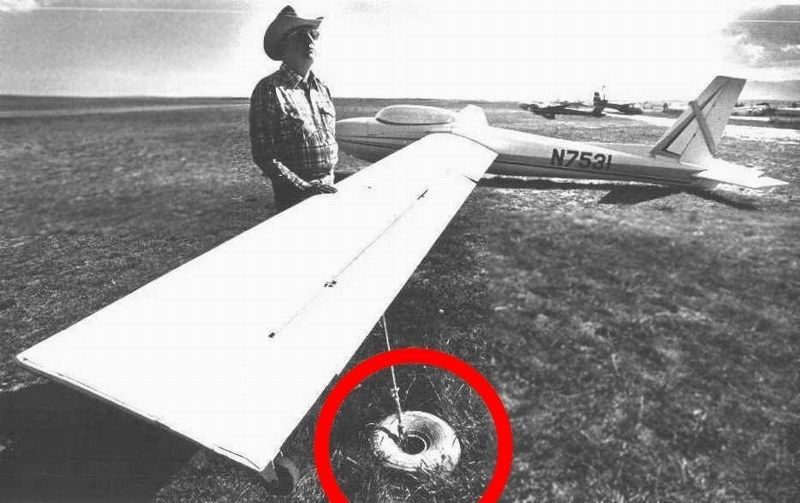
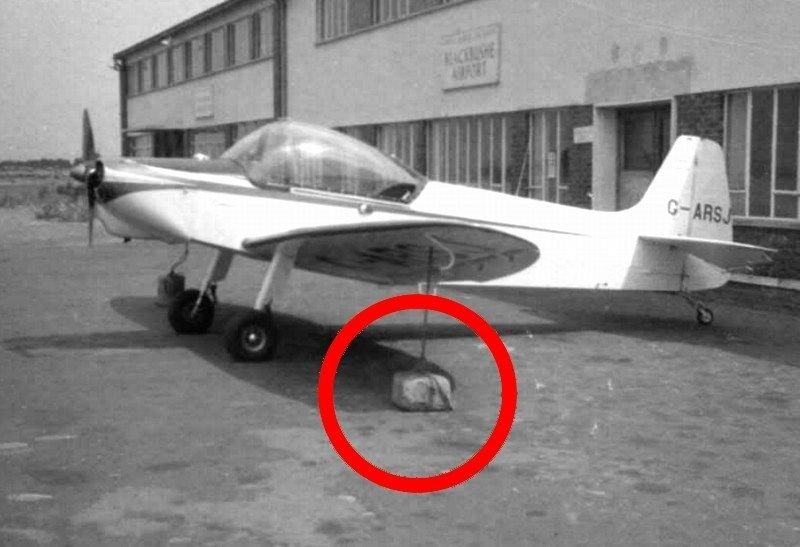
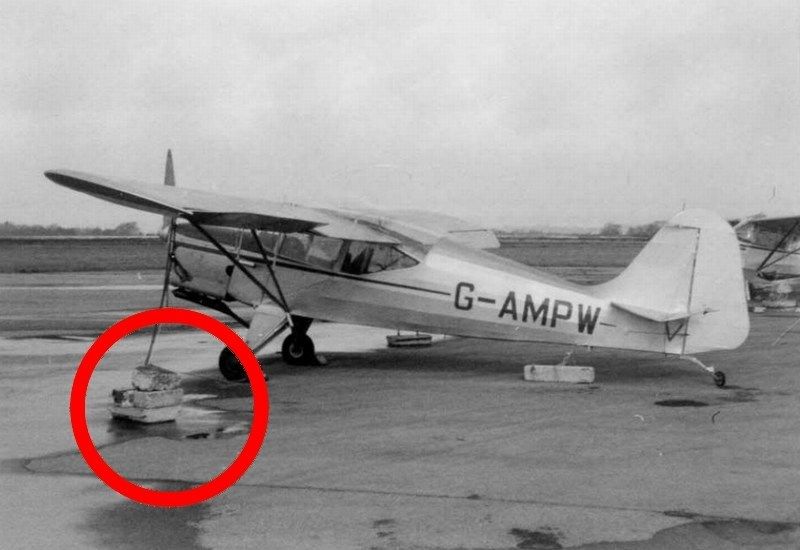
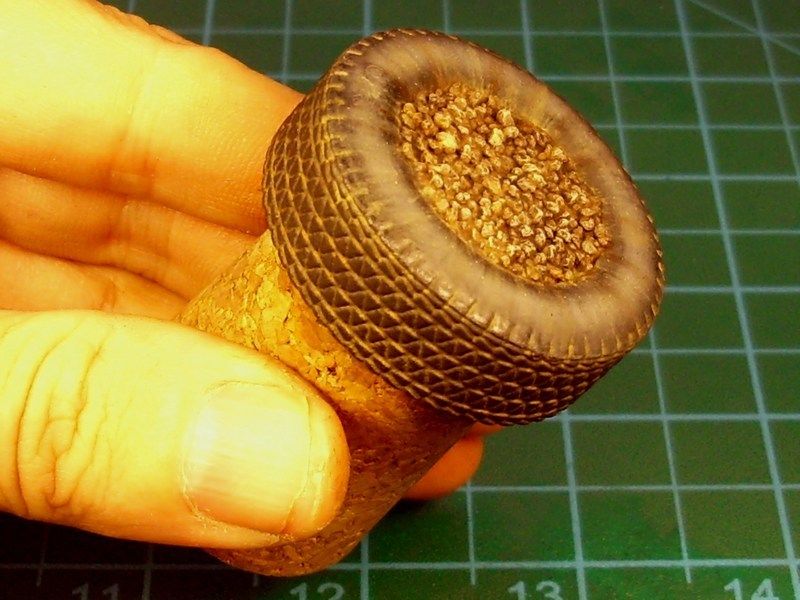
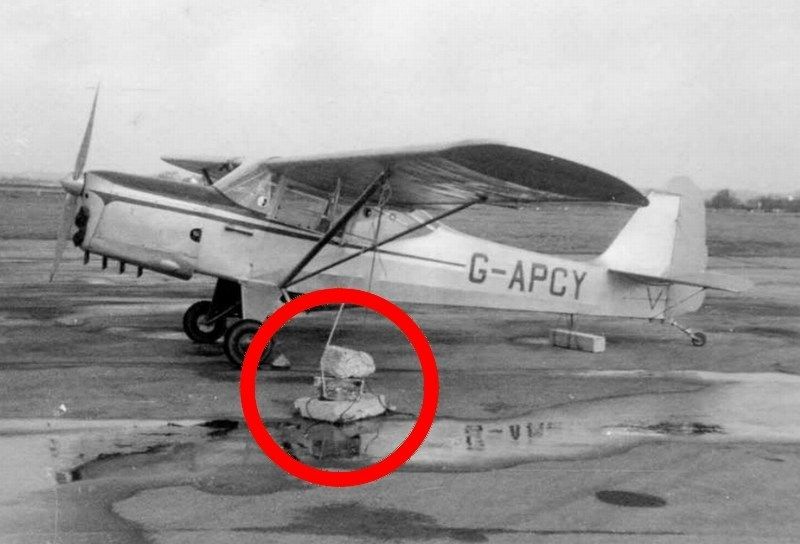 Building this improvised anchor made by concrete filled tire under scale, seemed OK to me. My first thought was to 3D print it and for this reason I actually, had just the right CAD model waiting for this purpose, in my laptops HD. Not having anything more to do that afternoon, I took my Mrs for a ride in town and some shopping at local Mall. 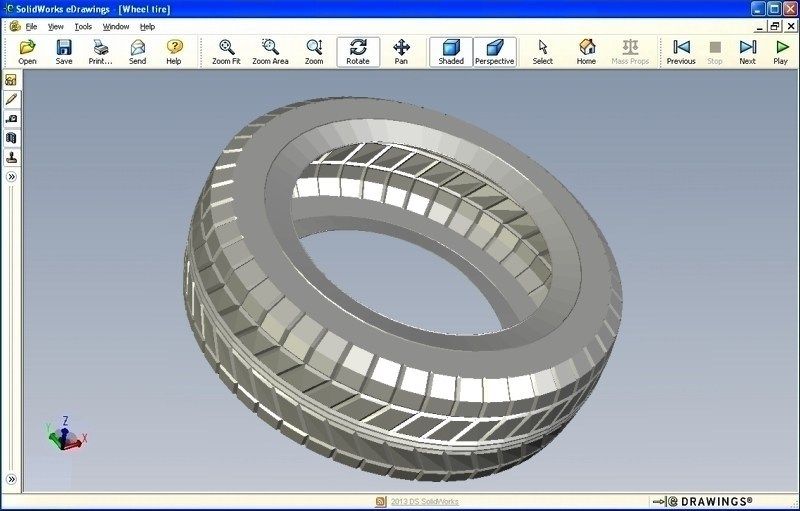 As people say, everything starts with a wish. And then, just like that, while shopping at the supermarket, I found the following item (actually a pencil eraser set for kids), for 0.5 only. Sometimes the simplest idea can make the biggest difference and it looks like someone had the idea to produce & sell some pencil erasers that look like car wheels, waiting for me to find it, when I need it. Since I found this item which looks like a weathered wheel tire and seems to meets the criteria for 1/18 scale size, for a cheaper than dirt cost, I had no reason to 3D print the tire. PS. Damnd, I should wish for World Peace instead of I need a 1/18 scale tire. 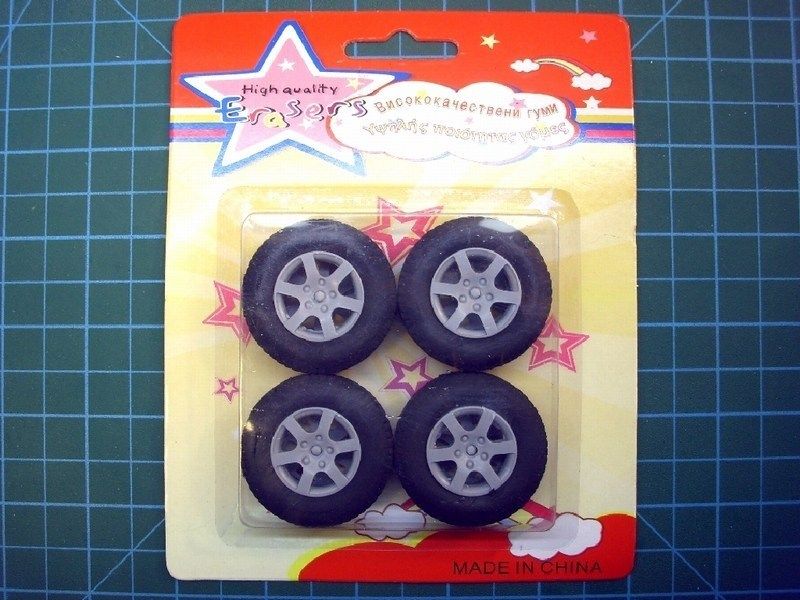 I removed the rim and filled the inside of the wheel with plaster to recreate as closely as I could the rough surface of cast cement & gravels. Because the plaster mixture was quite watery, I had plenty of time until become hard. So I also added some grains of volcanic sand into the plaster mix, hoping to recreate gravels. These volcanic sand grains (hand picked during summer vacations at the island of Santorini) seem to be ideal for the purpose and weight much less than normal beach sand. 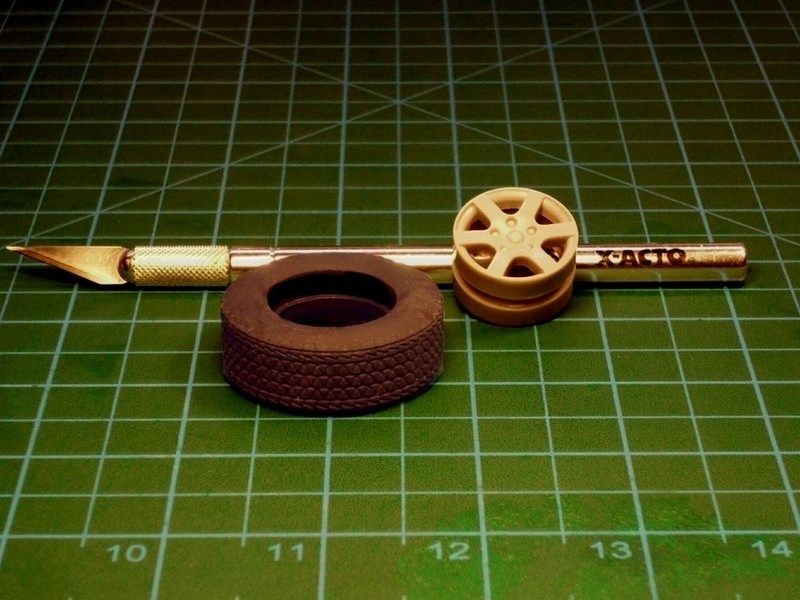
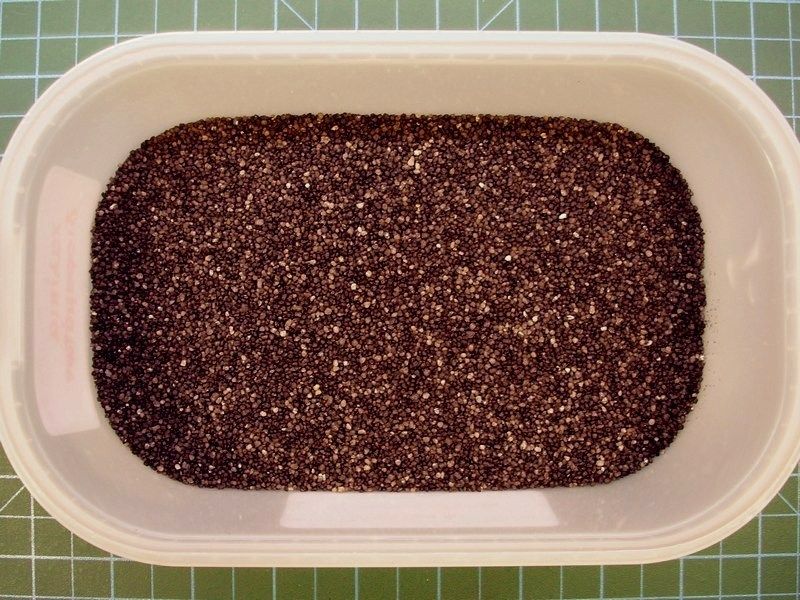
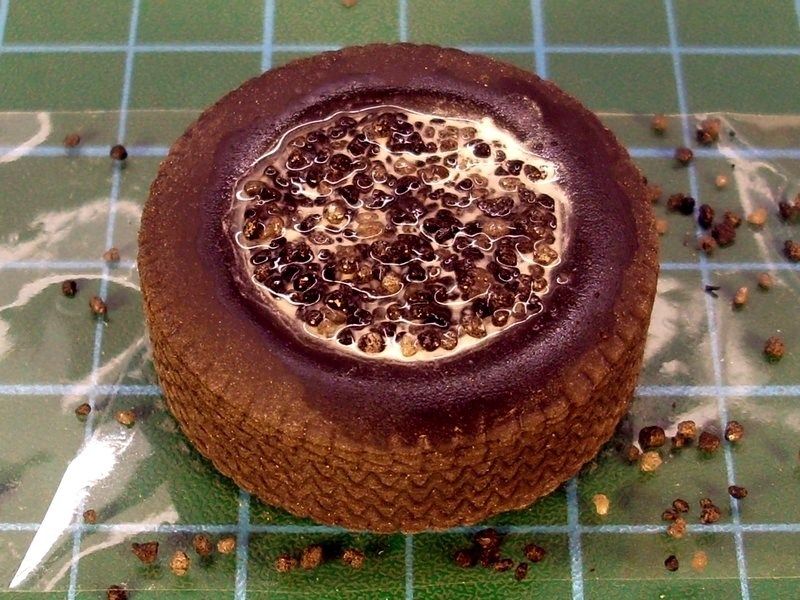 As soon as the plaster cast got harden, the anchor was sprayed over with Humbrol light grey acrylic primer to get prepared for the FS 37038 "Matt Black" available by Life Color as LC02 acrylic. Later, the gravels were also painted with light gray & sand shades. 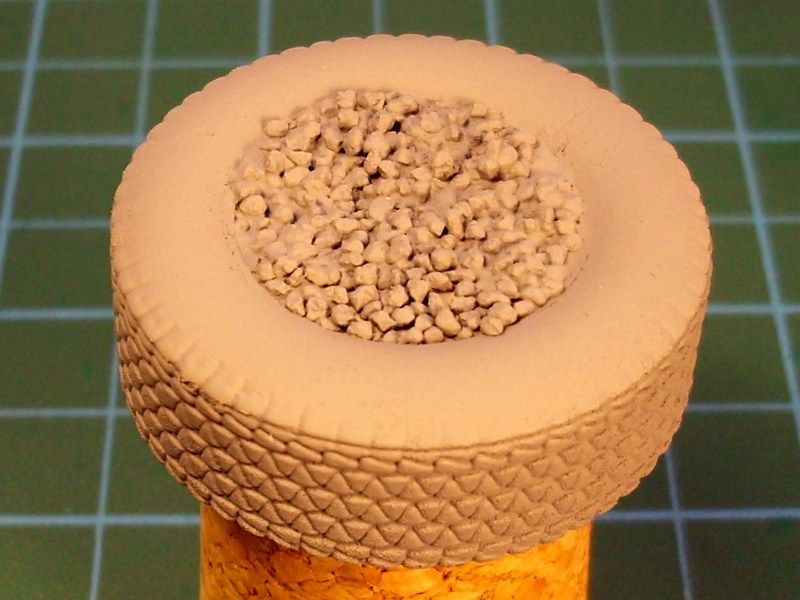
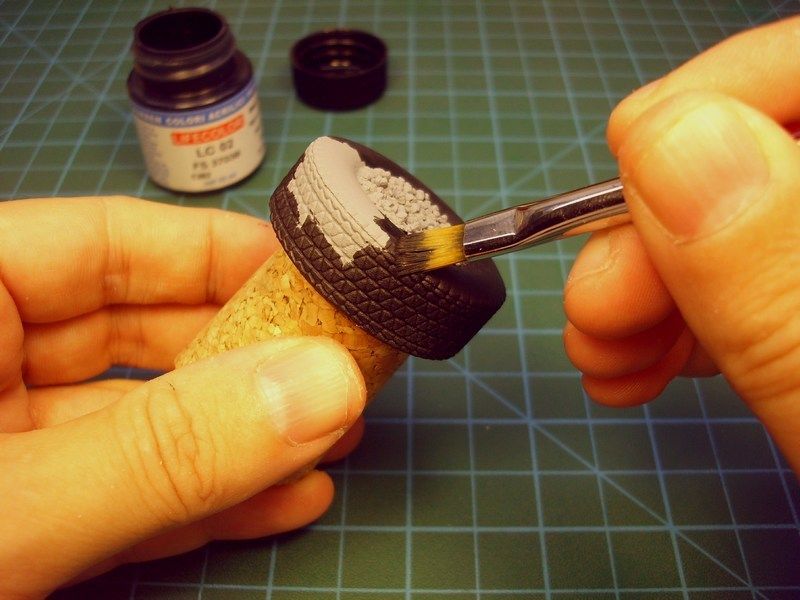
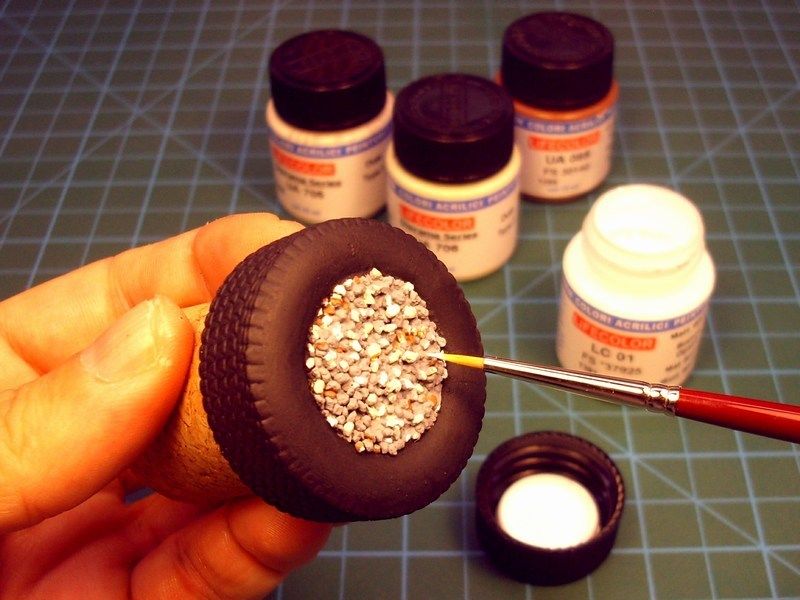 The paint allowed to dry for a couple of hours before starting the dusting process. The next two steps involve the use of pigments, which would give visual interest on the old & weathered tire. To get best results, I used "Raw Umber" pigment, a small metal cup, a flat brush and a bit of water. I add some grams of pigment powder and few drops of water into the cup to make the right mixture. It is important to add a tiny amount of water in order to make the mixture look like mud - not like soup. For this reason, I use a syringe to add just few drops on the pigment powder and I stir using the brush. The pigment applied with paintbrush with pressure, over the whole surface. 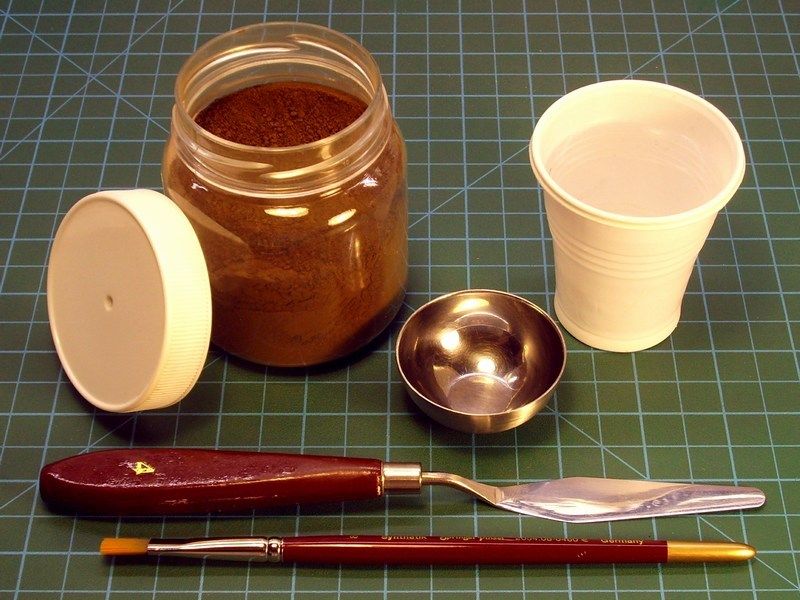
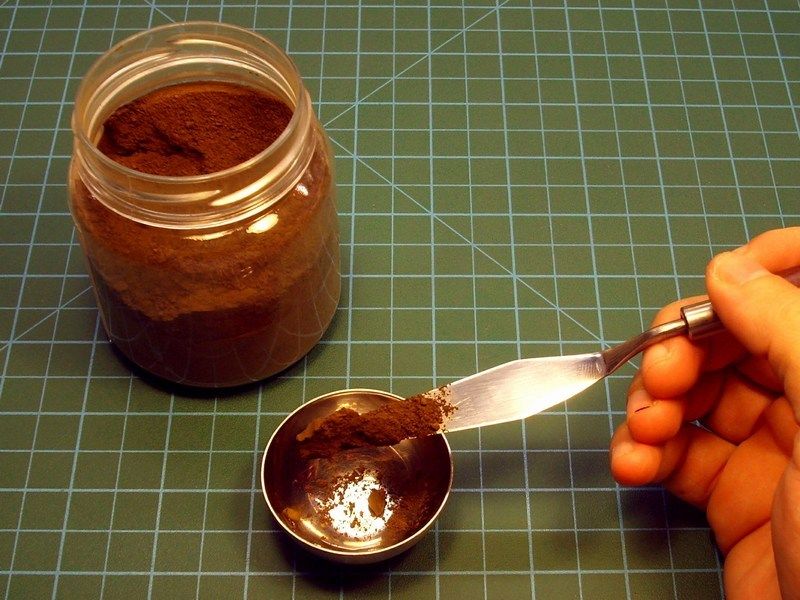
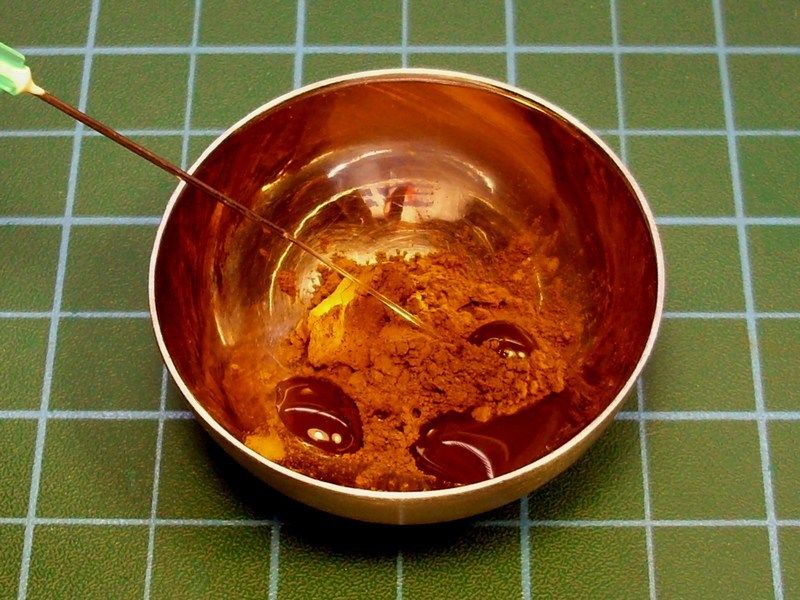
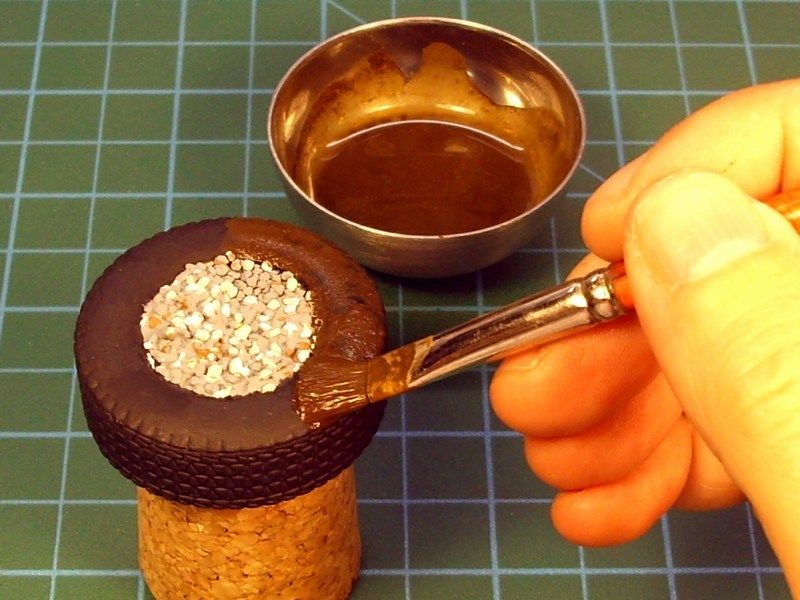
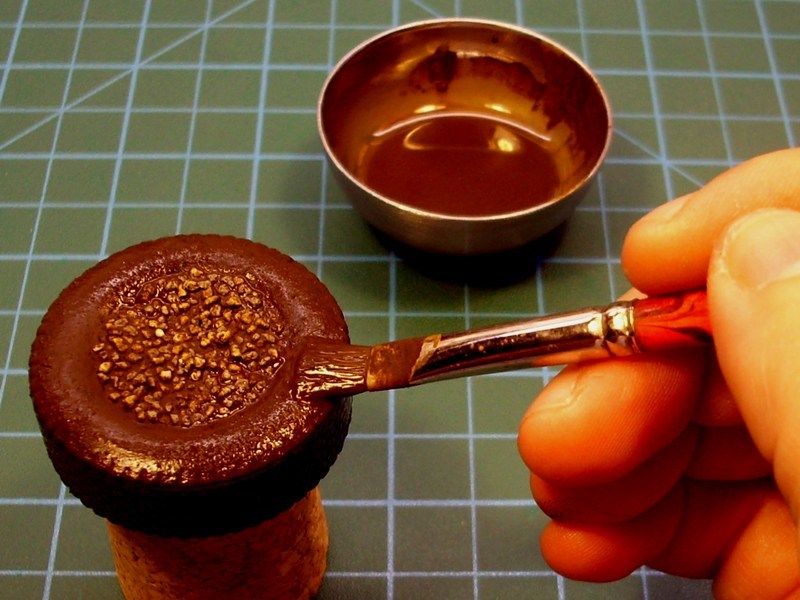 When the pigment wash dried, I rubbed off the high spots with a hard toothbrush and removed the dust excess. The high spots were cleaned to the basic finish and the low spots were left dusty. As soon as it looked OK to me after brushing & removing "Raw Umber" pigment dust, I continue to second step and add some grams of White pigment powder in the metal cup. Using a flat brush, I tried a pigment powder drybrushing, on the areas that supposed to be more enlighted. 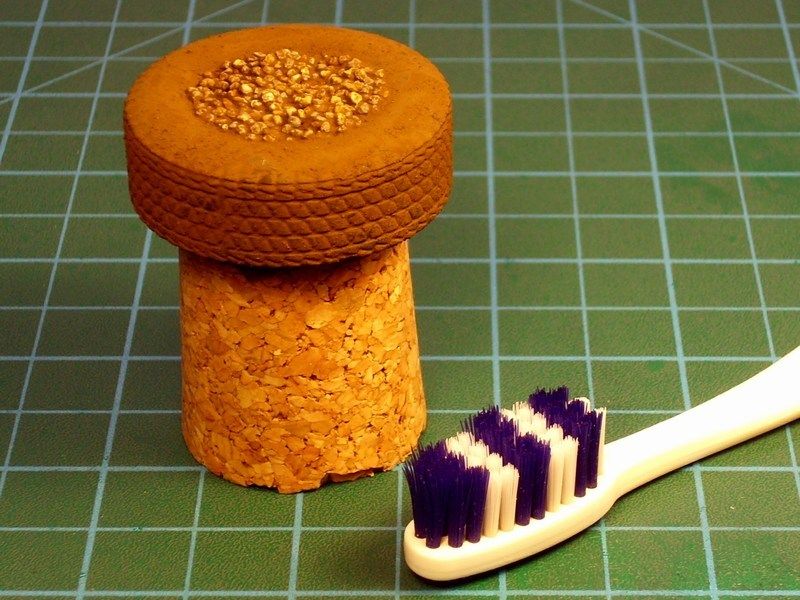
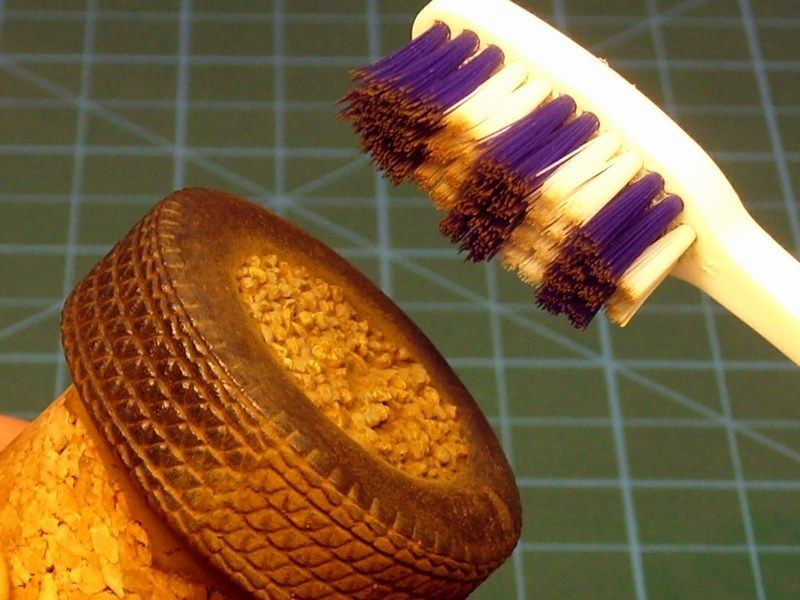
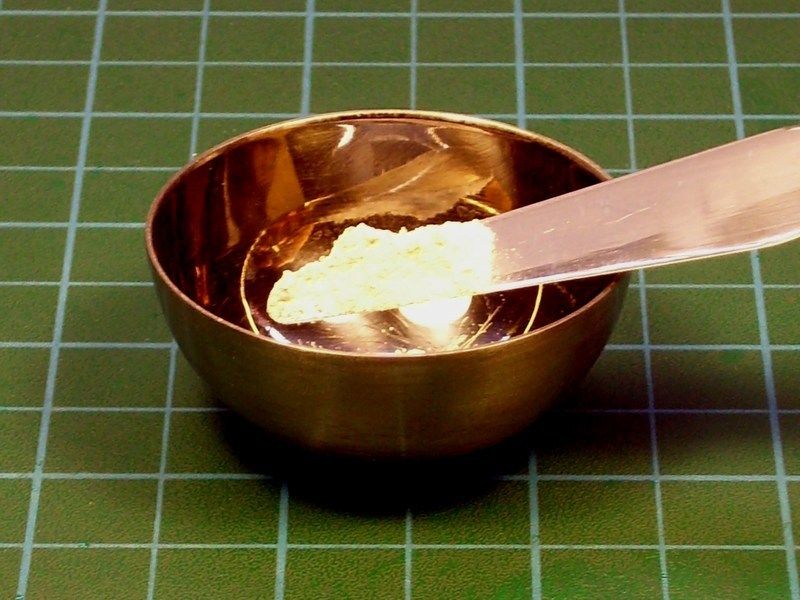
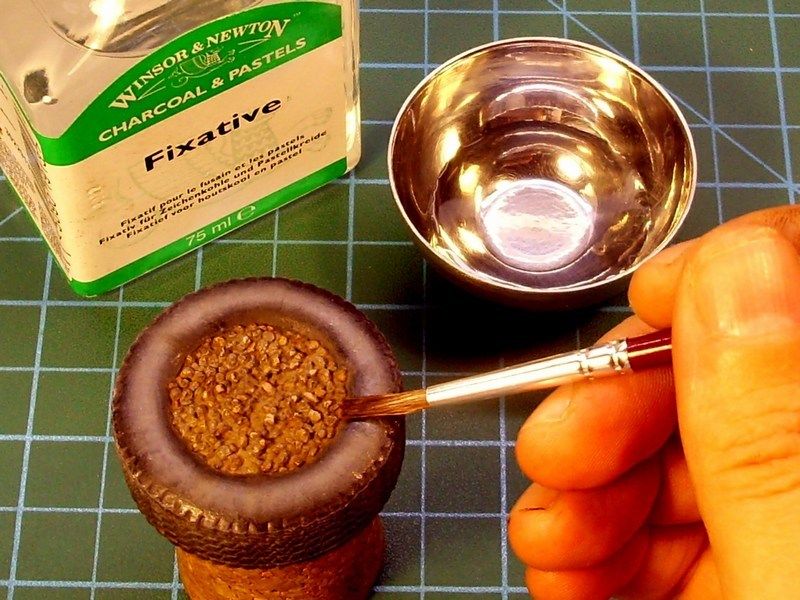
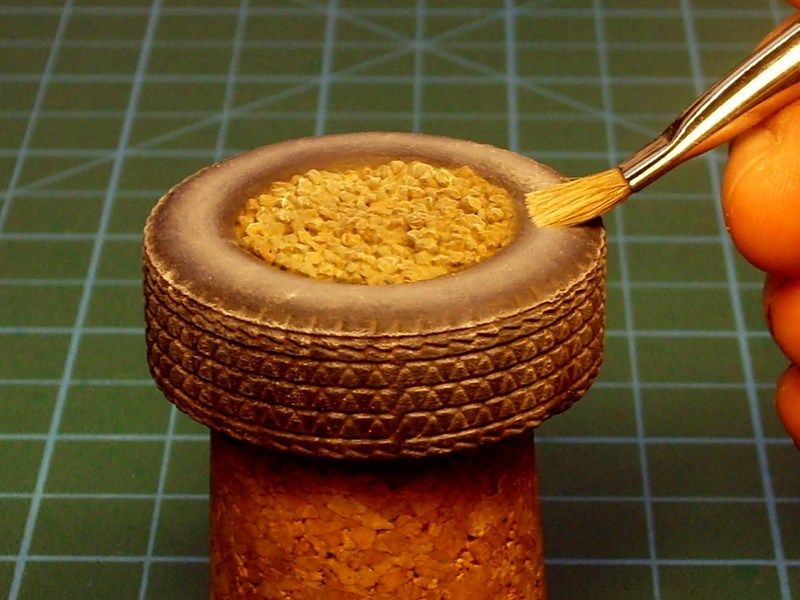 Afterwards, the surface was soaked with fixative by Winsor & Newton, to fix the previously applied pigments, moving in a motion outwards the center of the wheel. As a final touch, I tried some drybrushing on gravels, using light gray & sand acrylic paint. 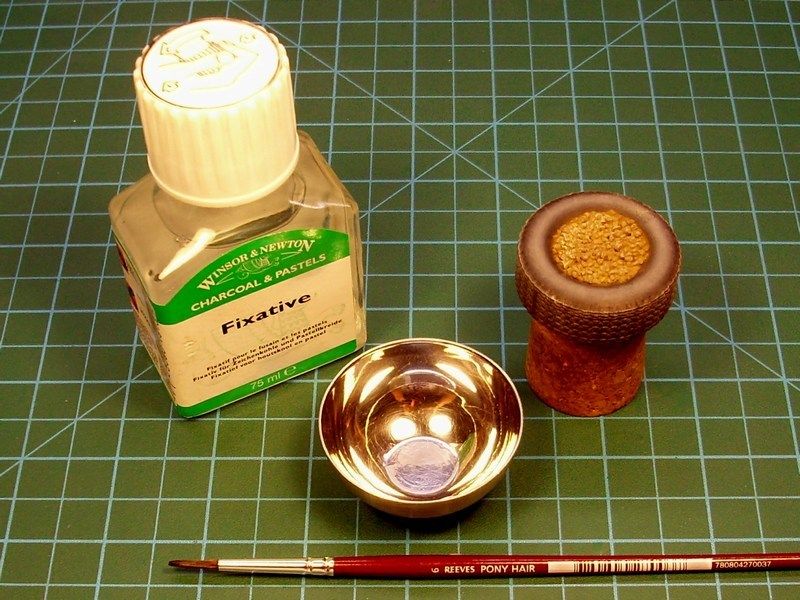
 Düzenleyen Nick_Karatzides - 29/01/2016 Saat 06:18 |
|
 |
|
|
Nick_Karatzides
Üye 

Kayıt Tarihi: 06/06/2009 Aktif Durum: Aktif Değil Gönderilenler: 250 |
  Gönderim Zamanı: 05/09/2013 Saat 09:56 Gönderim Zamanı: 05/09/2013 Saat 09:56 |
|
Daily watering was successful and the green grass is now high & wild enough on the field display base. At last, I had to conclude the "alles zusammen" final step. To assemble all individual parts in one scene, without damaging the glider's construction, the paint, the weathering and the rust & dust effects. Thats why I had to constantly monitor and try some dryfit tests all time, to ensure that I will not face any nasty surprises later. The windsock & the PSP plates, would be the first to be placed on the green grass display base and secured in place with hidden metal pins encased in the polished beechwood base through balsa wood sheet & glued with CA super glue. A last moments addition, an also 3D printed Fahrrad NSU bicycle model, painted in light blue colour (ammo box removed) not to remind its German military origin, placed against the windsock wood pole. Some rust effects also applied on bikes metal frame. 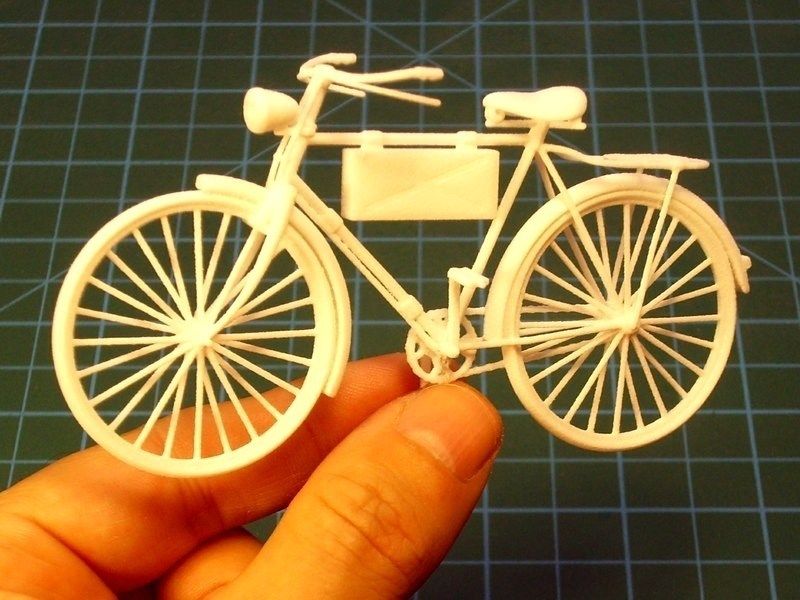
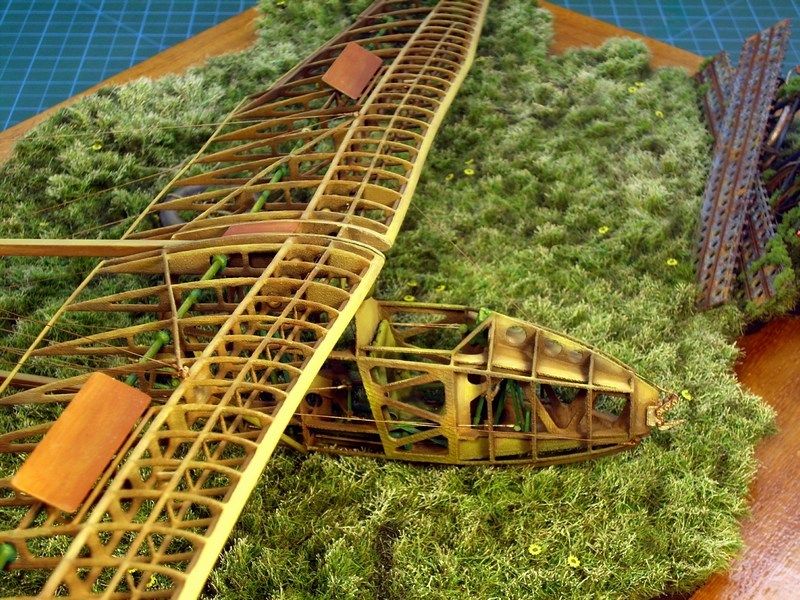
 Later, the improvised anchor made by concrete filled tire and the IS-A Salamandra glider model, both secured in place with hidden metal pins and glued on the ground with transparent silicon. Final details were added, such as the seat belts & buckles in cockpit, the clear windscreen, some extra dust & rust weathering effects on tension wires, etc. As soon as the result was OK for me, the scene sprayed over with Humbrol enamel mat coat, to seal the work so far and left it overnight to dry. The next day, I did a final inspection on result and set it up to shoot some pictures. 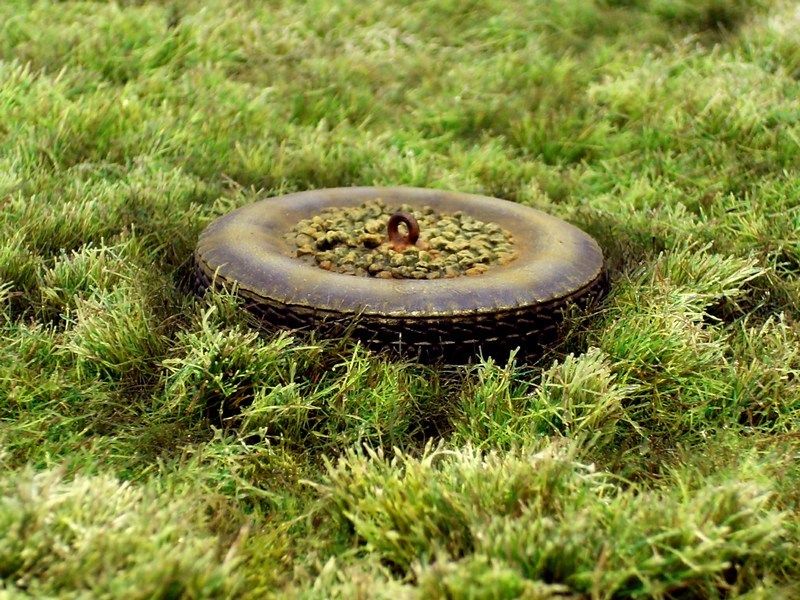 Düzenleyen Nick_Karatzides - 29/01/2016 Saat 06:26 |
|
 |
|
|
Nick_Karatzides
Üye 

Kayıt Tarihi: 06/06/2009 Aktif Durum: Aktif Değil Gönderilenler: 250 |
  Gönderim Zamanı: 09/09/2013 Saat 12:50 Gönderim Zamanı: 09/09/2013 Saat 12:50 |
|
Although I had other plans at the beginning of this WIP, I was not really sure about the ending and especially the display base for the model. I changed my mind during the building process and finally decide to present as found in a small green grass covered airfield, now used by general aviation pilots for their weekend excursions, where the Salamandra glider is now resting tilted sideways, with one wingtip touching the ground and the other on air. A kind of wordless symbolism for the old fella who tirelessly offered training services to thousands aviators, weary lying on the ground but still turning wing high in the sky, where it belongs. 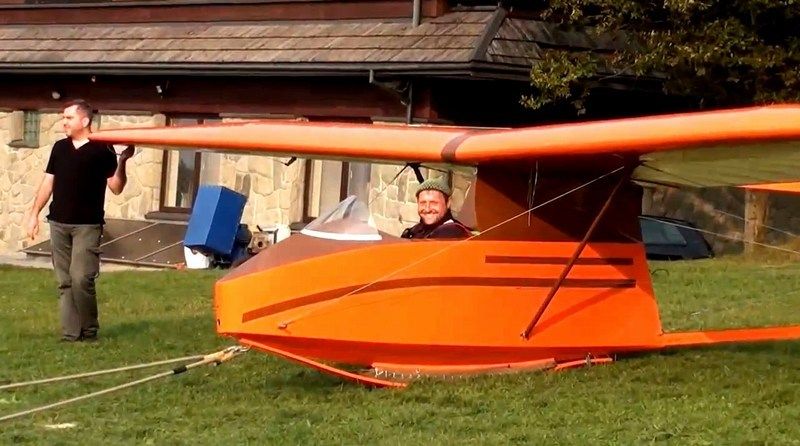 I d like to share with you, a rare photograph. It takes us back to autumn of 1936, possibly in Lwow, Poland (now Lviv, Ukraine). The man with the hat (right), is Mr. Waclaw Czerwinski, one of the leading aircraft designers and head of the "WWS - Wojskowe Warsztaty Szybowcowe" (meaning Military Gliding Workshops in Polish language). The WWS-1 Salamandra glider (re-engineered as "Instytut Szybownictwa IS-A" after the WWII), was the first project which was created under his leadership during the mid 1930ies. The other man (left) is Mr. Tadeusz Chlipalski, the head engineer who established the plant for the gliders production in Bielsko Biala at south Poland. 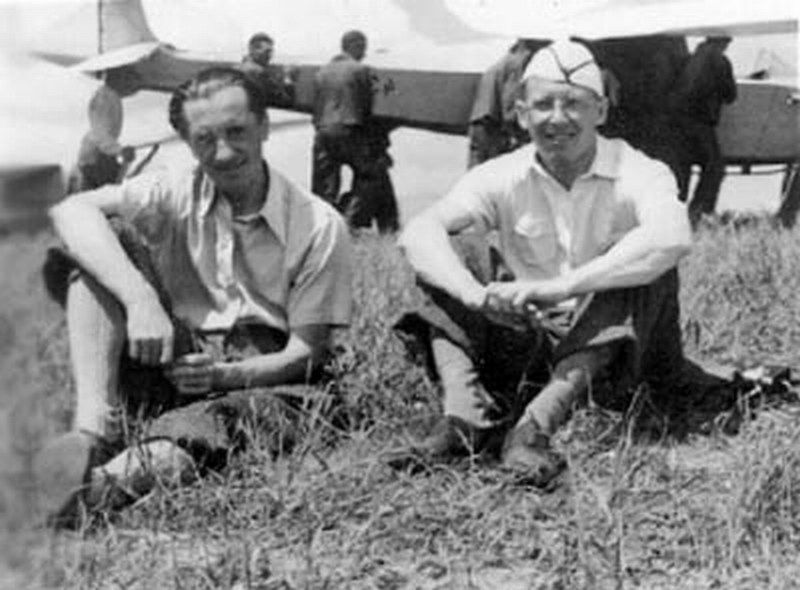 It was a pleasant surprise to discover that an American guy named Scott J Grunewald found the model kit build interesting enough and dedicated an article on 3D printing related site. For more info, feel free to click HERE. I would like to express my special thanks to:
[*]Mr. George Papadimitriou, owner of Hobby Gallery hobby shop and exclusive distributor for LifeColor & AK Interactive products in Greece, for his kind support and providing all the goodies I asked for - from A to Z. [*]Mr. Nikolaos Kountouris, owner of MDC - Model Display Case store, who personally supervised the construction of the polished beechwood base after my request and made sure superior quality work. [*]Spartan king Agesilaus, from whom I borrowed the cue "today, the prowess died", later rephrased by me as "today, the scratch building died", which became the main motto during this WIP presentation. [*]My sweetheart 4-star General in home wife, who actively participated in the project as an indispensable assistant, offering me relaxing neck massage while working on my bench. 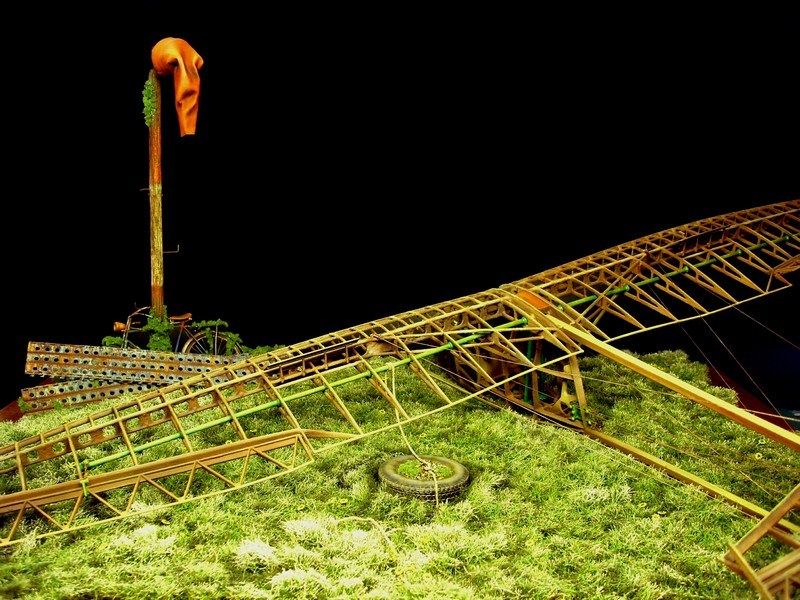
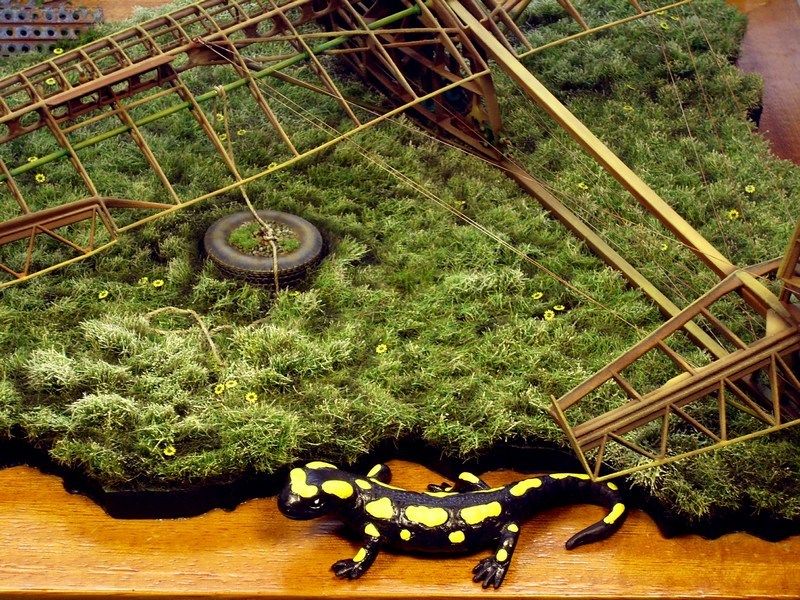
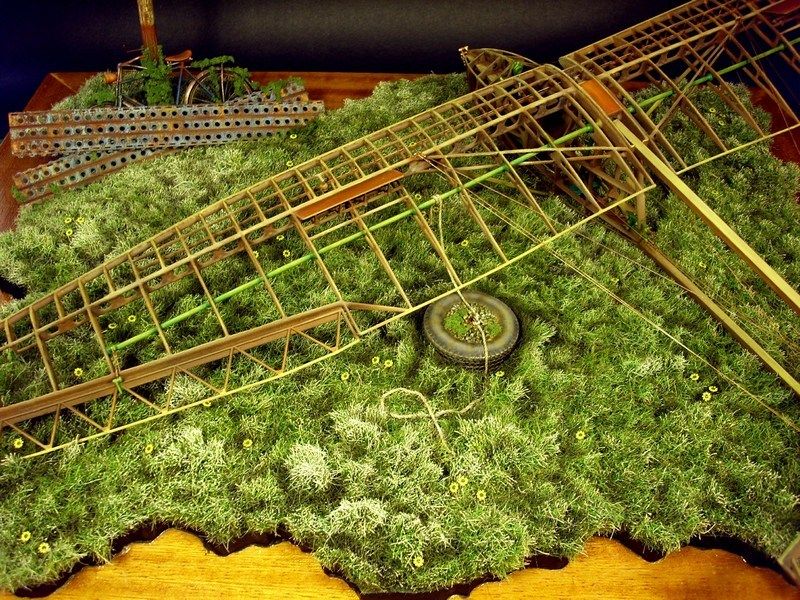
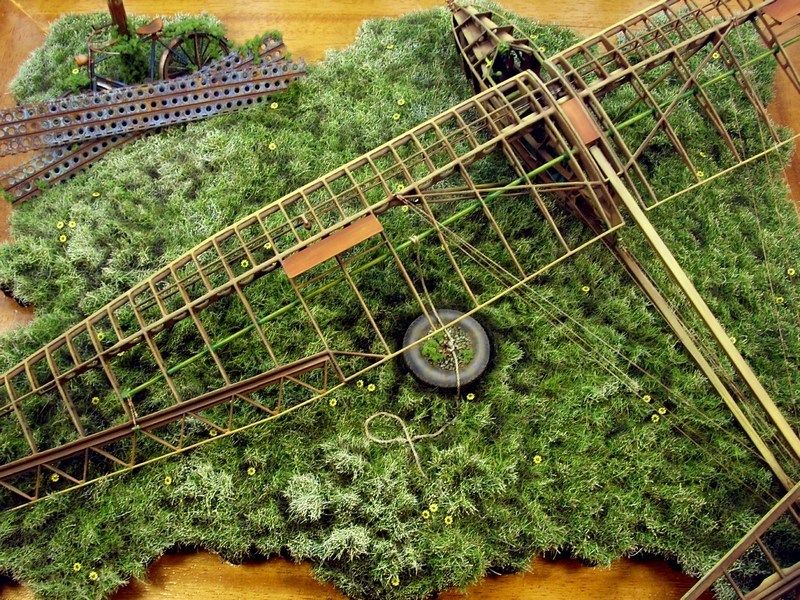
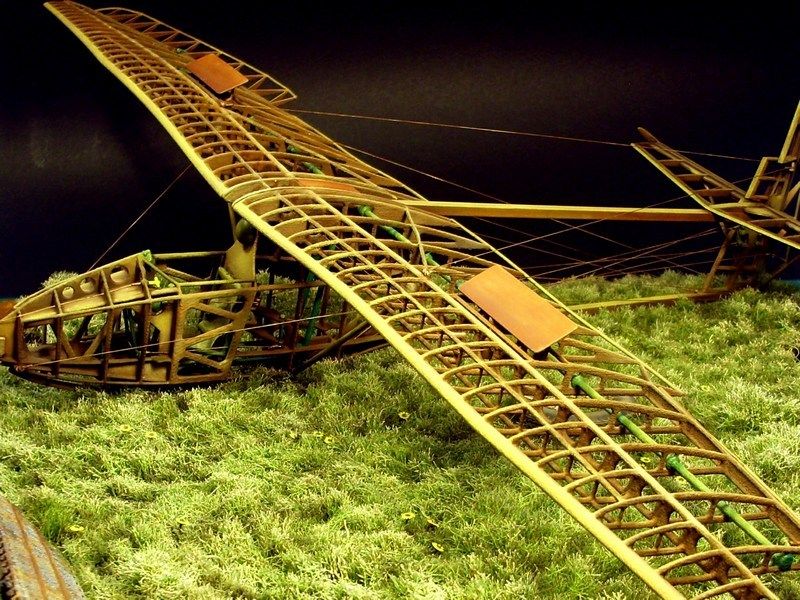
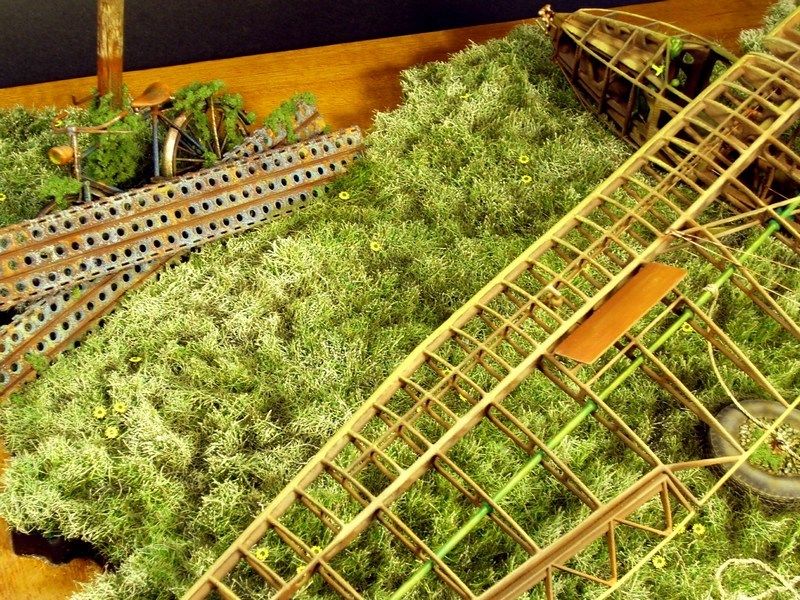
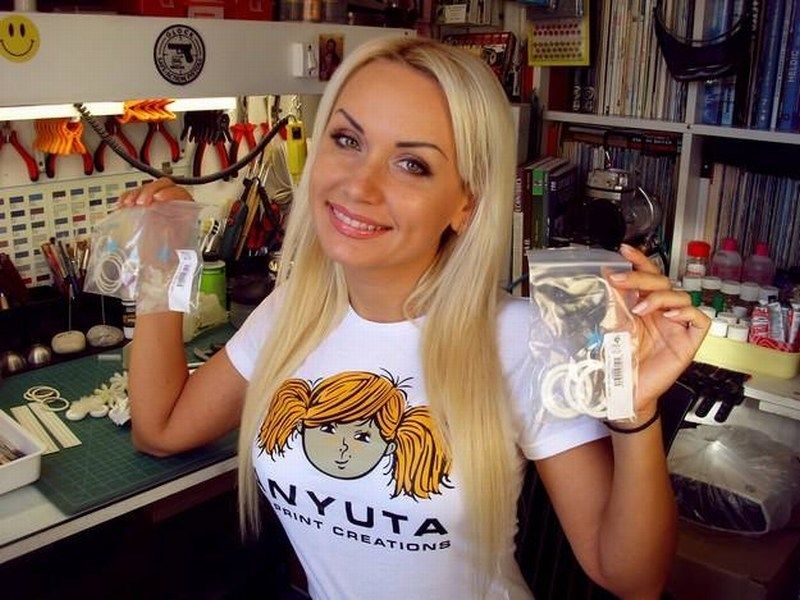
 Finally, for those who are interested to check more info & pics, feel free to have a look on our Anyuta 3D printed scale models products catalog. Wife as website operator & sales cordinator is always ready to answer customer questions regarding 3D printed scale model kit & diorama accessories products. Thank you all for following this thread and I hope you enjoyed reading this article. Ill meet you soon, on my next WIP - possibly a 3D printed.one. Regards, Nick 
 Düzenleyen Nick_Karatzides - 29/01/2016 Saat 07:06 |
|
 |
|
| << Önceki Sayfa 2 |
  |
||
Forum Atla |
Kapalı Foruma Yeni Konu Gönderme Kapalı Forumdaki Konulara Cevap Yazma Kapalı Forumda Cevapları Silme Kapalı Forumdaki Cevapları Düzenleme Kapalı Forumda Anket Açma Kapalı Forumda Anketlerde Oy Kullanma |
|